1. Tabview
1.1 Create a tabview widget
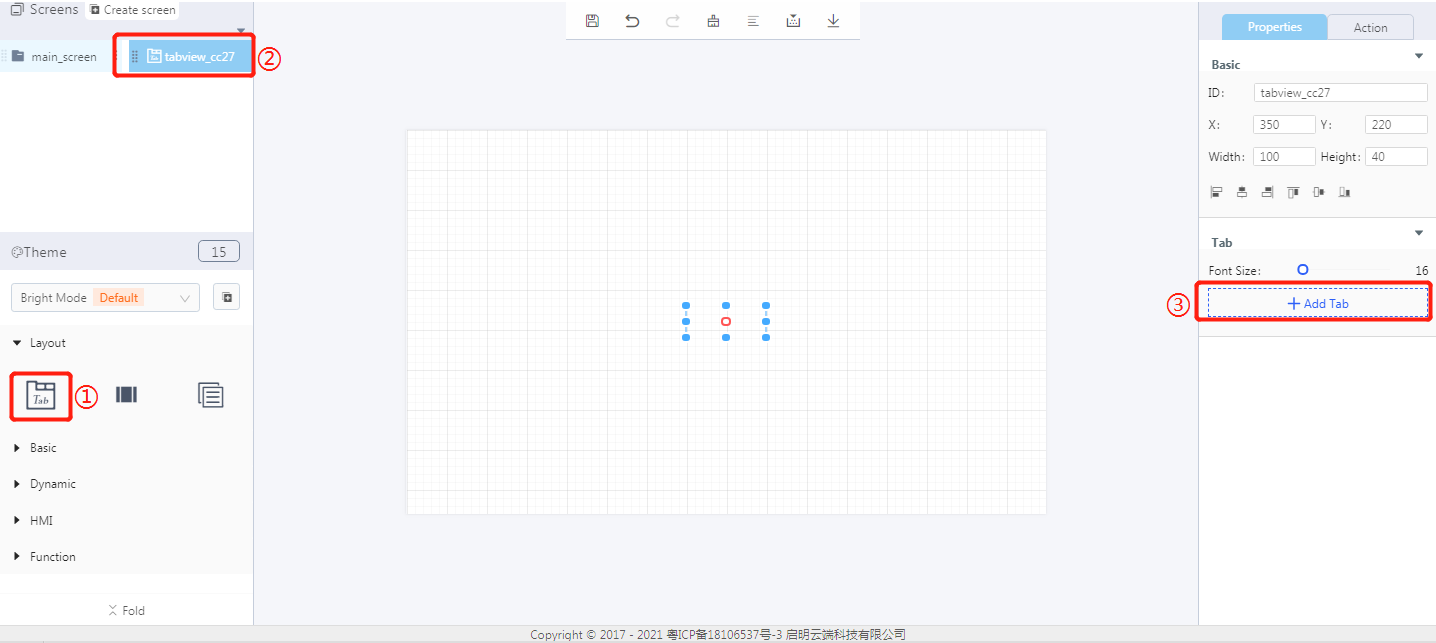
① Create a tabview widget
② The ID of a tabview widget
③ Add a new tab
1.2 Steps for use
1.2.1 Set screens for a tabview widget
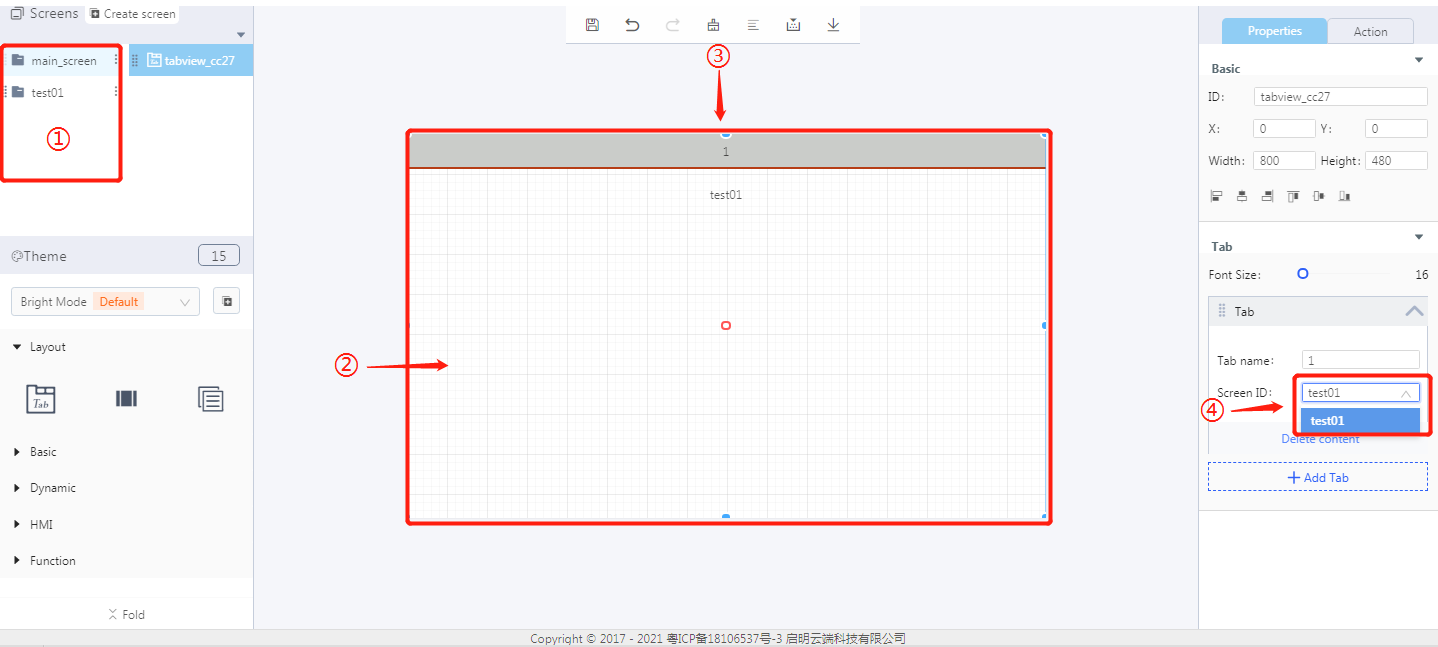
① The screen ID in a project
② Show the bound screen
③ Show the tab name
④ Bind a screen to a tab
Properties-Basic:
ID: Tabview_cc27 is the ID of the tabview widget
X, Y: its coordinate position in the work area
Width, Height: set the size of a tabview widget
Alignment (in order): left alignment, horizontal center alignment, right alignment, top alignment, vertical center alignment, bottom alignment
Properties-Content:
Font size
Add a tab: click to add a tab. You can set the tab name, which will be displayed in the work area; Screen ID: you need to create screens in advance(set the screen type to tag page)
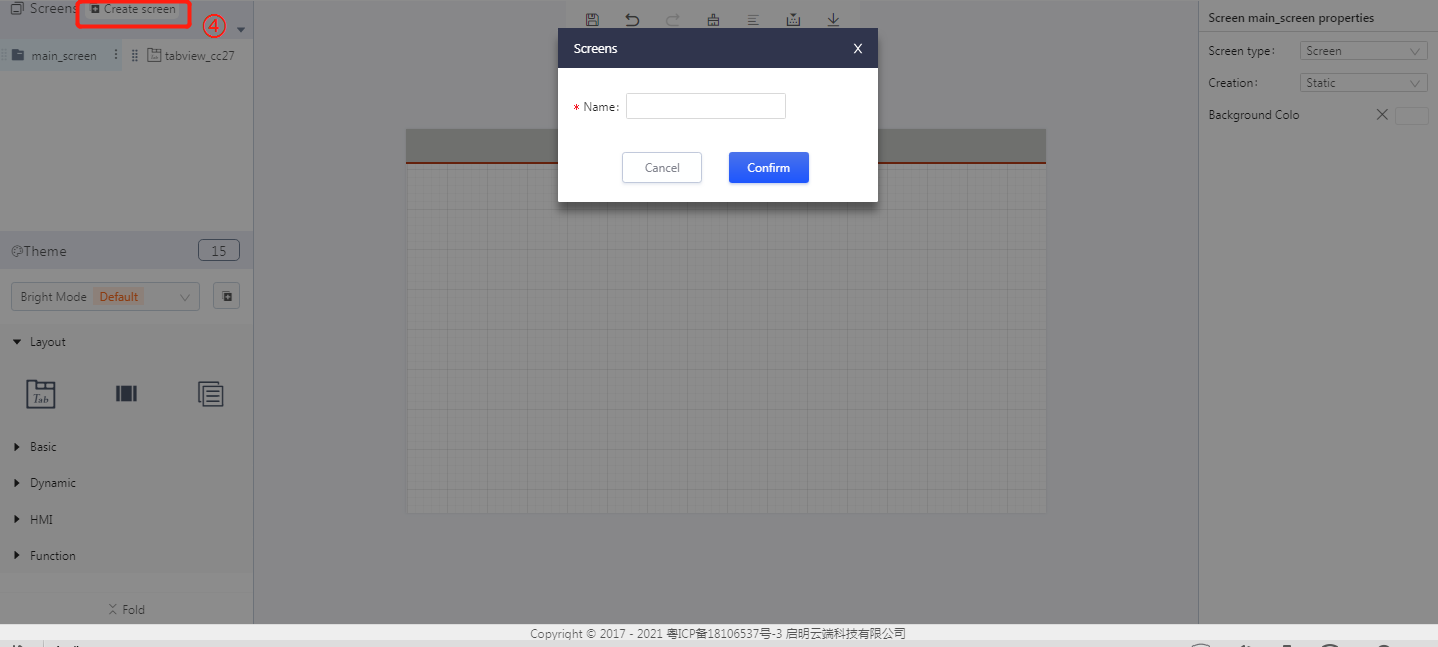
1.2.2 Create a screen
- Click ④ to create a new screen.(Demo: three new screens test01, test02, and test03 will be created; screen type: tag page)
Note: The premise to add a tab is that there are multiple screens prepared in the same project.
- The screen type of the new added screen is set to tag page, and its width and height are set the same as the widget size.
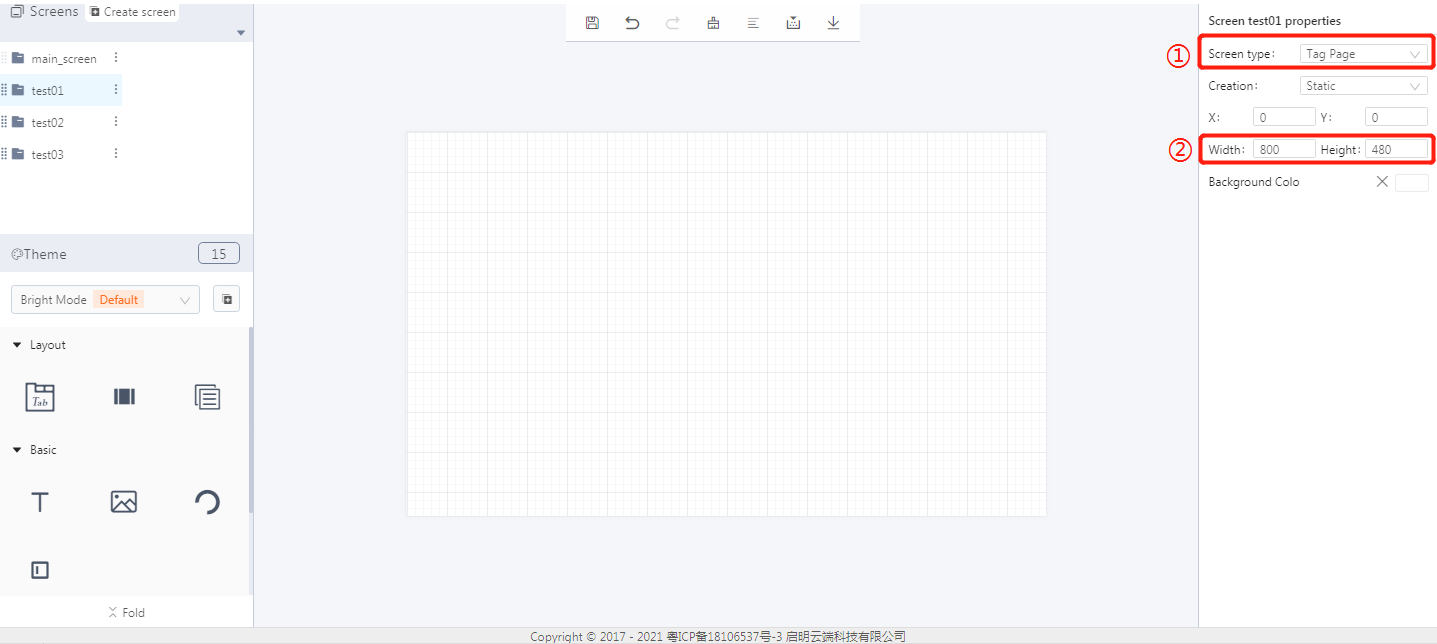
① Set the screen type to tag page
② The screen size should be the same as the tabview widget size.
- Add tab: a tab name can be defined as needed; then select a screen ID for the tab.
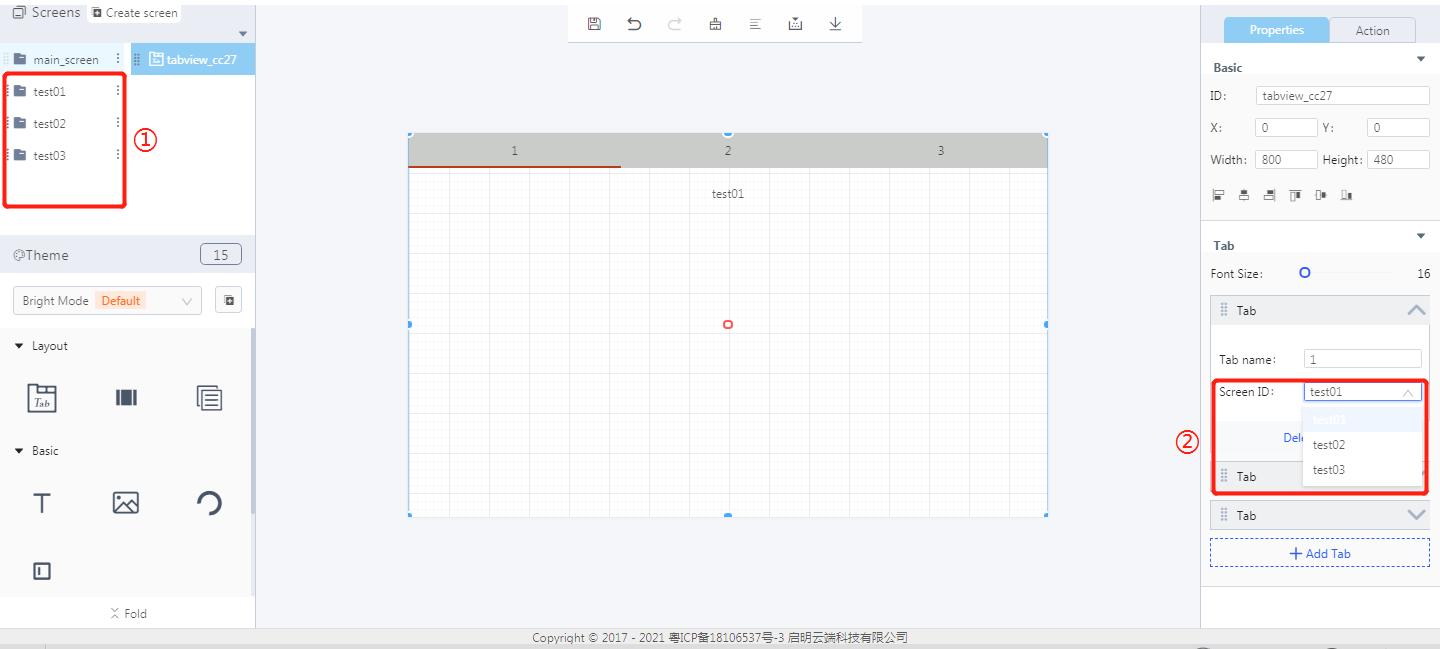
① Screen ID
② Select a screen ID for the tab
- Modify the position and size of the tabview widget. You can click on any tab name to display the screen bound to this tab.

① The tabview widget ID
1.3 Download the source code of the project from the 8ms platform
- Compile the project and then download the source code of the project.

① Font
② Program entry
- qm_ui_entry.c analysis.
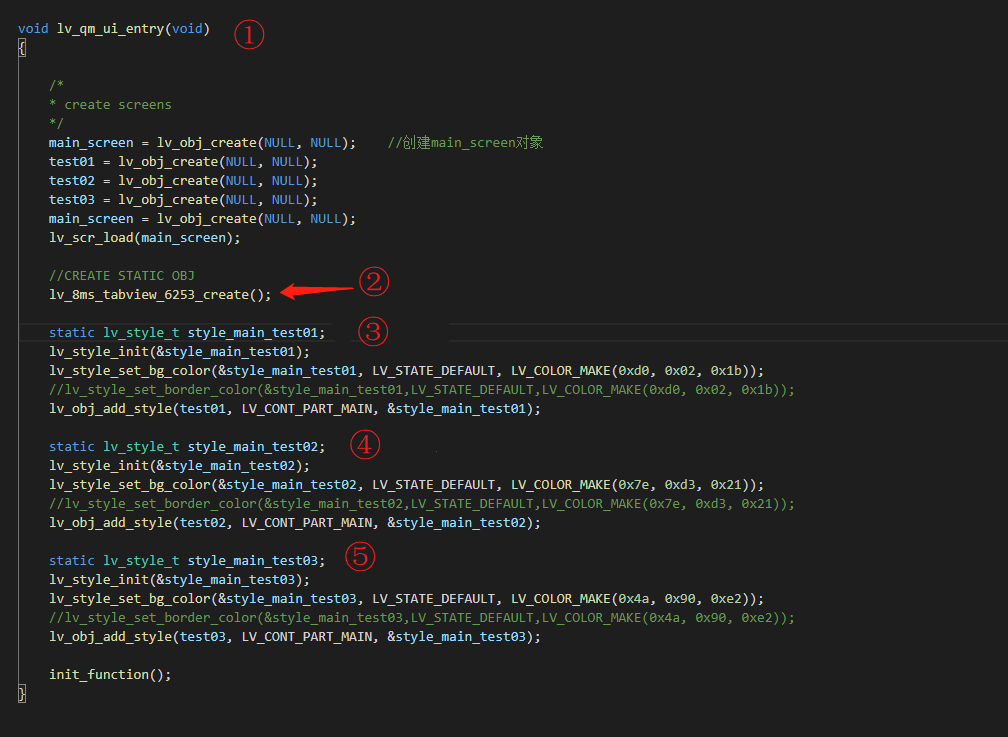
① Entry function
② Create a tabview
③ The style of test01
④ The style of test02
⑤ The style of test03
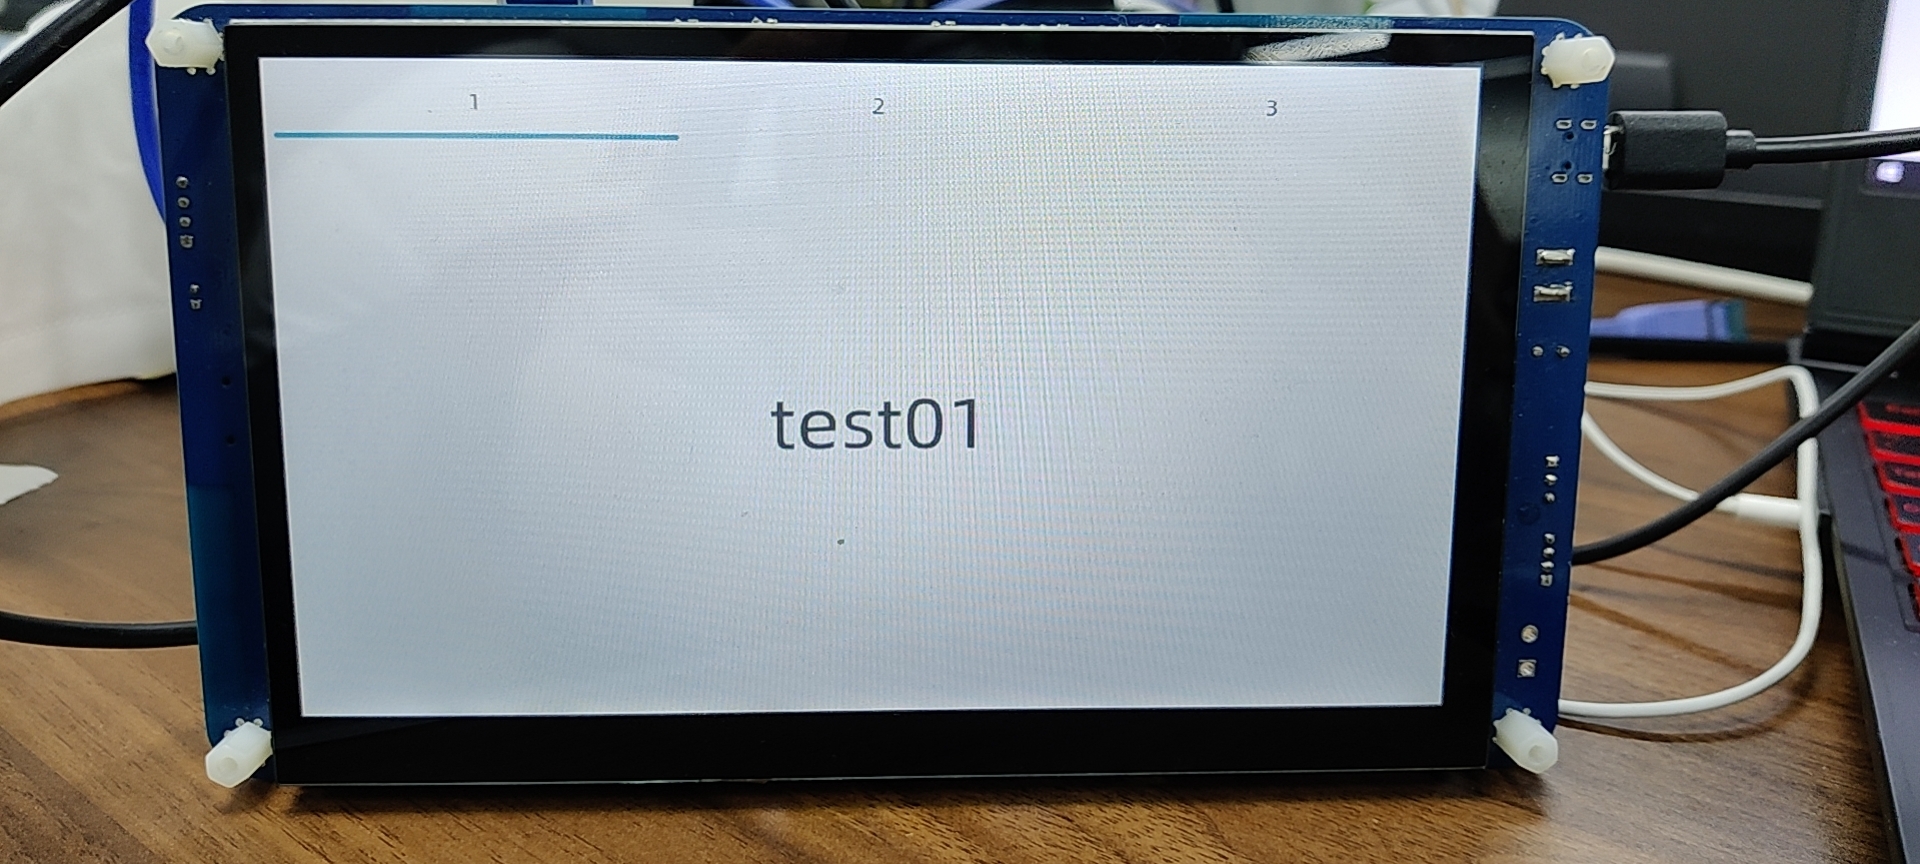
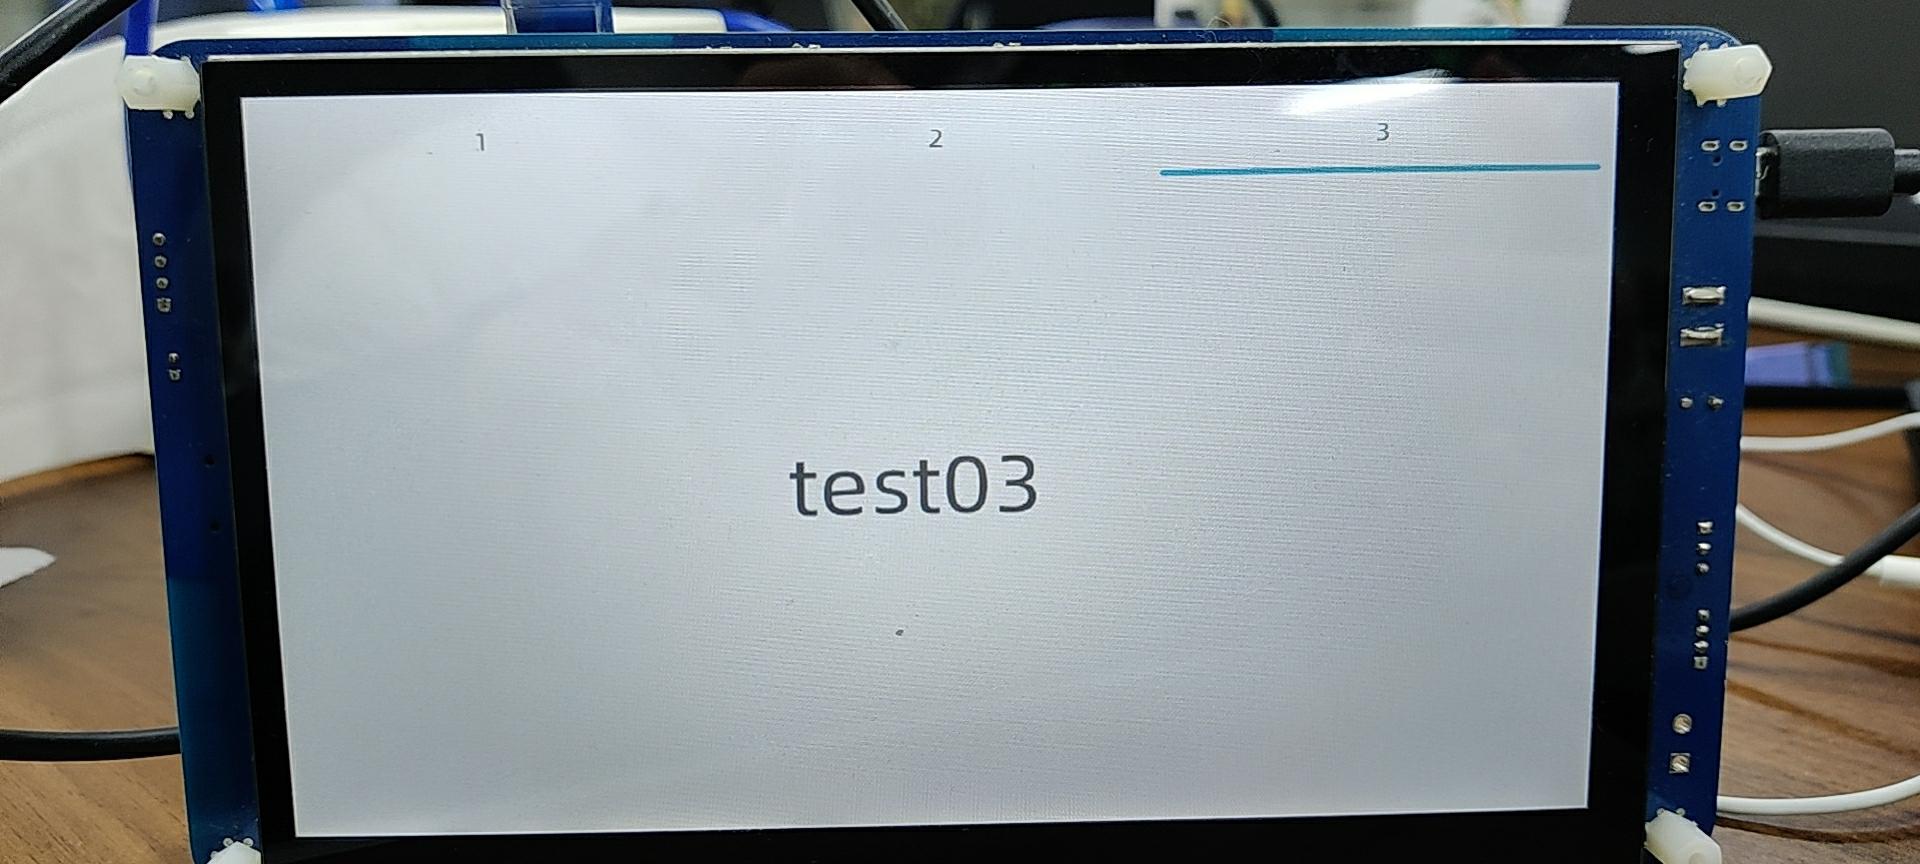
1.4 Demo
- Project number: 3193
