86box case tutorial
1. Links to the 86box demo and project
“1” Video demo:https://www.bilibili.com/video/BV17A411V7dX
“2” Project sharing link:https://8ms.xyz/view/share/NTI1NSMxODUy
Note: Click Preview after entering the link. This tutorial is for reference only.
2. Introductions to widgets and Blockly used in the 86box project
The effect of this case is achieved by the combination of widgets and Blockly, with a small amount of code fragments added.
“1” There are 8 widgets used in the case, namely “label”, “image”, “button”, “switch”, “list”, “tileview”, “line”, and “slider”. For the usage of these widgets, please refer to the 8ms Manual-“Designer”.
“2” Blockly used in the case will be explained in detail in the production tutorial below.
3. Production tutorial
The making process of some interfaces is similar, so in the following tutorial we will focus on some interfaces with different making processes to illustrate, which are mainly implemented by creating different screens.
During the period, explanations and logical analysis of the used Blockly will be added in the tutorial.
“1” Create a Welcome interface**(first interface)
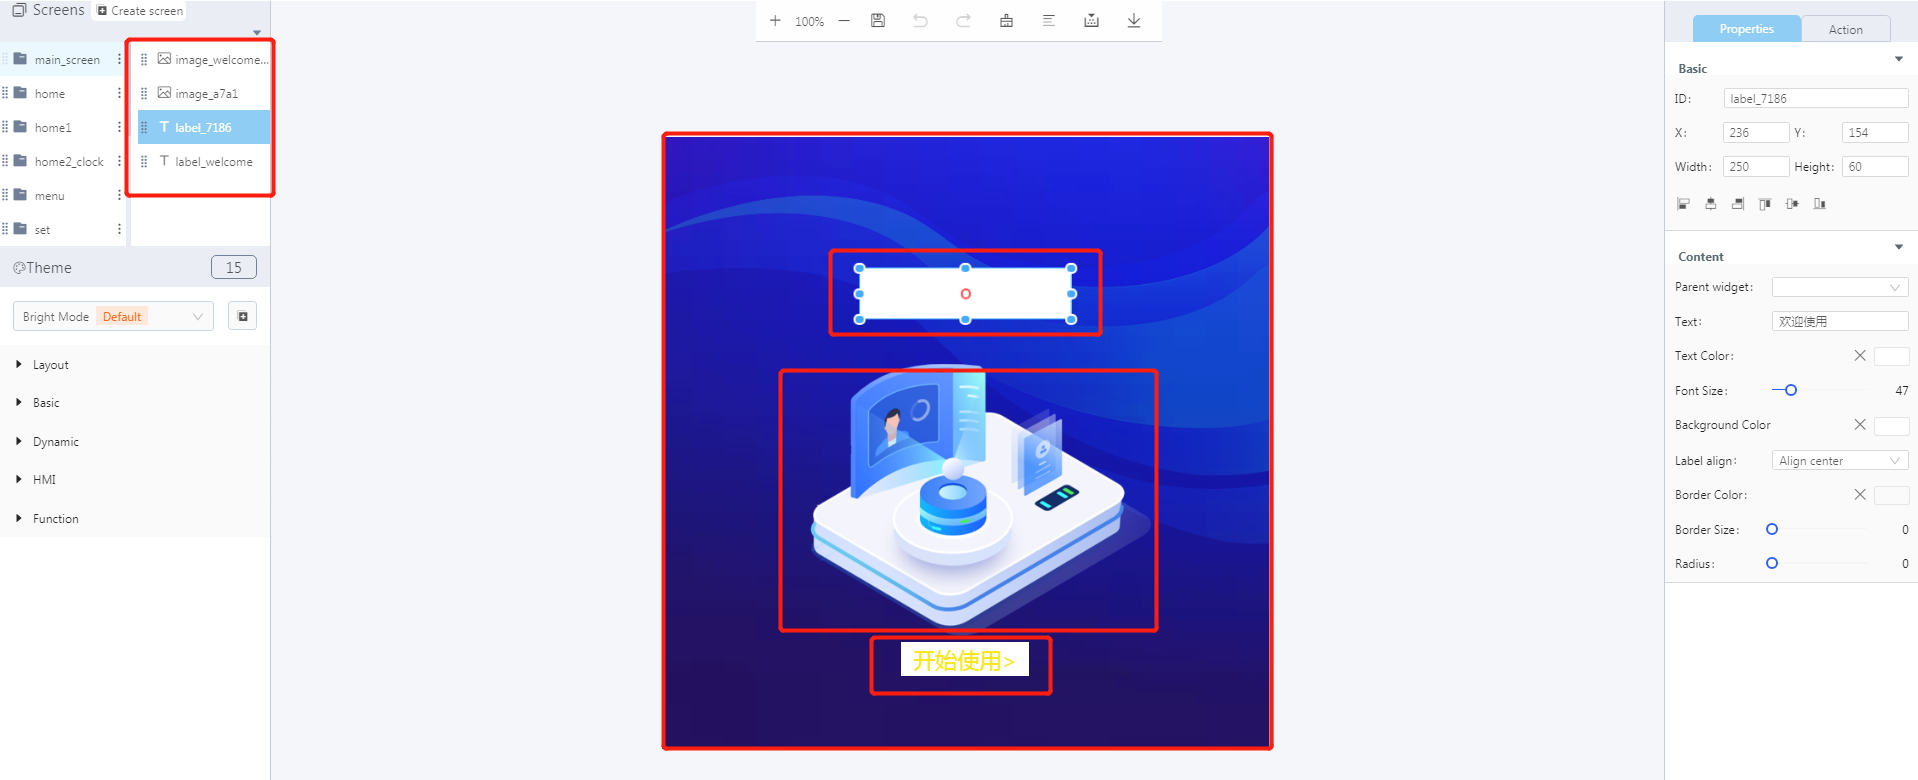
Click anywhere to enter the “home” interface, which mainly uses two image widgets and two label widgets.
The image widget can adapt to the size of an image. It is recommended that you design the image size according to your needs before uploading it.
The label widget can be set with attributes such as size and color as required.
- Blockly implementation

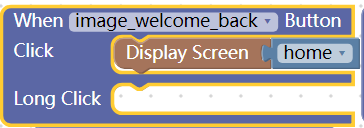
Click UI Controls-Object Base-“Enable widget clicked” and choose the corresponding widget ID.(In this example, we set the background image widget and the “Get Started” label widget to be clickable).
Click Process/Event-UI-“When button click” and choose the corresponding widget ID.
Click UI Controls-Object Base-“Display Screen” and choose the “home” screen.
- “2” Create a Home interface
- The home interface mainly uses three screens, namely “home”, “home1” and “home2_clock”, which will be explained respectively below.
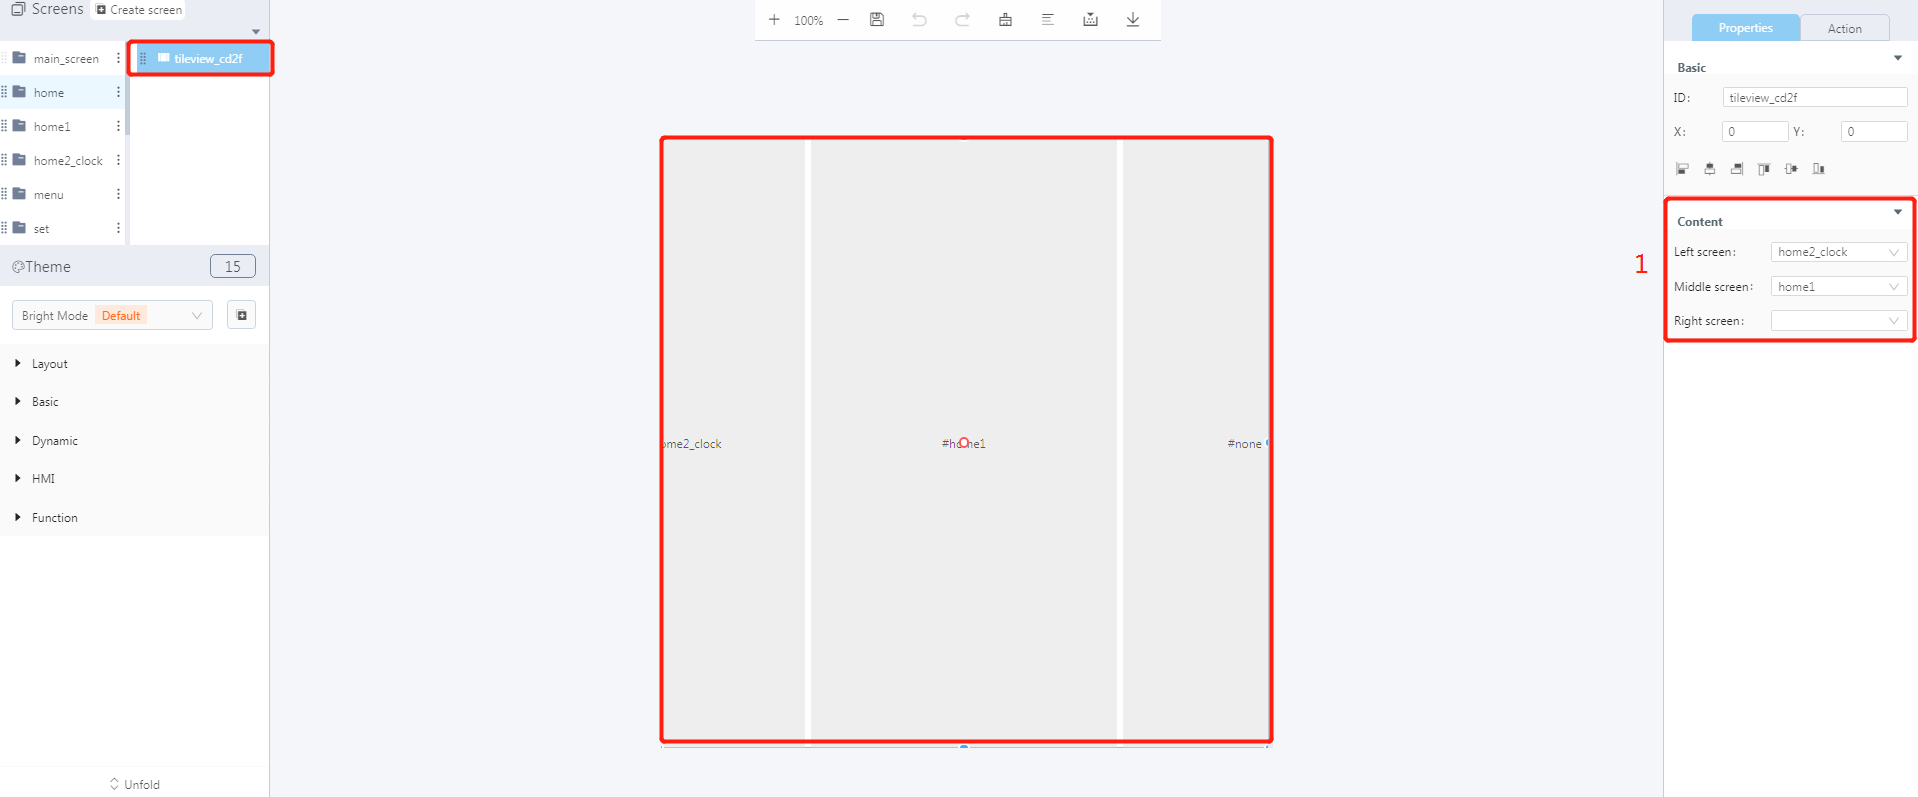
- In the “home” screen, the tileview widget is used to enable users to slide the screens. You can add the corresponding screens as shown in Figure 1 above.
Note:When only two screens are added, the screen on the right will be displayed first.
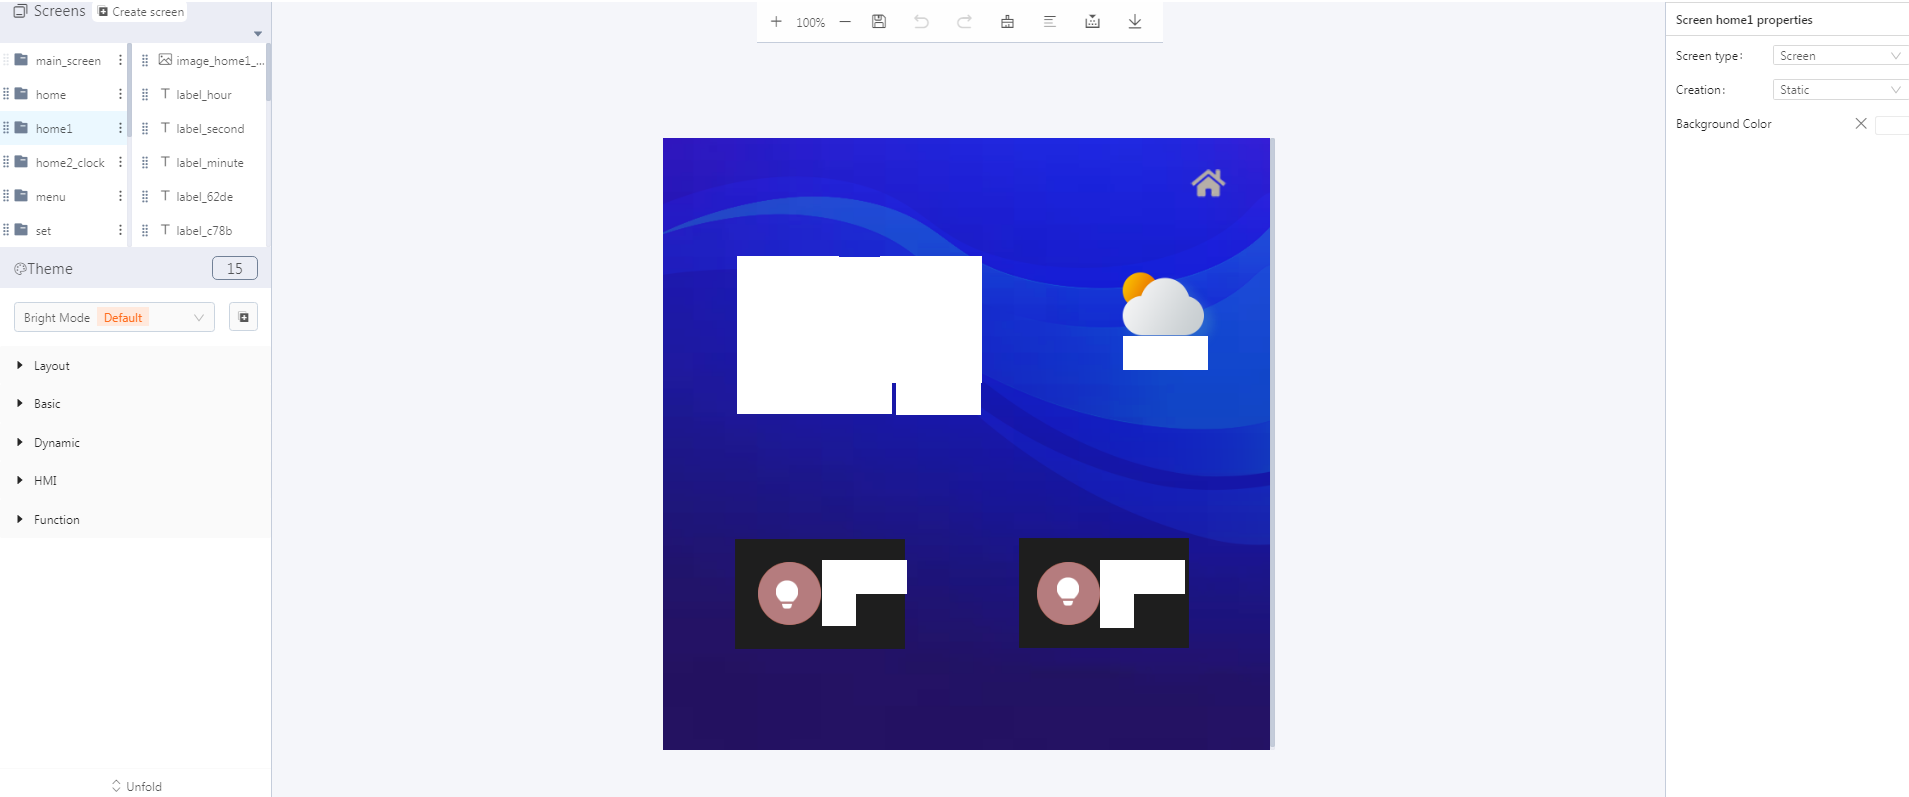
- The “home1” interface mainly features two LED lighting controls, time counting and entering the menu interface.
- LED lighting control
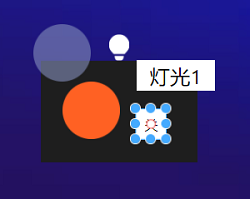
As shown in the figure, the widgets used here are three image widgets, two label widgets and one button widget.
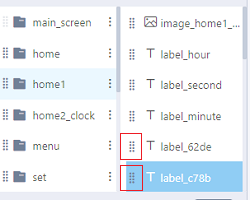
To simplify the use of Blockly, please pay attention to the order in which widgets are created in the layout. The one created first appears at the bottom. You can drag the upper layer to change its position.
Blockly implementation
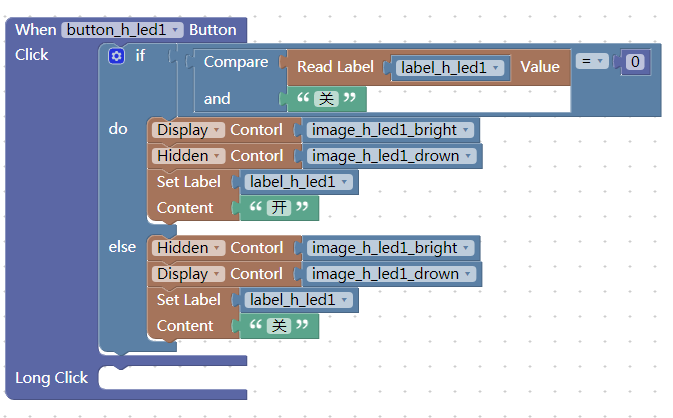

- Code
LED lighting control is achieved by judging the label content “开/关”(”on/off”), and then displaying or hiding Blockly to switch the LED on/off images.
The added code fragment is to set the opacity of the black background image to achieve the dark shadow effect (the black background that appears later is all implemented by adding this code).
Note: The LED lighting control method in the “room1” interface is the same as this.
- Time counting(In this example, time changes in hours, minutes and seconds)
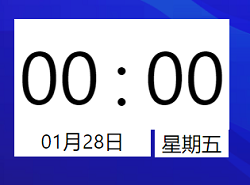
- Five label widgets are created as shown in the figure, the contents of which correspond to hour, minute, second, date and week respectively.
- Blockly implementation and code demo
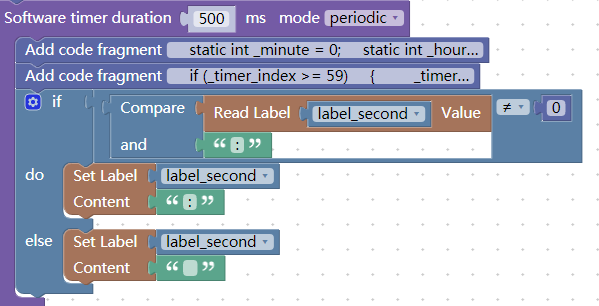
- Code
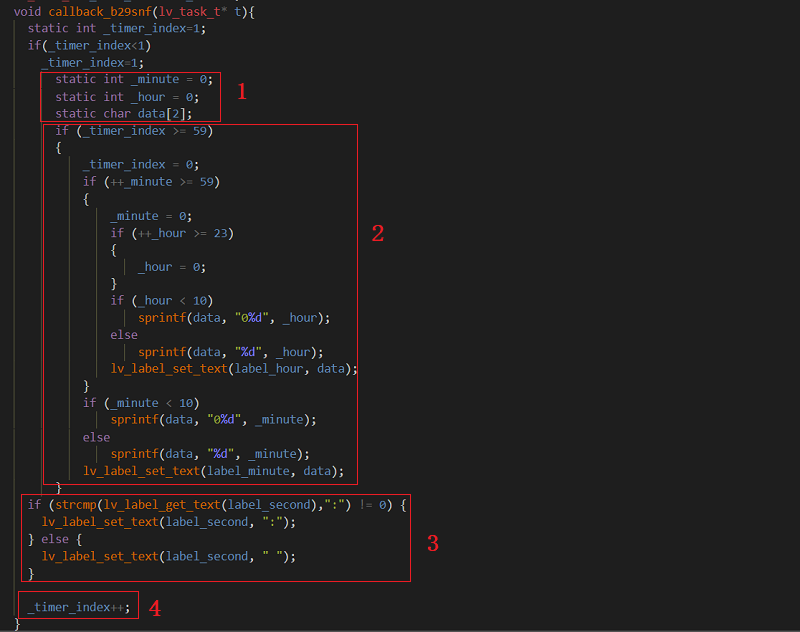
Click Process/Event-“Software Timer” to achieve the blinking effect by judging the value of label “second”.
The added code fragments corresponds to the code marked 1 and 2.
- Entering the menu interface
- Please refer to the content of Blockly implementation in “Create a Welcome interface”.
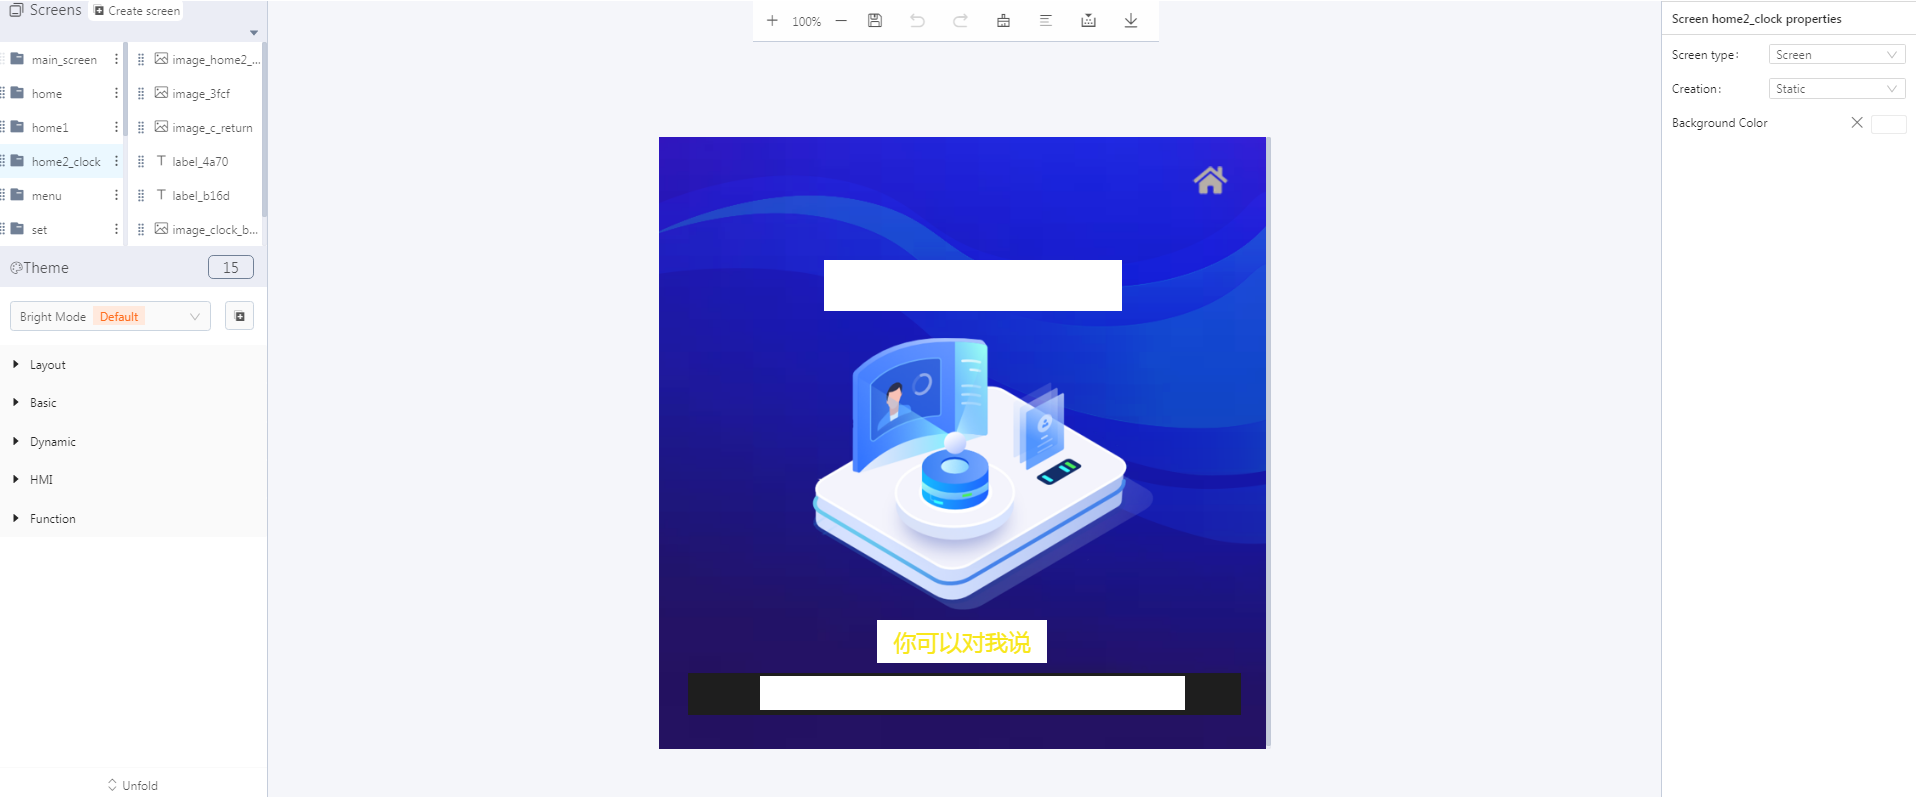
- Please refer to the above tutorial for creating the “home2_clock” interface.
- “3” Create a Menu interface
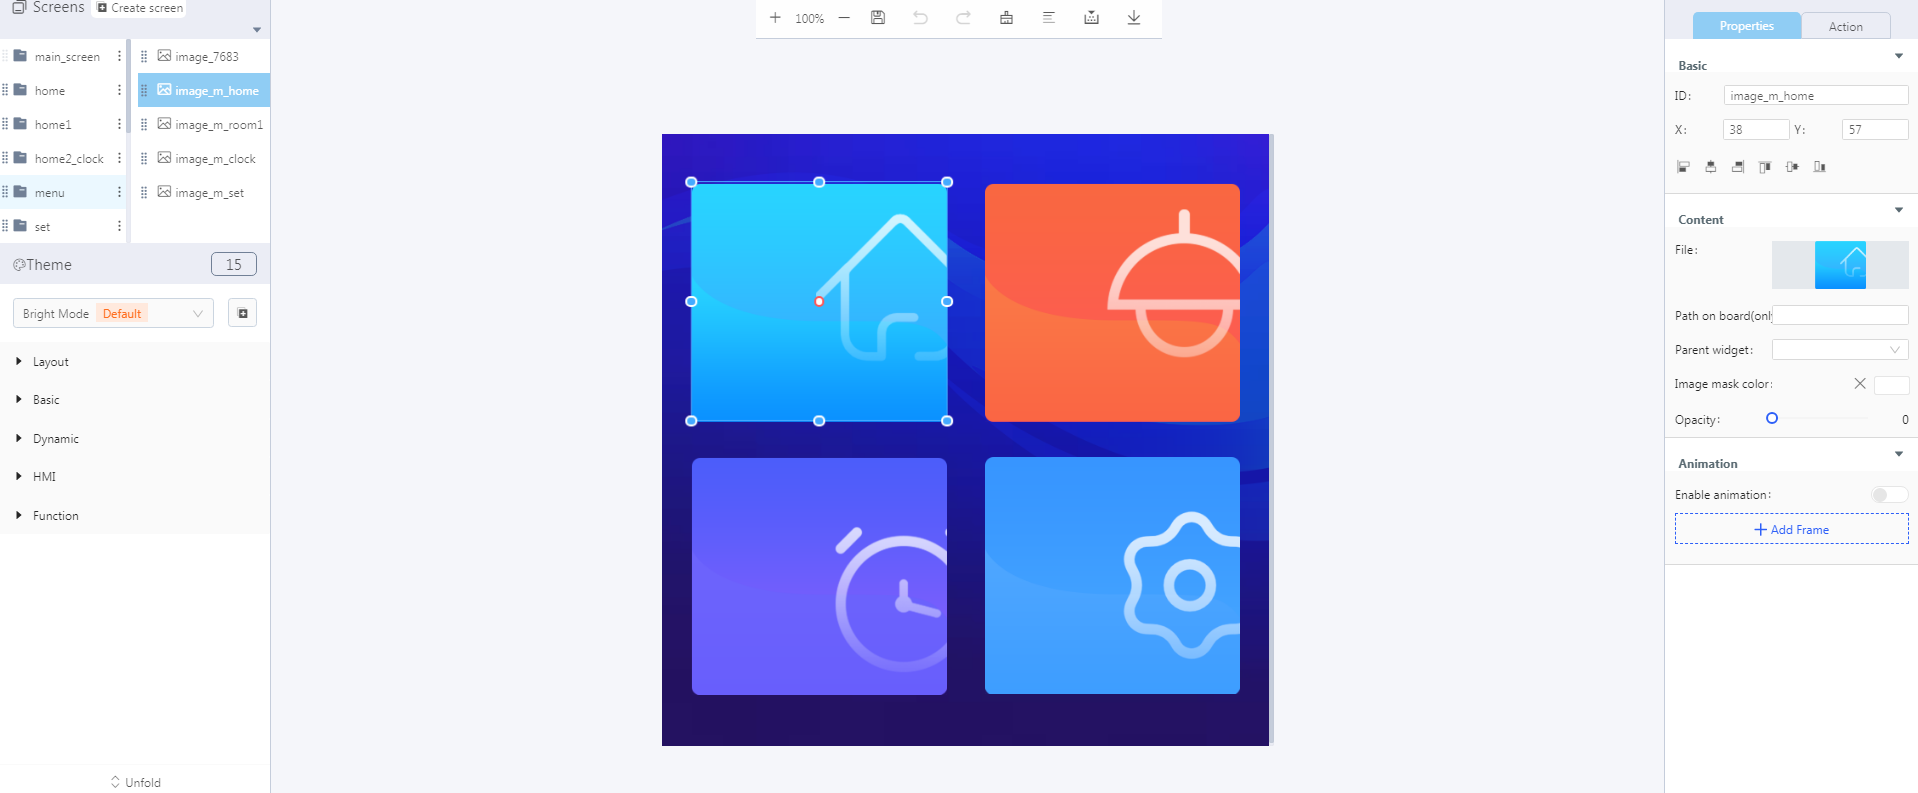
The menu page uses four “image” widgets, which can jump to the screens “home1”, “room1”, “Home2_clock” and “set” respectively.
For details, please refer to the tutorial of “Create a Welcome interface”.
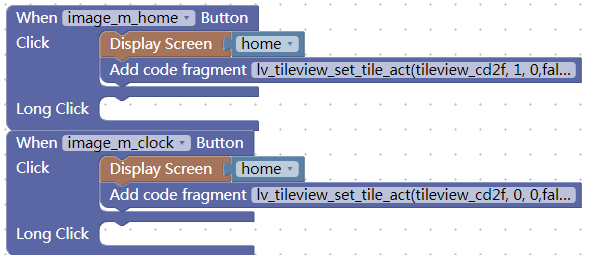
The screens “home2_clock” and “home1” have been added to the “tileview” widget as tiles. The following code fragments need to be added to perform page jumps when clicking on the alarm clock image and the home image, otherwise there will be a stuck state.
- Code
- The code fragment mainly achieves to reach the set position, (1, 0) corresponds to home1, (0, 0) corresponds to Home2_clock.
- “4” Create a Set interface
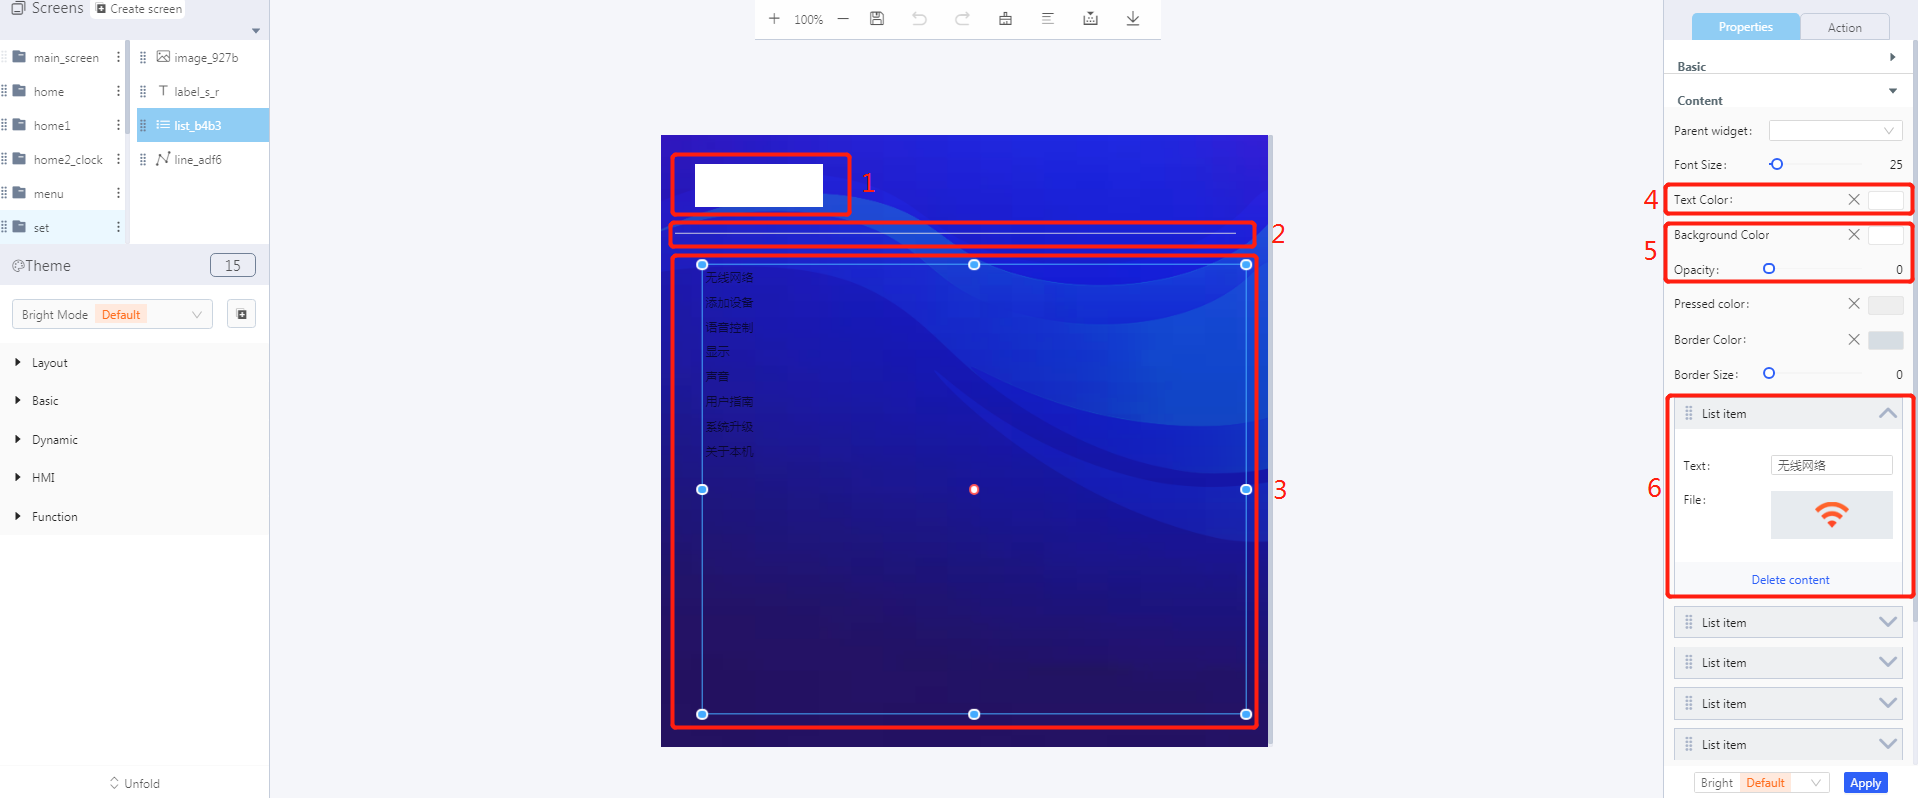
This interface mainly uses the following widgets, that is, a “label” widget, a “line” widget and a “list” widget. It mainly features returning to the menu page and selecting setting options.
To return to the menu page, please refer to the “Create a Welcome interface” tutorial.
- Setting options
Add list items as shown above, and then add the corresponding text and files (images).
Note:In order to keep the text of the list items aligned, the added images should have the same width.Set the font size to 25, the text color to white, and the background opacity to 0 (for reference only).
- Blockly implementation
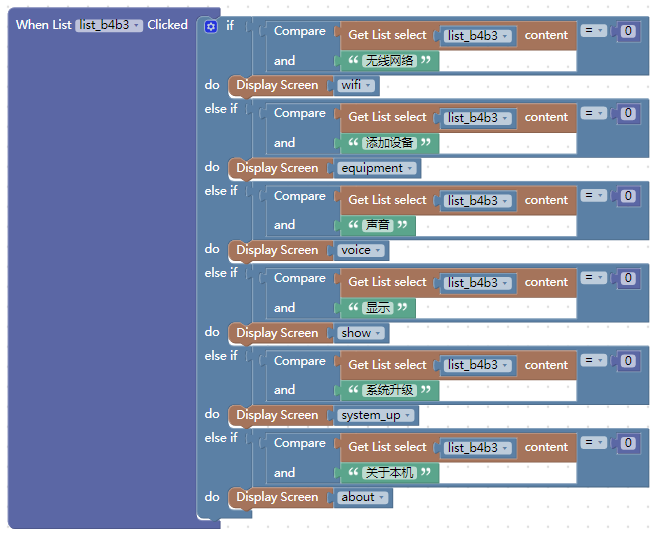
- Click Process/Event-UI-“When list clicked”, perform a corresponding page jump by comparing between “Get list select content” and the set text of list items.
- “5” Create a “wifi” interface
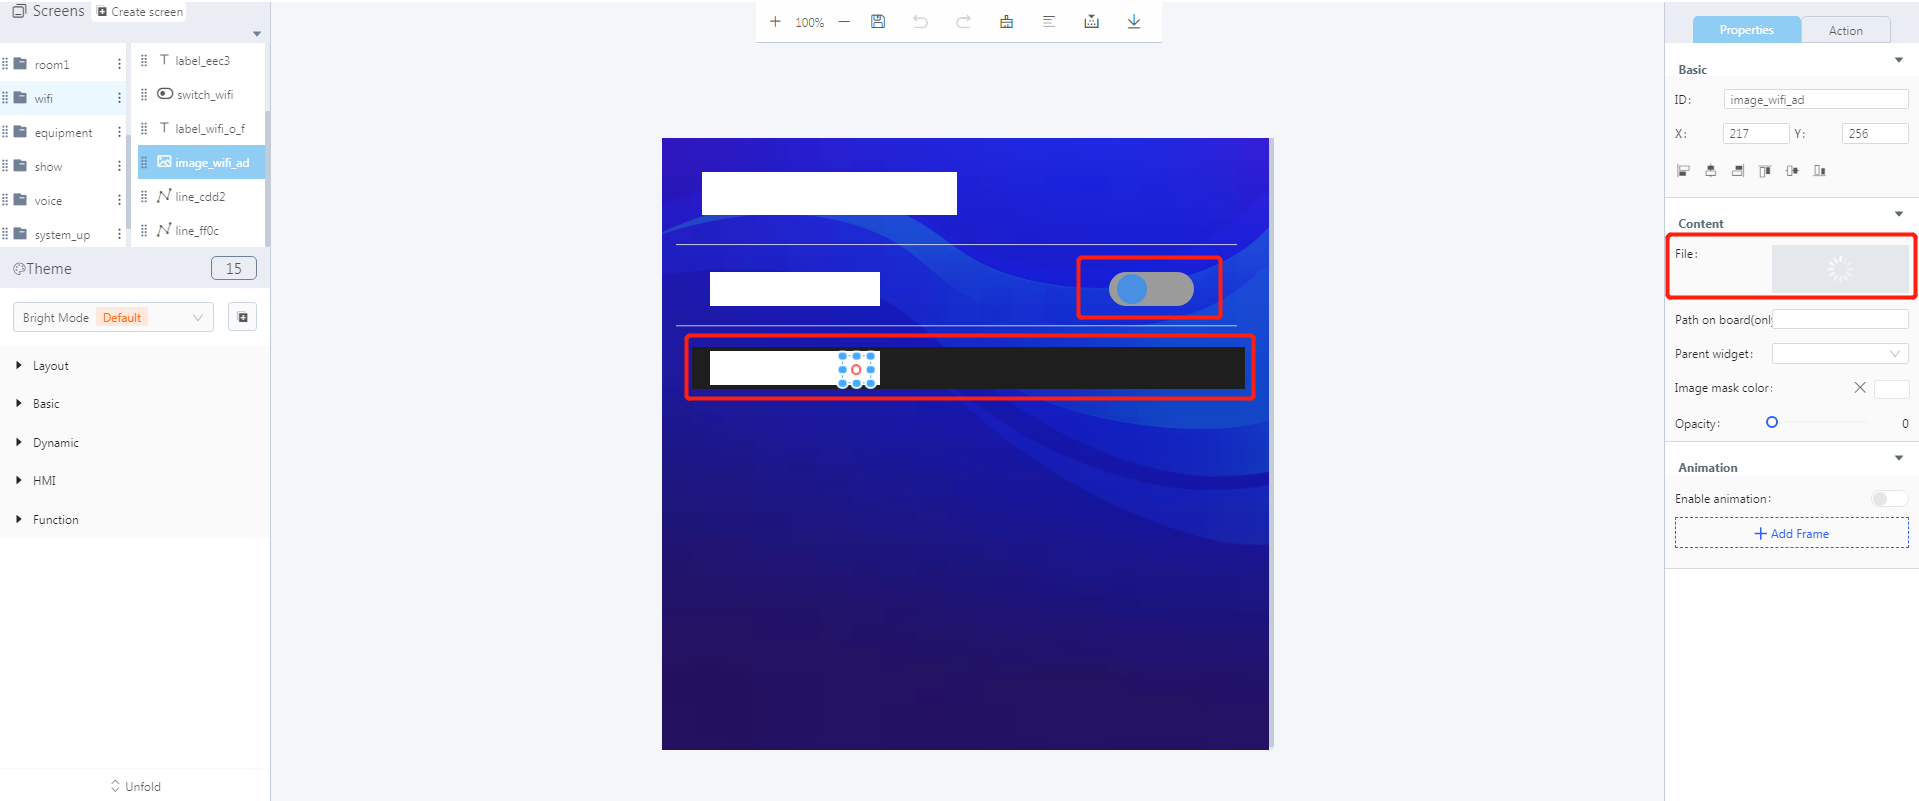
This interface mainly features returning to the “set” interface, WiFi switch control and scanning status.
To return to the “set” interface, please refer to the “Create a Welcome interface” tutorial.
- WiFi status control
- Blockly implementation
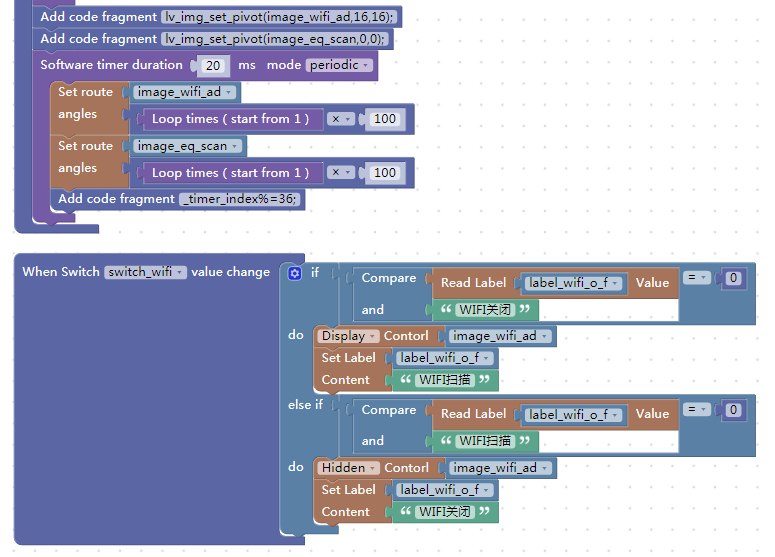
Figure 1. To control the image rotation, please refer to http://doc.8ms.xyz/docs/gui/gui-1ckoatqsmhkqt
Note:Hide the image widgets when booting up.Click Process/Event-UI-“When switch value change”, and switch WiFi status by judging “read label value” and “set label content”.
- “6” Create a “show” interface
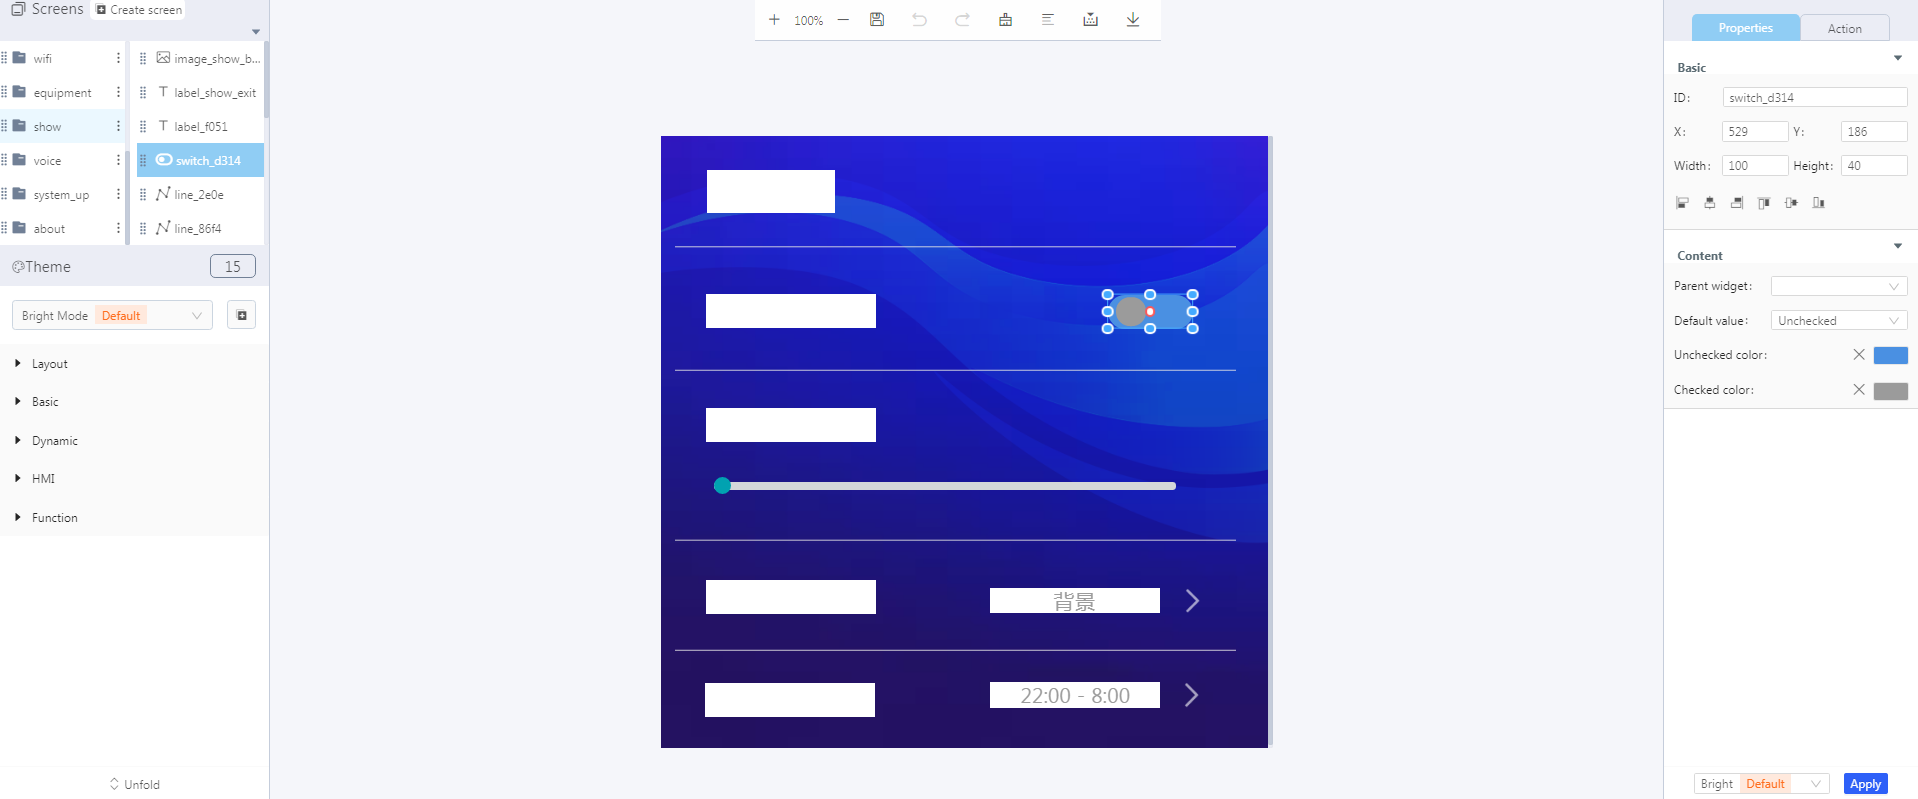
The “show” interface mainly uses the following widgets, “label”, “switch”, “line”, “slider” and “image” to display effects. At present, you can return to the “set” interface from this interface.
To return to the “set” interface, please refer to the “Create a Welcome interface” tutorial.
Other widgets display effects in the layout, and features can also be added according to requirements.
