Label
1. Create a label widget
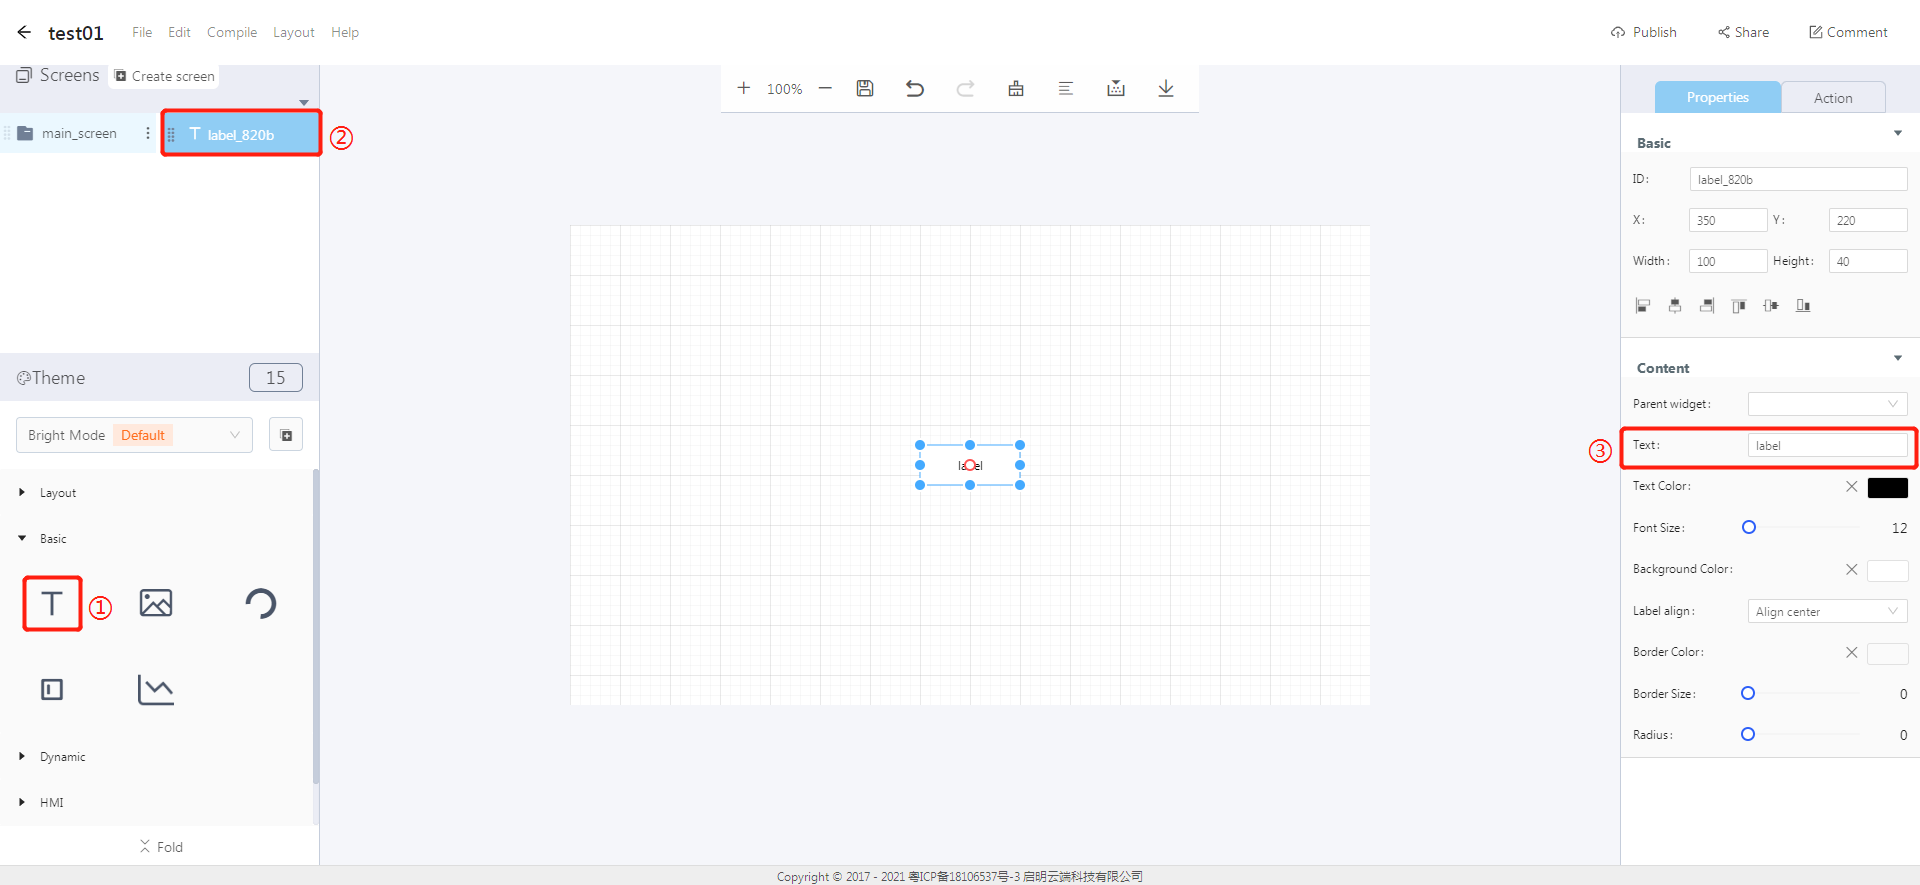
① Create a label widget
② The label widget ID
③ Modify the label content
2. Steps for use
2.1 Widget properties
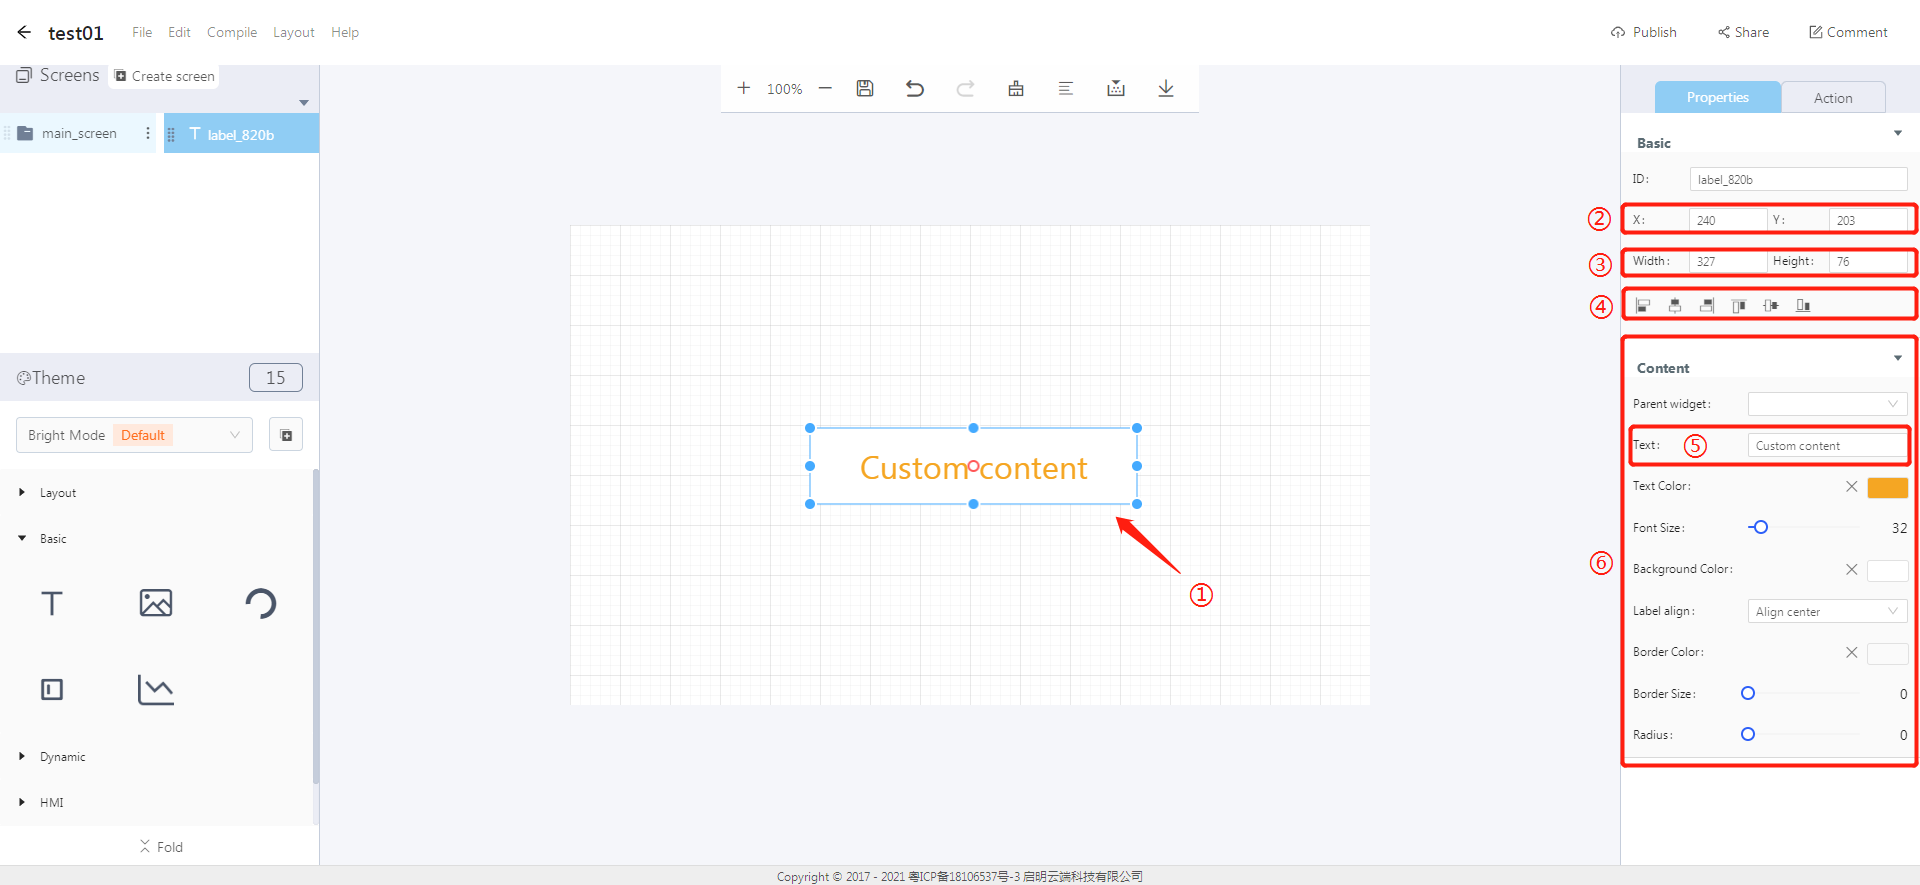
Properties-Basic:
ID: label_820b is the ID of the label widget
X, Y: its coordinate position in the work area
Width, Height: set the size of the widget
Alignment (in order): left alignment, horizontal center alignment, right alignment, top alignment, vertical center alignment, bottom alignment
Properties-Content:
Parent widget: set the parent object, and the label widget is its child object
Text content: set the text content in the display area
Text color: set the color of the input text in the display area
Font size: set the font size of the input text in the display area
Background color: the background color of the label widget
Label alignment: center, left and right
Border color: the border color of the label widget
Border size: the border size of the label widget
Radius: set the round corner of the label border
3. Blockly—Label
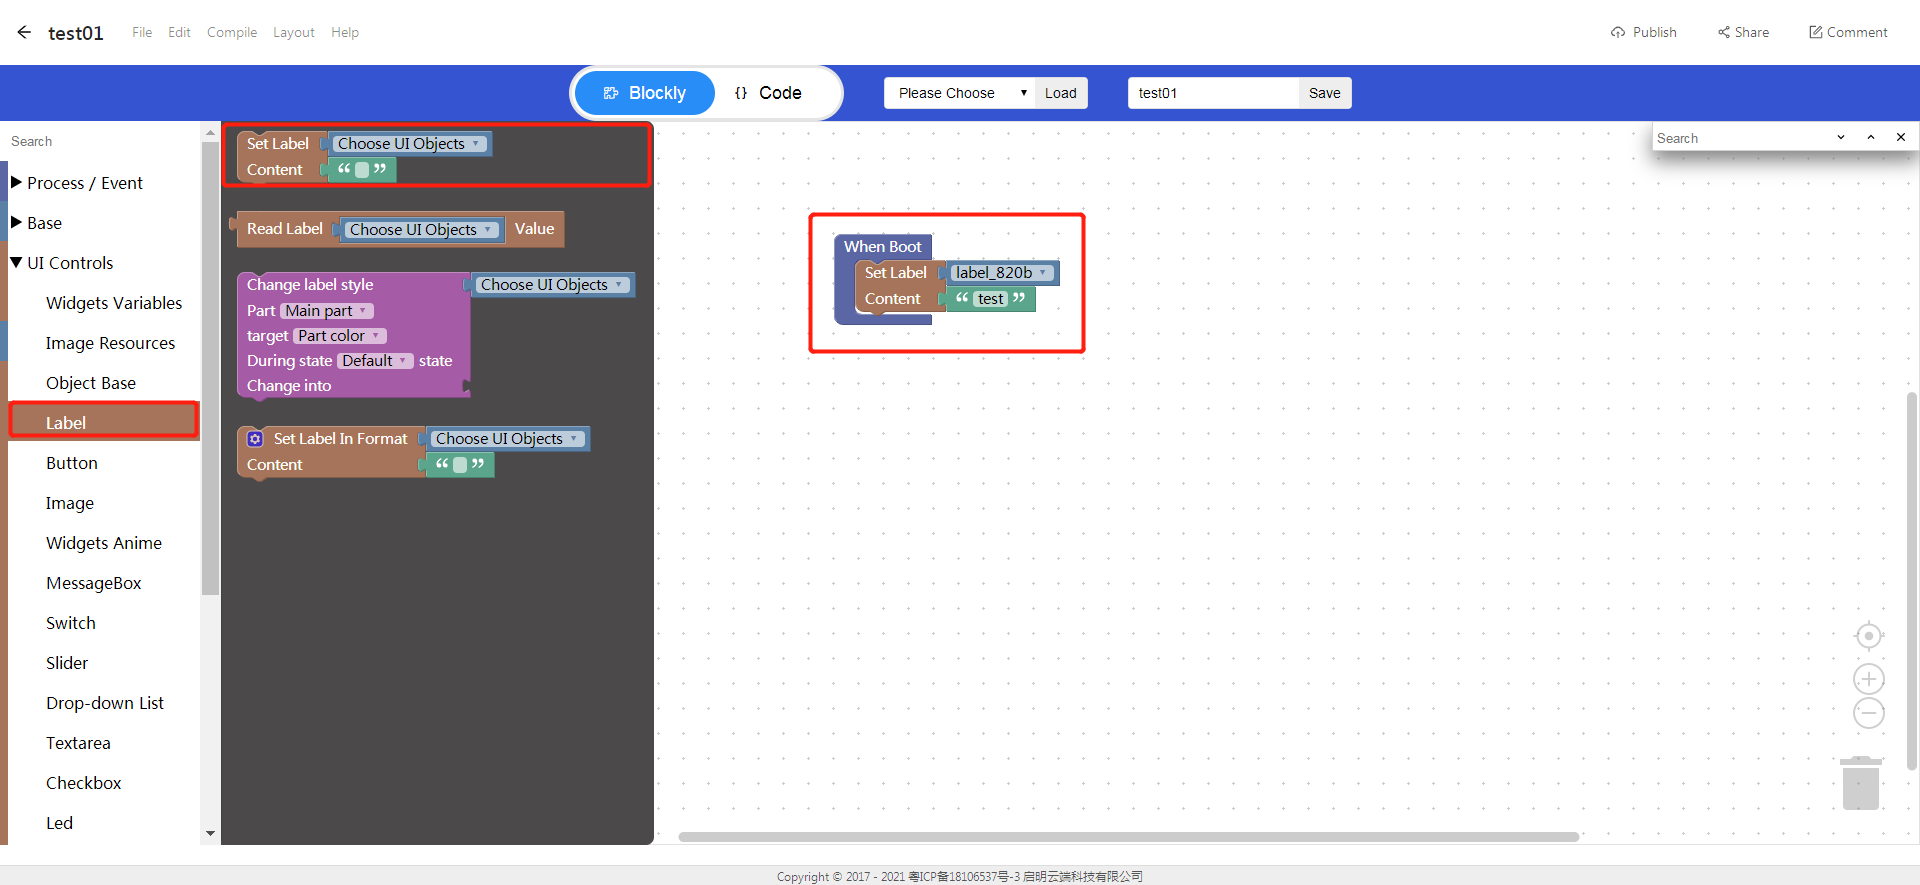
3.1 Set label content (it needs to be used with Process/Event)
Choose UI objects: choose the label ID created in Layout-Designer
Content: Click to input text, which will be displayed as the label content
Example: choose the label widget ID: label_820b, content: test
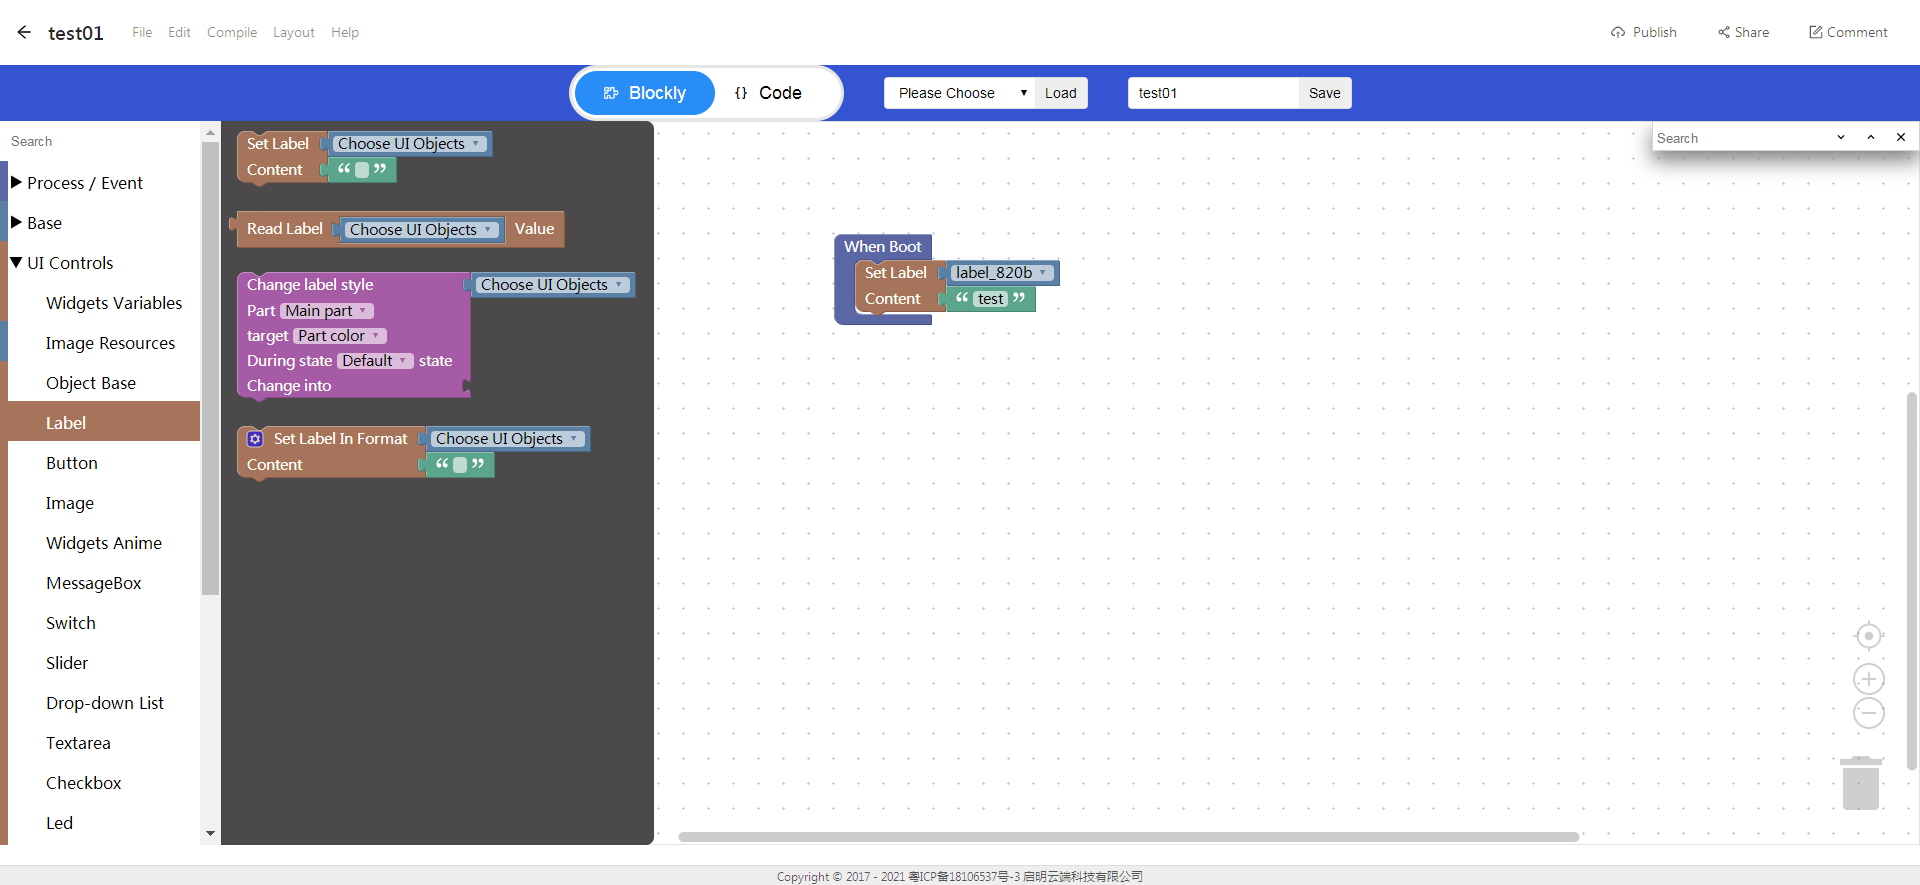
- Click “{} code” to view the code:

① API
② The label widget ID
③ The label content
4. Implement the recognition of the clicked button with Blockly (ssd201)
- UI design
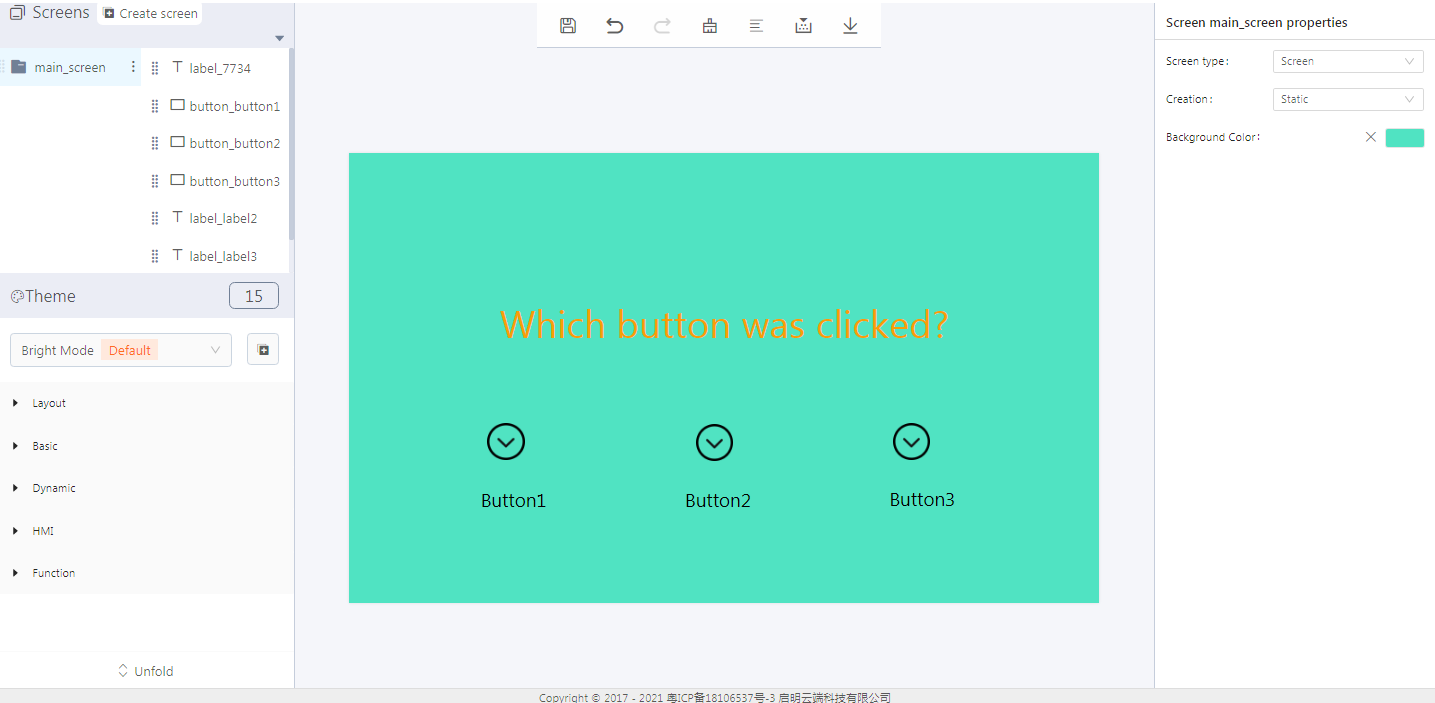
- Create label widgets
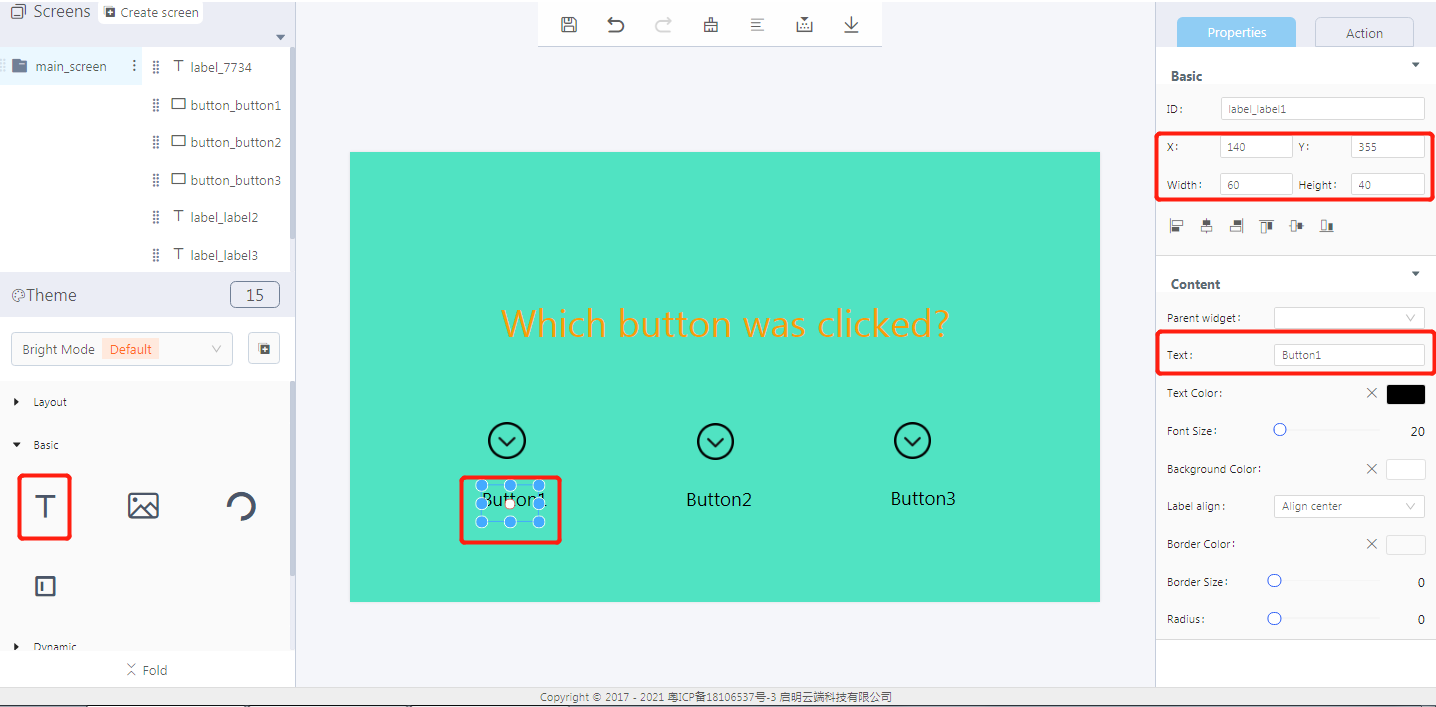
- Create button widgets
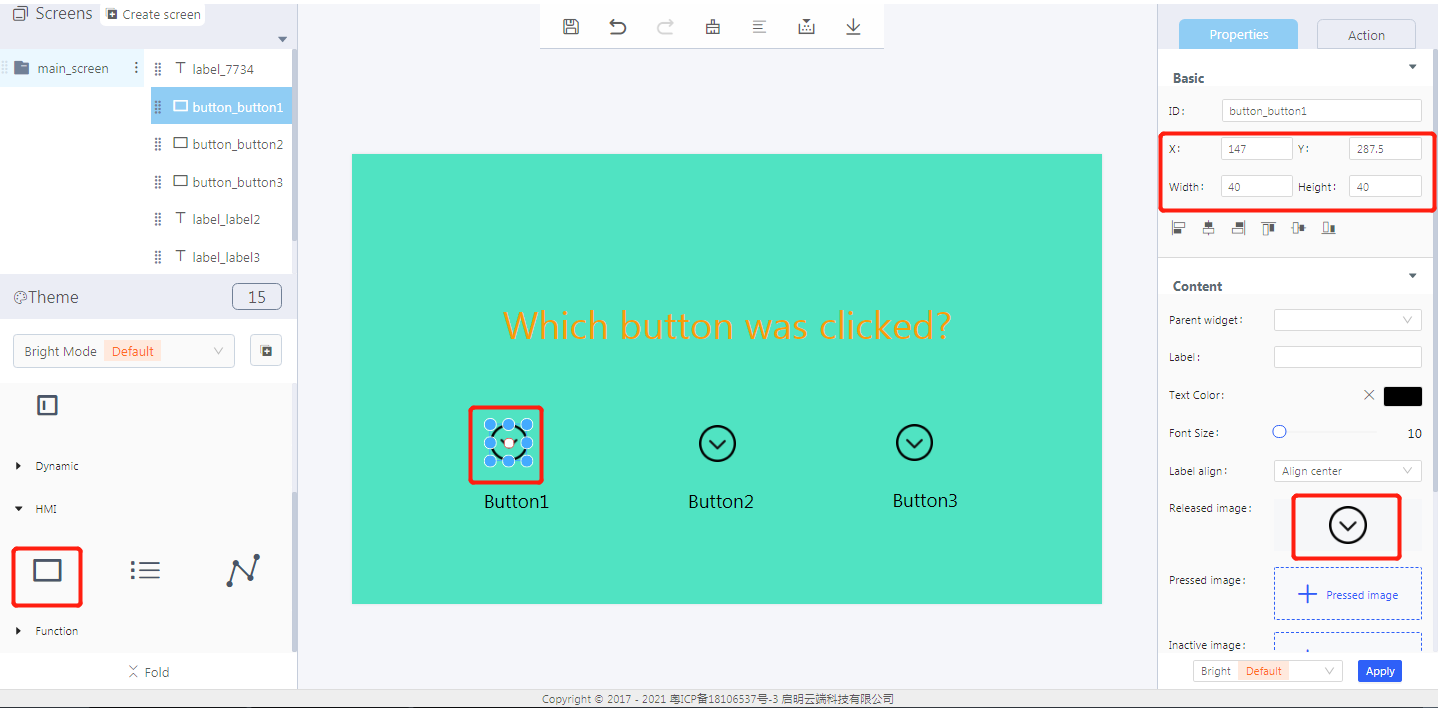
- Blockly design
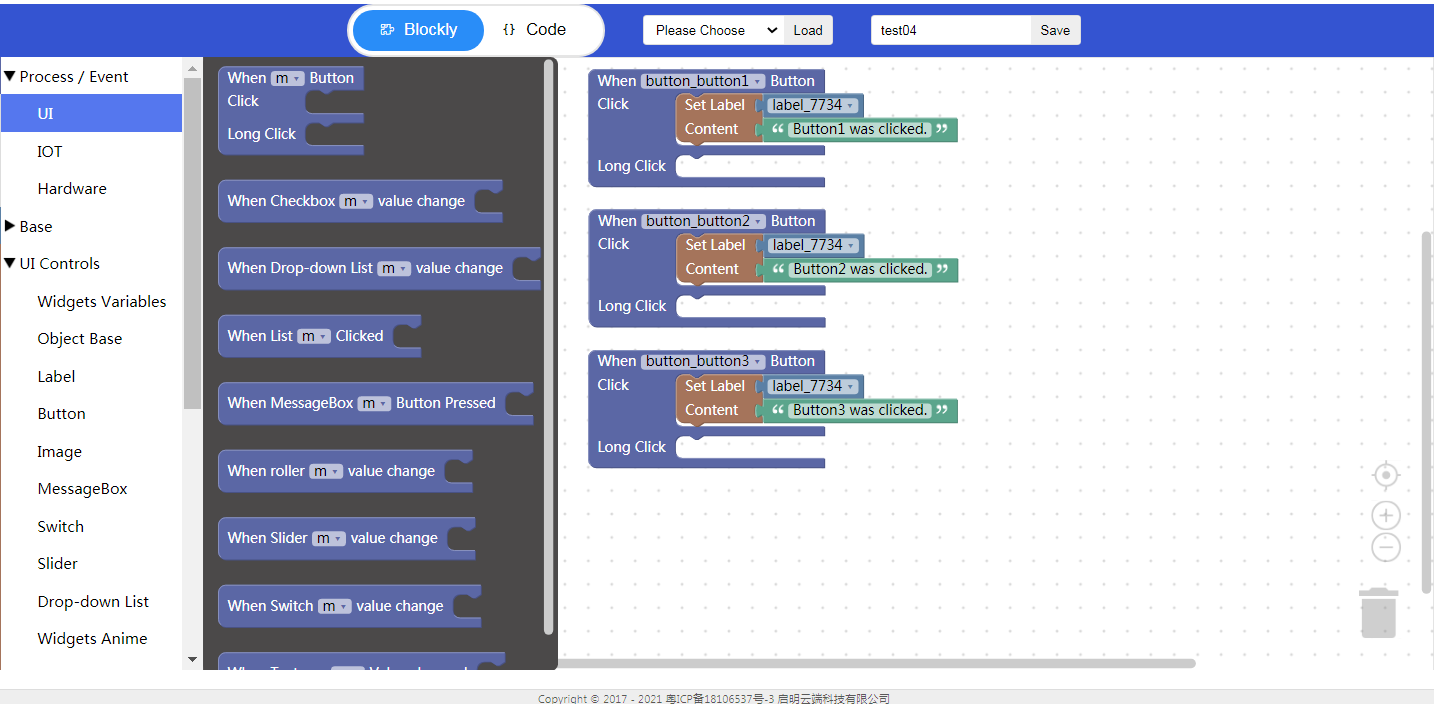
5. Download and analyze the source code of the project
- Zip files

① Font
② Image
- qm_ui_entry.c analysis
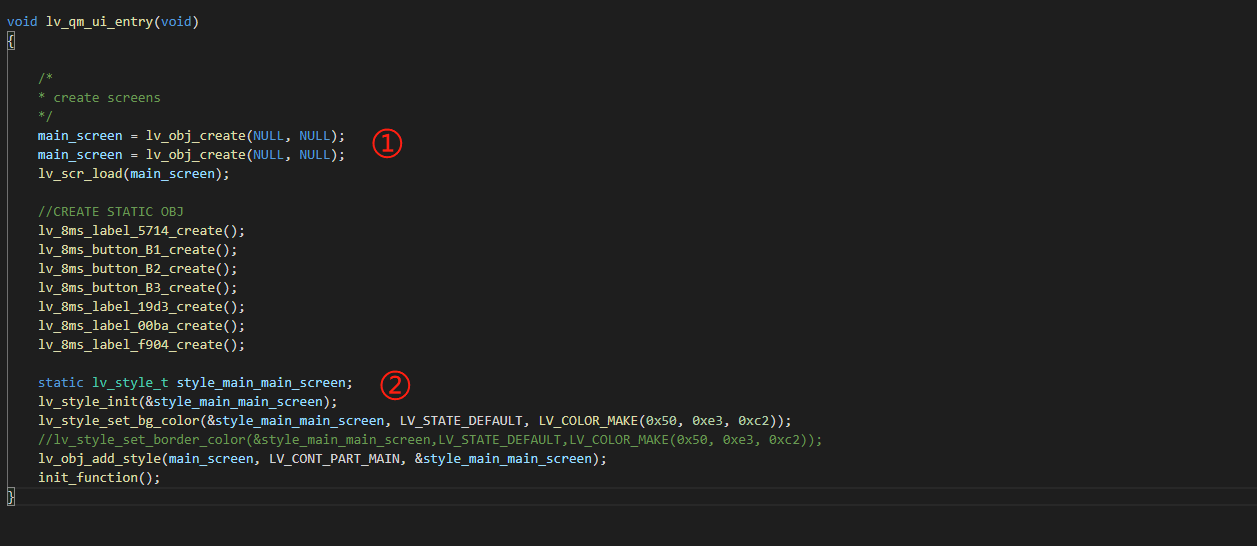

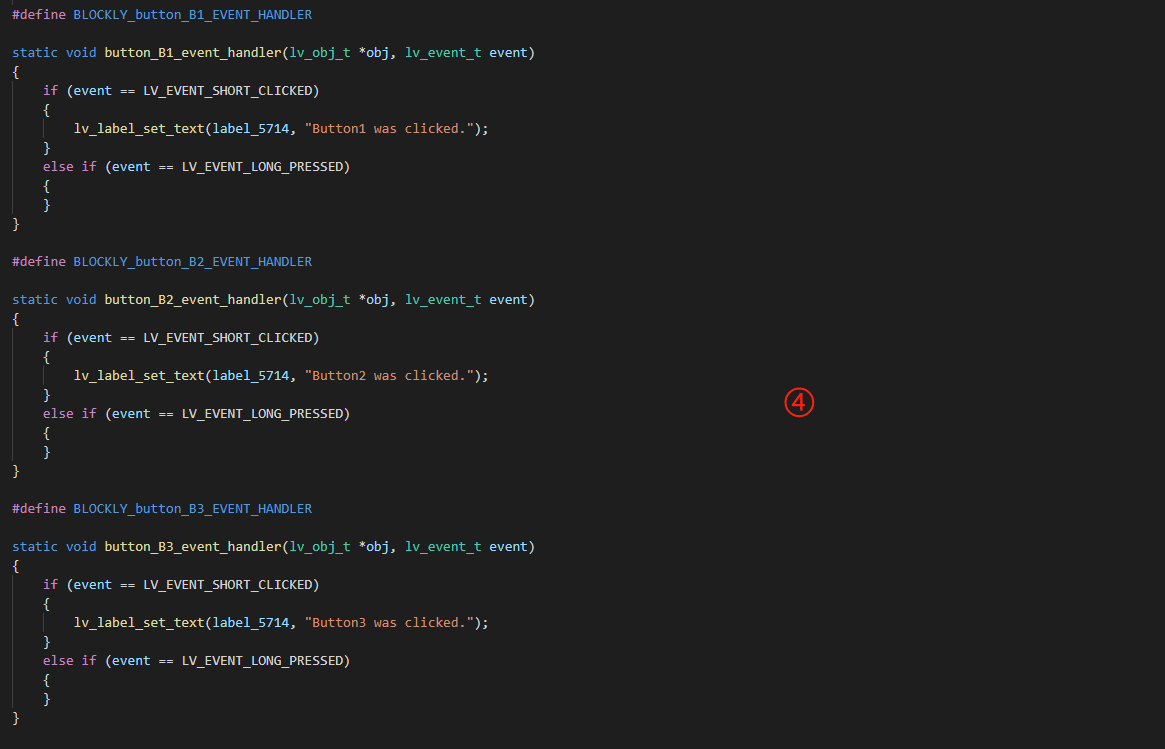
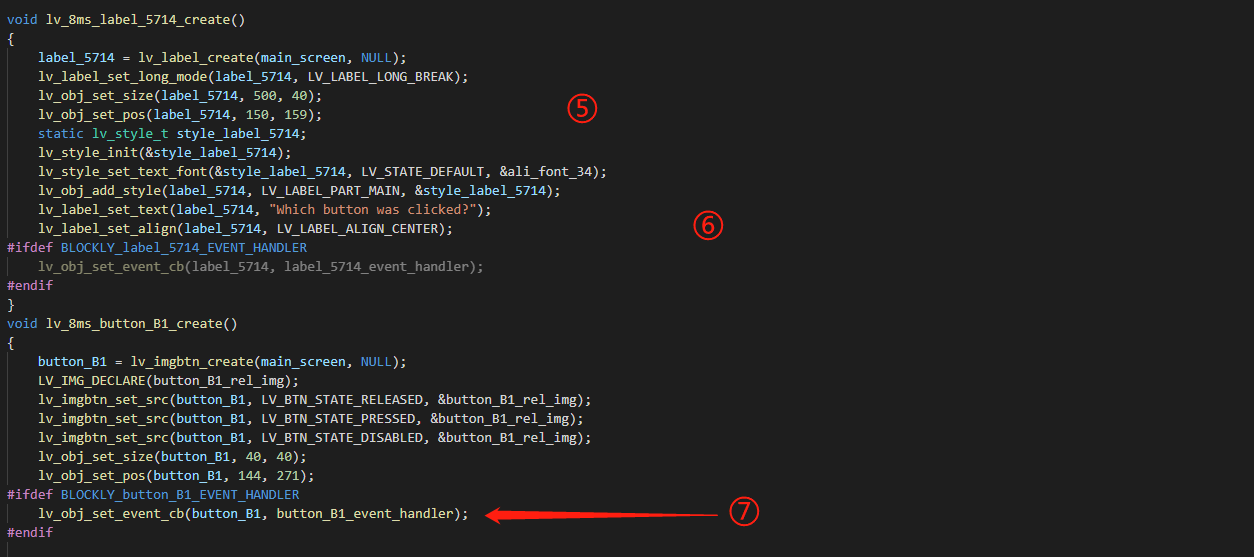
① Create an object
② Style
③ Relevant variables
④ Blockly logic
⑤ Create labels and set styles
⑥ Create key1 and set the style
⑦ Key1 event
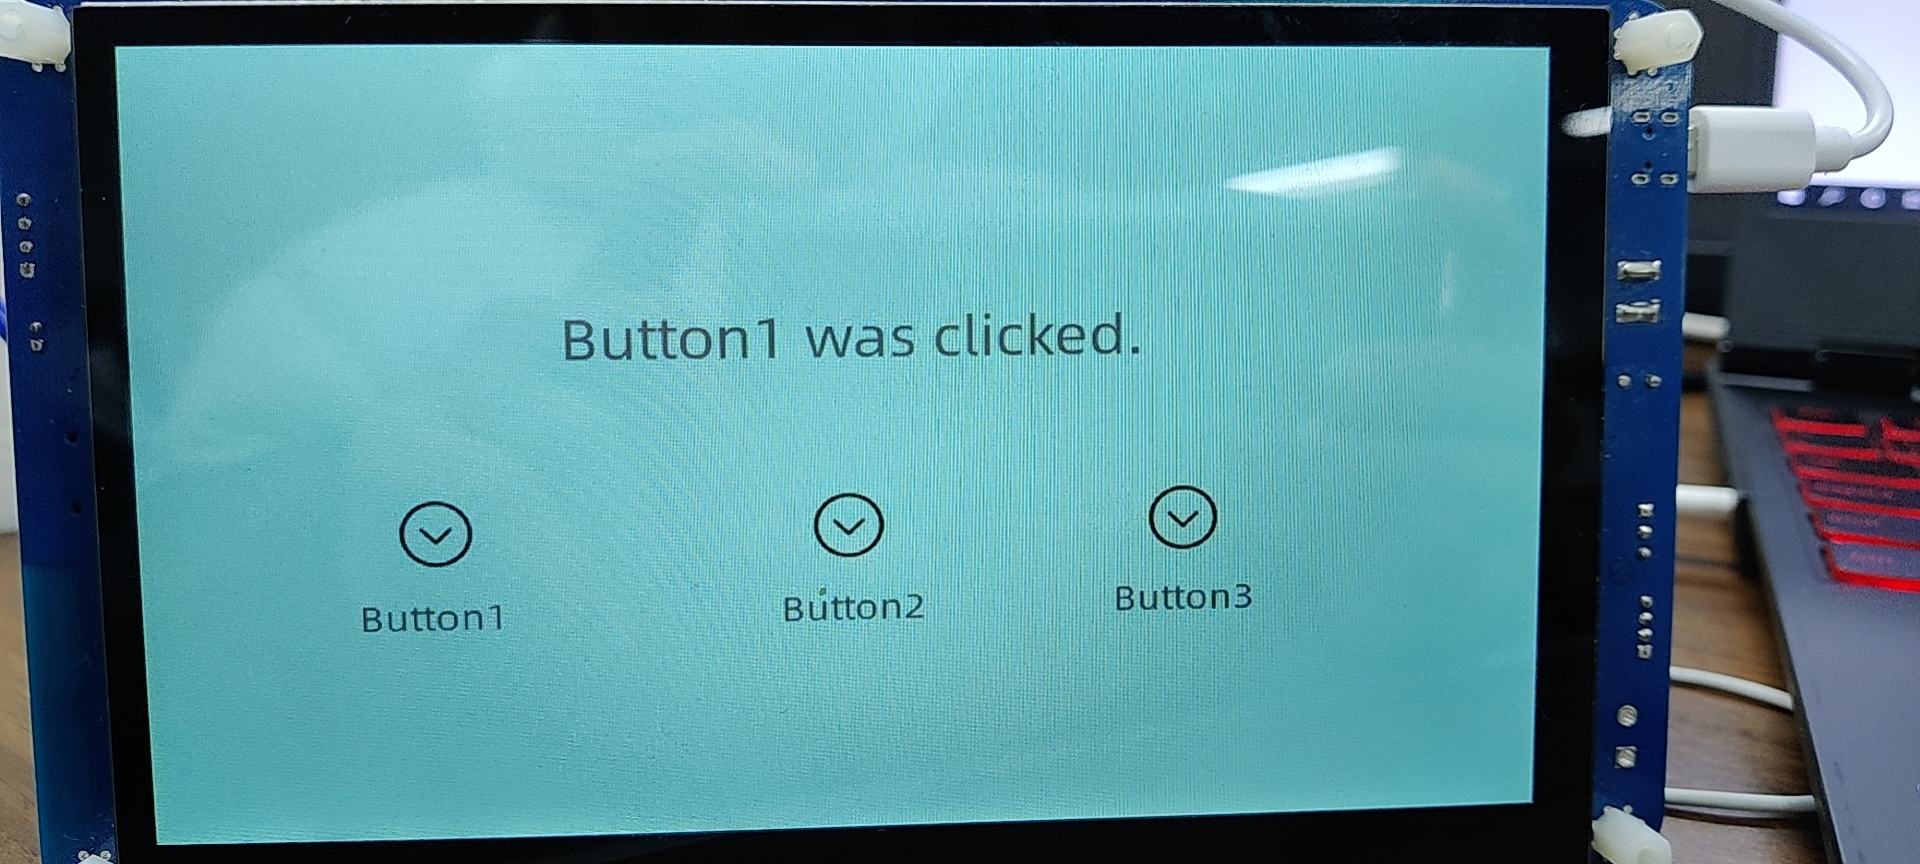
6. Demo
Project number: 3210

7. Extension –a callback function of a label widget
- UI design
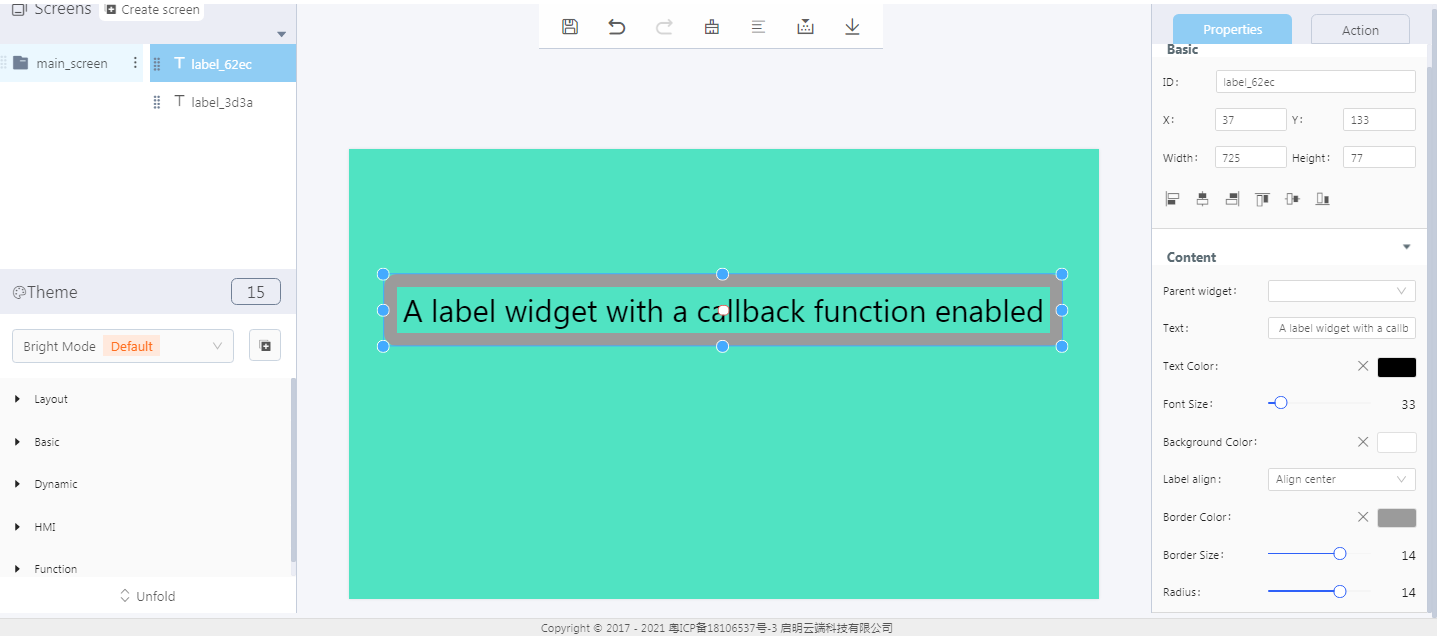
- Enable a callback function of the label widget

- Logic: when you click a label widget that “enables a callback function”, the content of another label widget will appear as “text”.
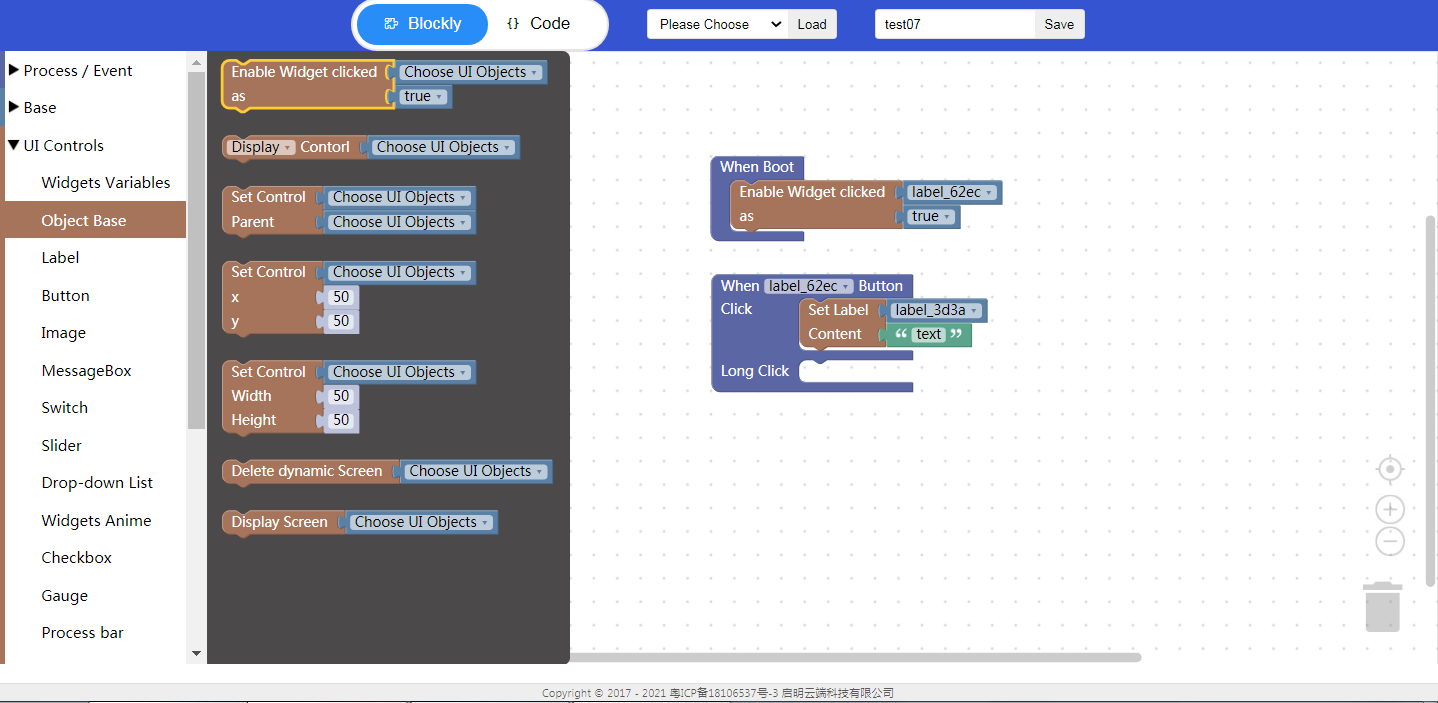
① Enable a callback function
- Callback function interface

② Callback function API
- Code analysis
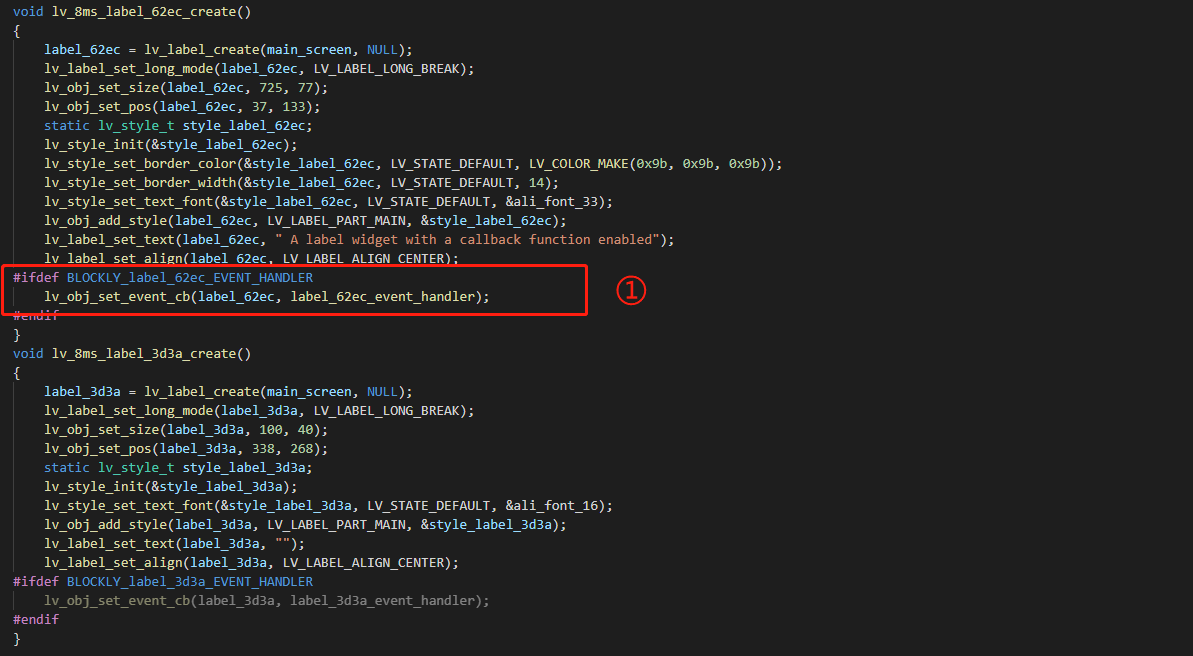

① Callback function
② Event handling
Demo


Note: click to display the label content “text”.
