Arc
1. Create an arc widget
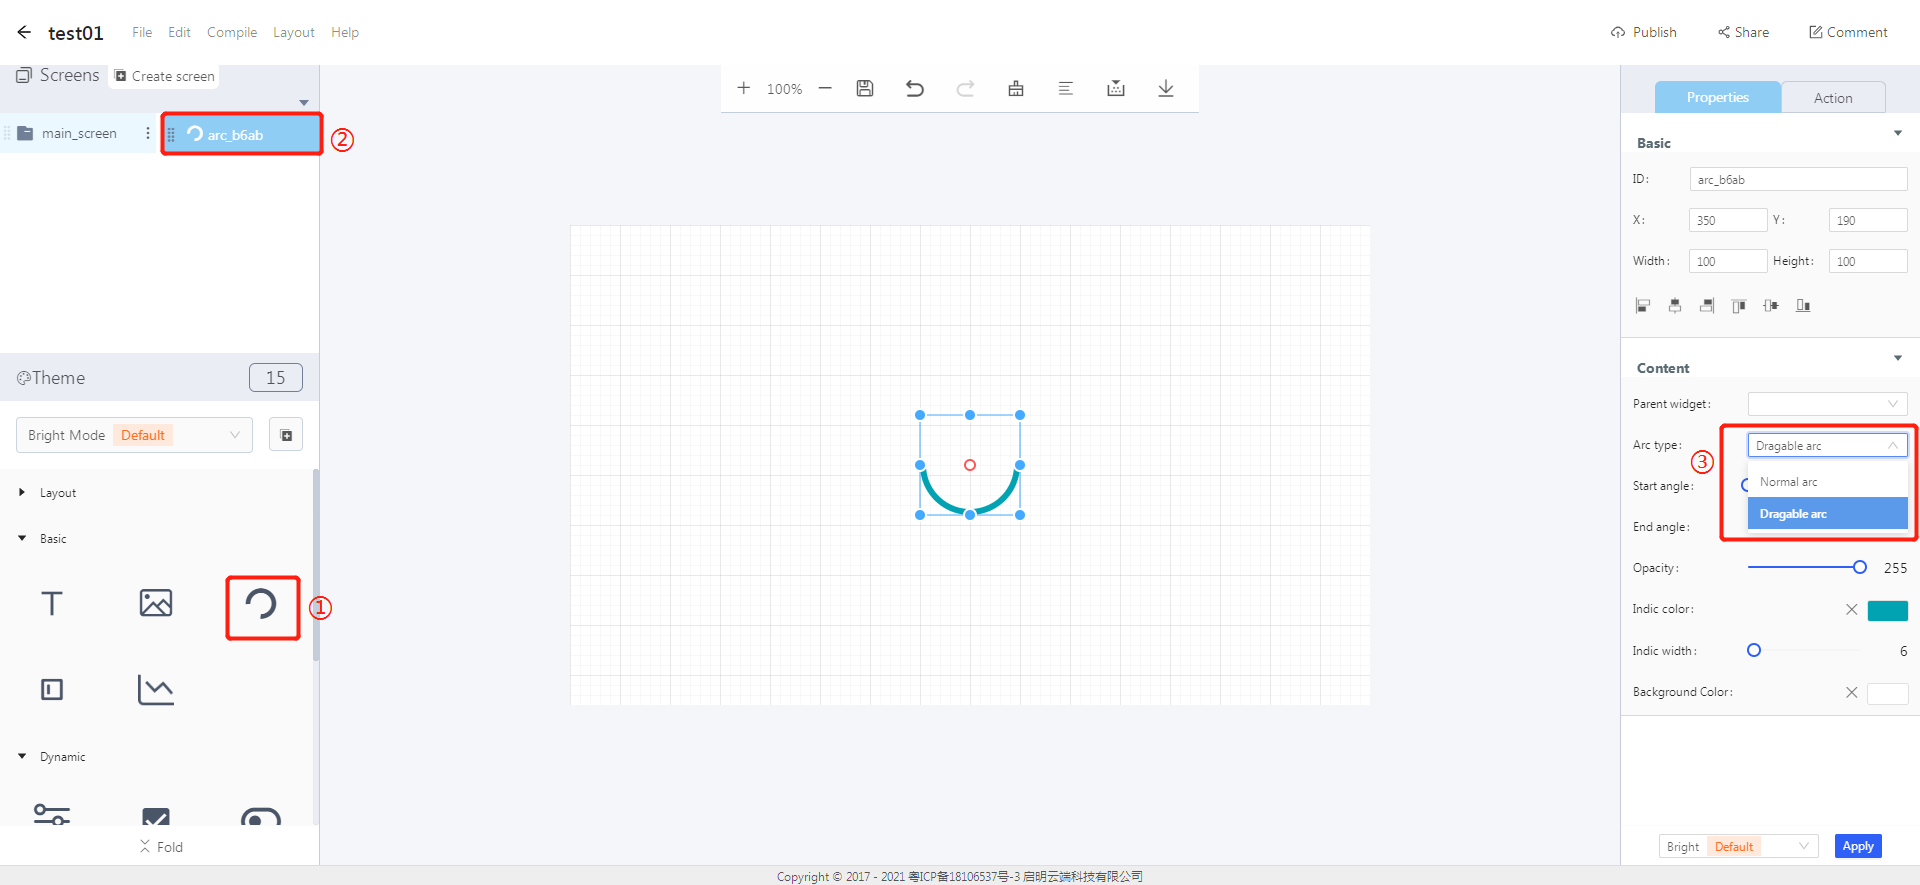
① Create an arc widget
② The arc widget ID
③ Arc type—normal arc: a simple arc without interaction; dragable arc: a dragable arc slider
2. Steps for use
2.1 Widget properties
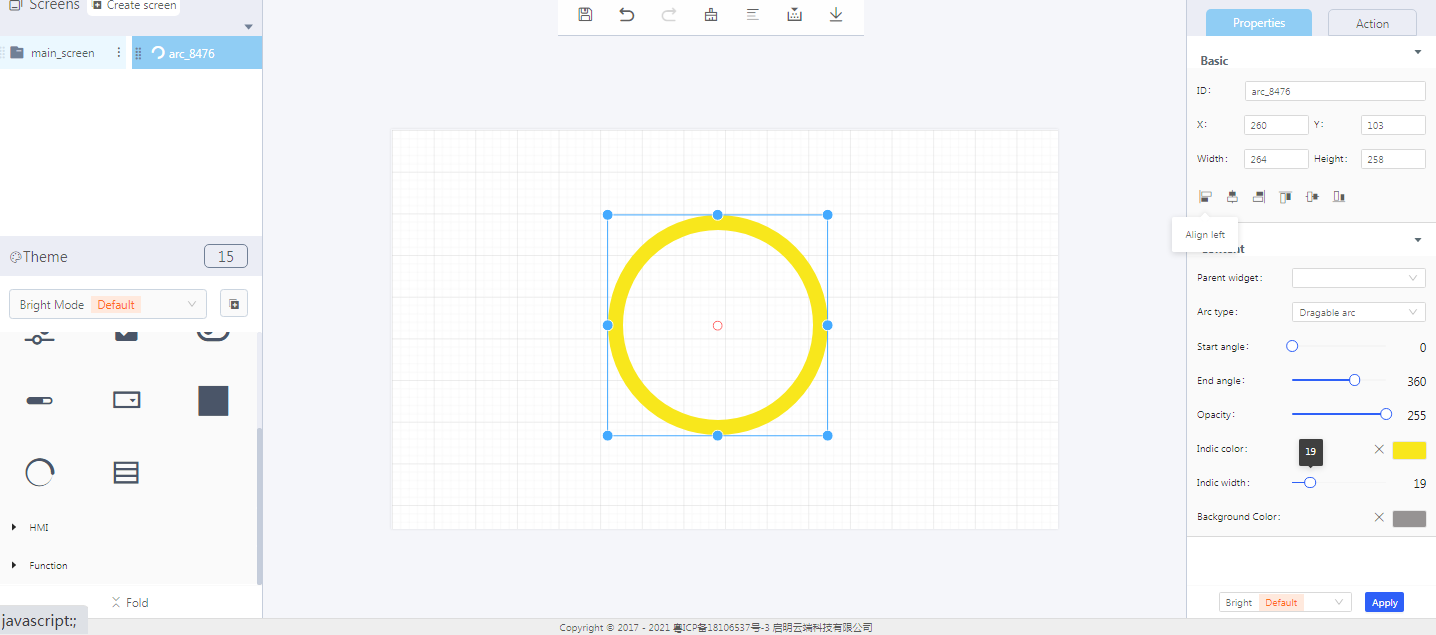
① The coordinate position of an arc widget ② The size of an arc widget ③ Alignment ④ Set its style ⑤ You can change the size of the widget by dragging its border directly.
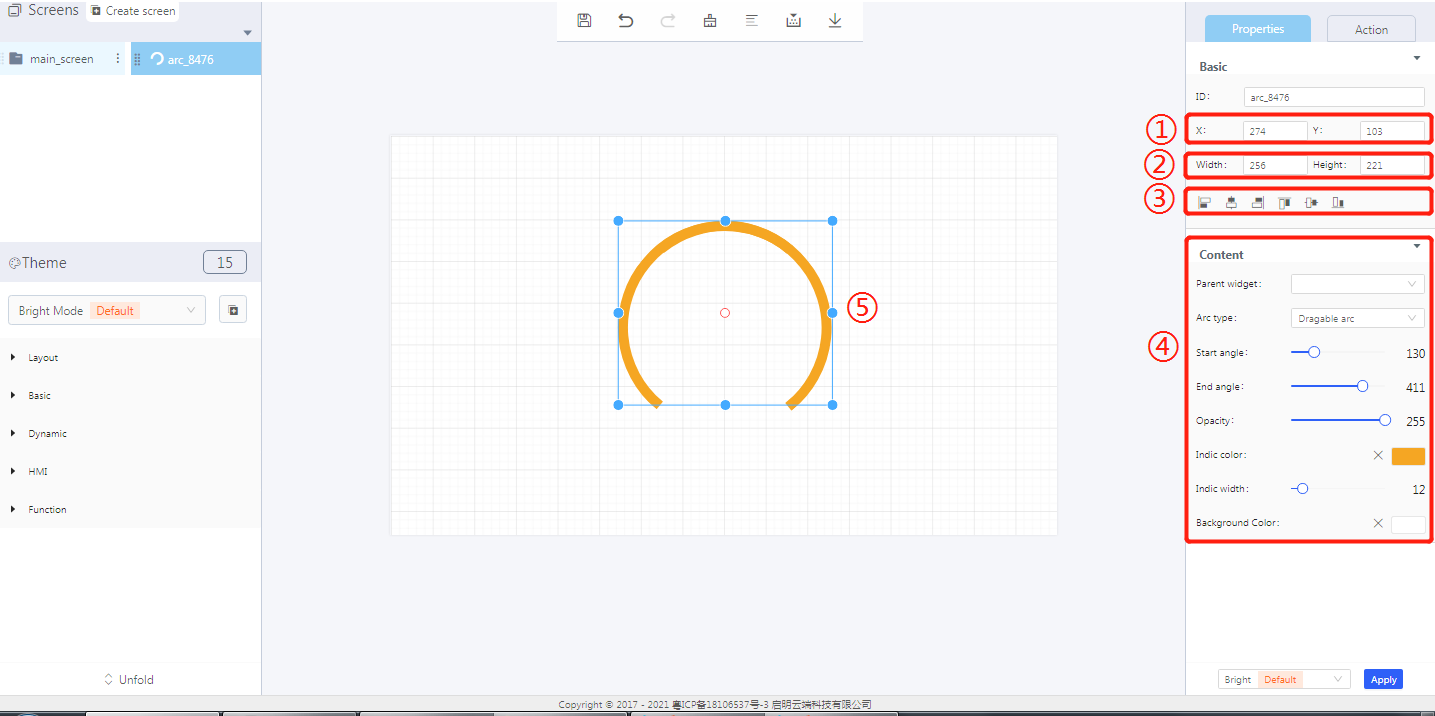
Properties-Basic:
ID: arc_b830 is the ID of the arc widget
X, Y: its coordinate position in the work area
Width, Height: set the size of an arc widget in the work area
Alignment (in order): left alignment, horizontal center alignment, right alignment, top alignment, vertical center alignment, bottom alignment
Properties-Content:
Parent widget: set the parent object, and the arc widget is its child object
Arc type: “Normal arc”—not interactive, only display; “dragable arc”—sliding interaction
Start angle: the angle of the left end of an arc—corresponding to the start angle of an arc slider background
End angle: the angle of the right end of an arc—corresponding to the end angle of an arc slider background
Opacity: the transparency displayed by an arc slider-not applicable at present
Indicator color: the display color of an arc slider
Background color: the background color of an arc slider
3. Blockly—Arc
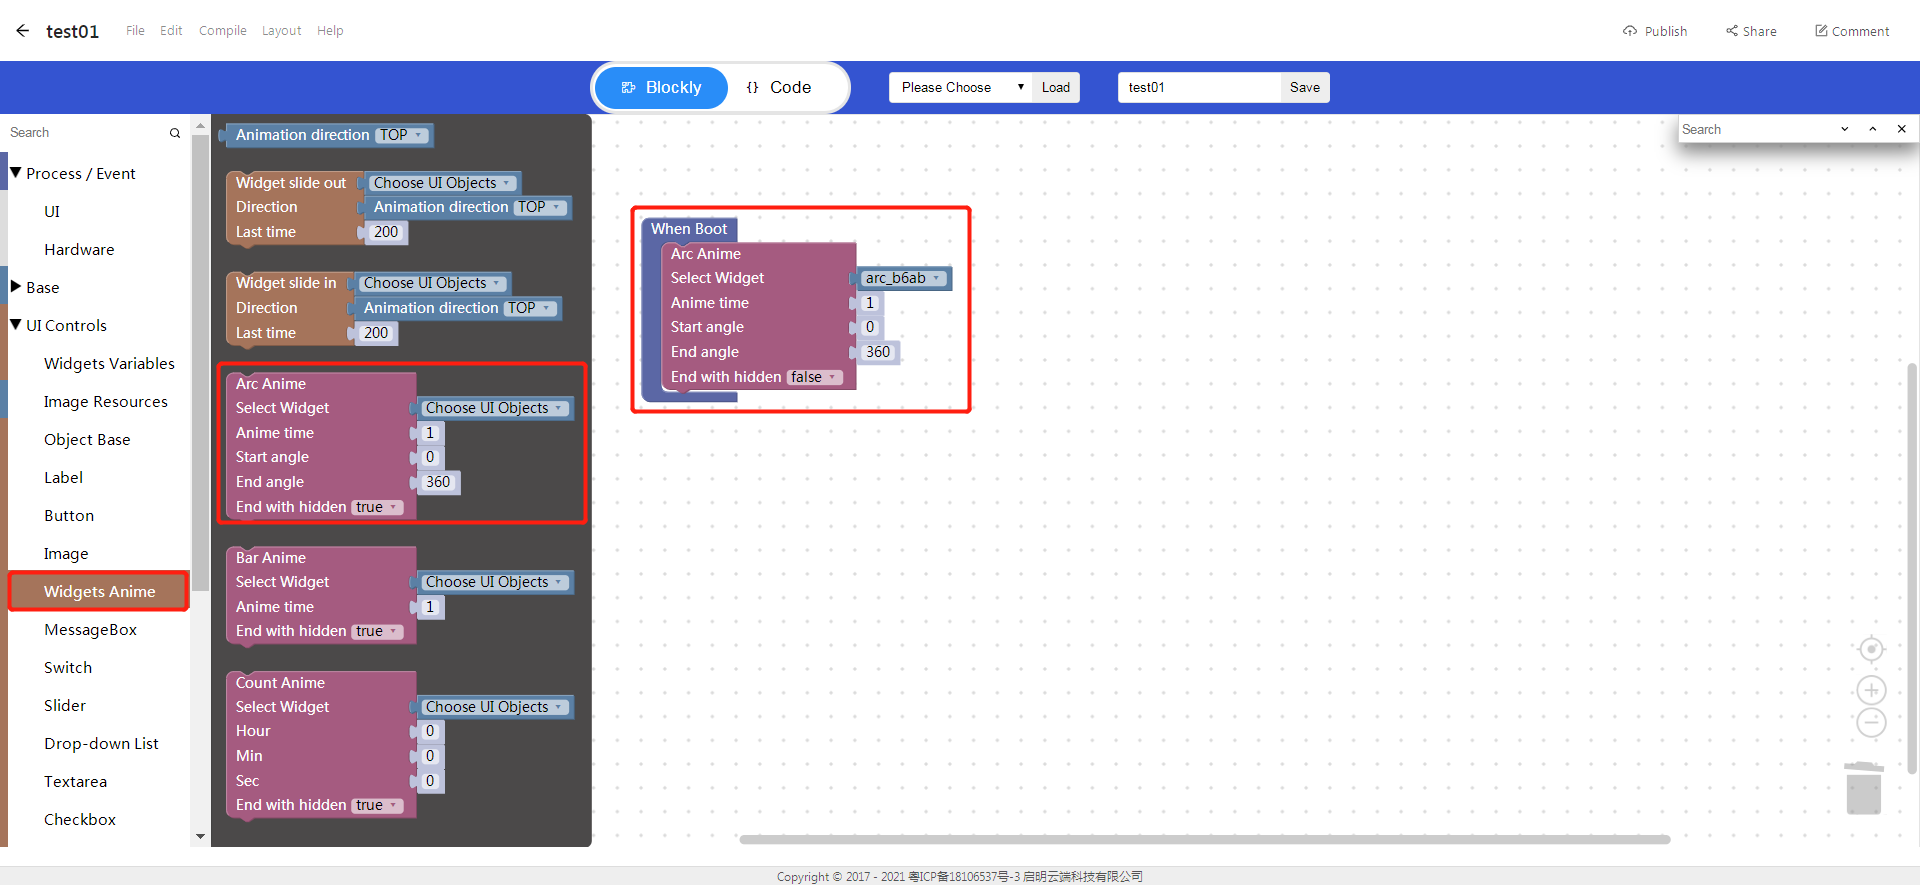
3.1 Set widget animation (it needs to be used with Process / Event together)
Choose UI objects: choose a widget ID created in Layout-Designer
Animation time: arc animation loading time
Start angle: where the arc slider starts loading
End angle: where the arc slider ends loading
End with hidden: whether to hide the arc widget after playing the animation
Example: Bind the arc widget id: arc_b6ab, set the start & end angles to be the same as those of the arc slider background set in Designer.
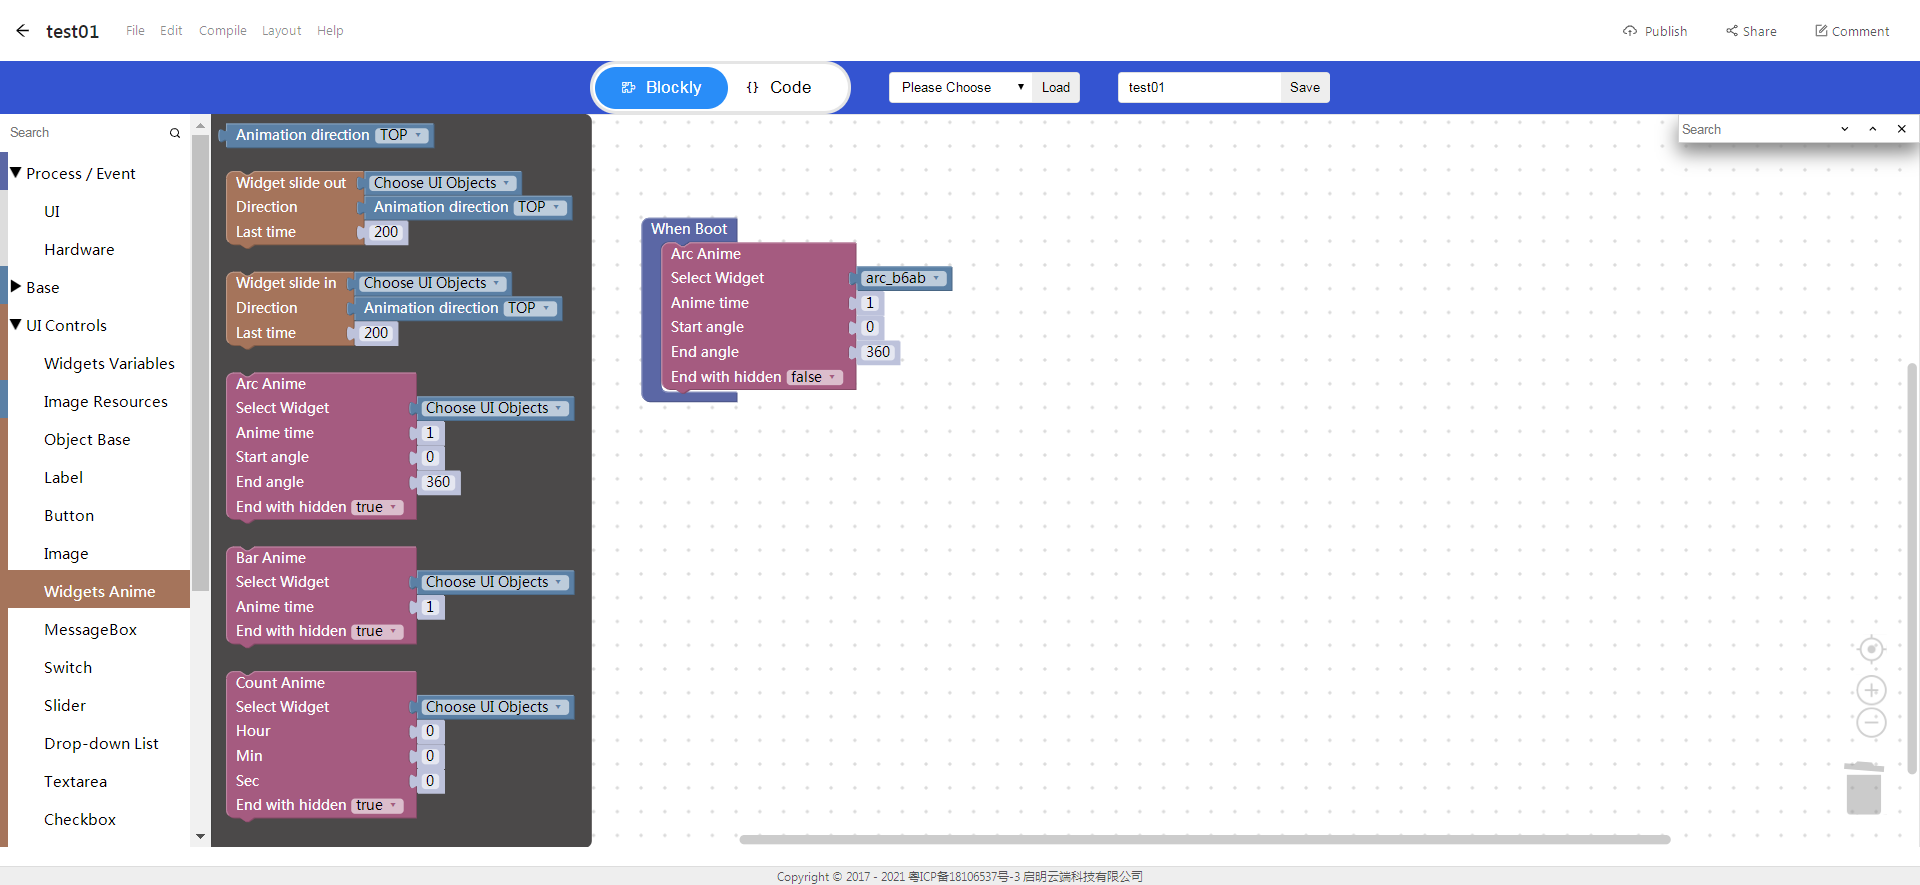
- Click “{} code” to view the code:

① Animation task API
② Animation time
③ Set angles
④ Define Blockly function
⑤ Display widget API
⑥ Task creating API
⑦ Start animation
4. Implement an arc animation with Blockly (ssd201)
Modify as the above instructions: the start & end angles of the slider background and the start & end angles of the arc animation.

Note: When setting the angles of an arc animation, the start and end angles must be set within 0~360 degrees at the same time, or set greater than 360 degrees at the same time. In the case, the animation effect will meet your expectations.
5. Download and analyze the source code of the project
- Zip files

① Font generated by default
② Task and widget initialization entry
- qm_ui_entry.c analysis


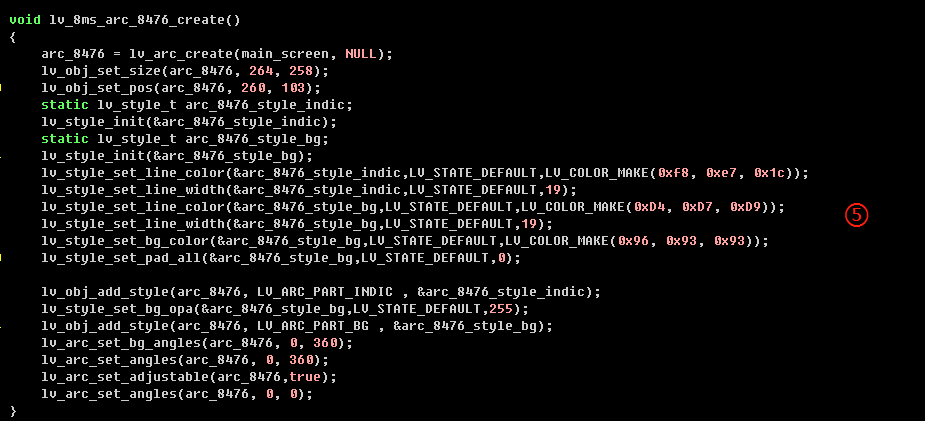
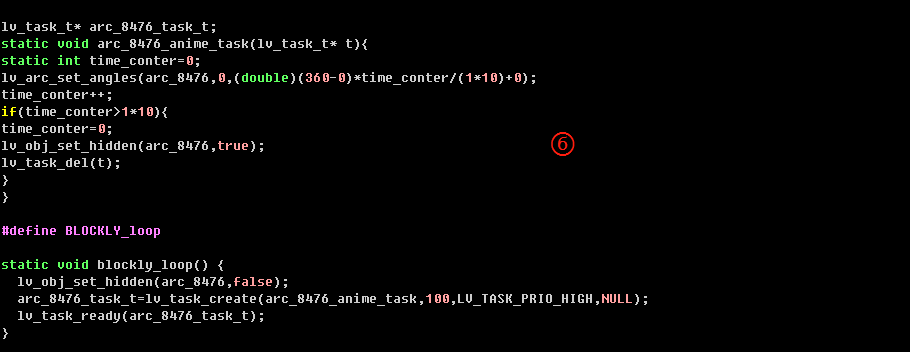
① Entry function
② Create objects
③ Create widgets
④ Relevant variables declaration
⑤ Create an arc widget and set its style
⑥ Blockly logic
