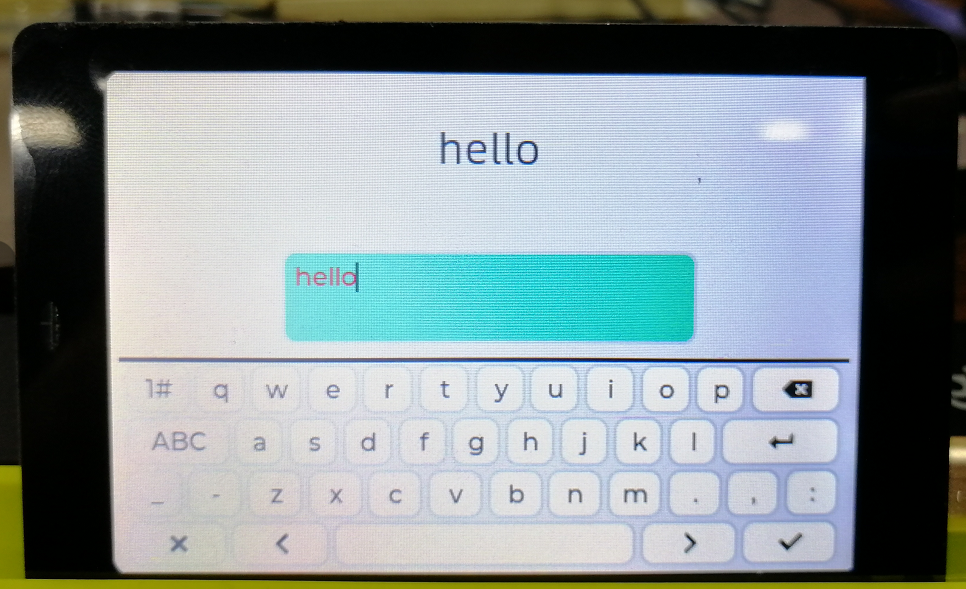
Textarea
1. Create an textarea widget
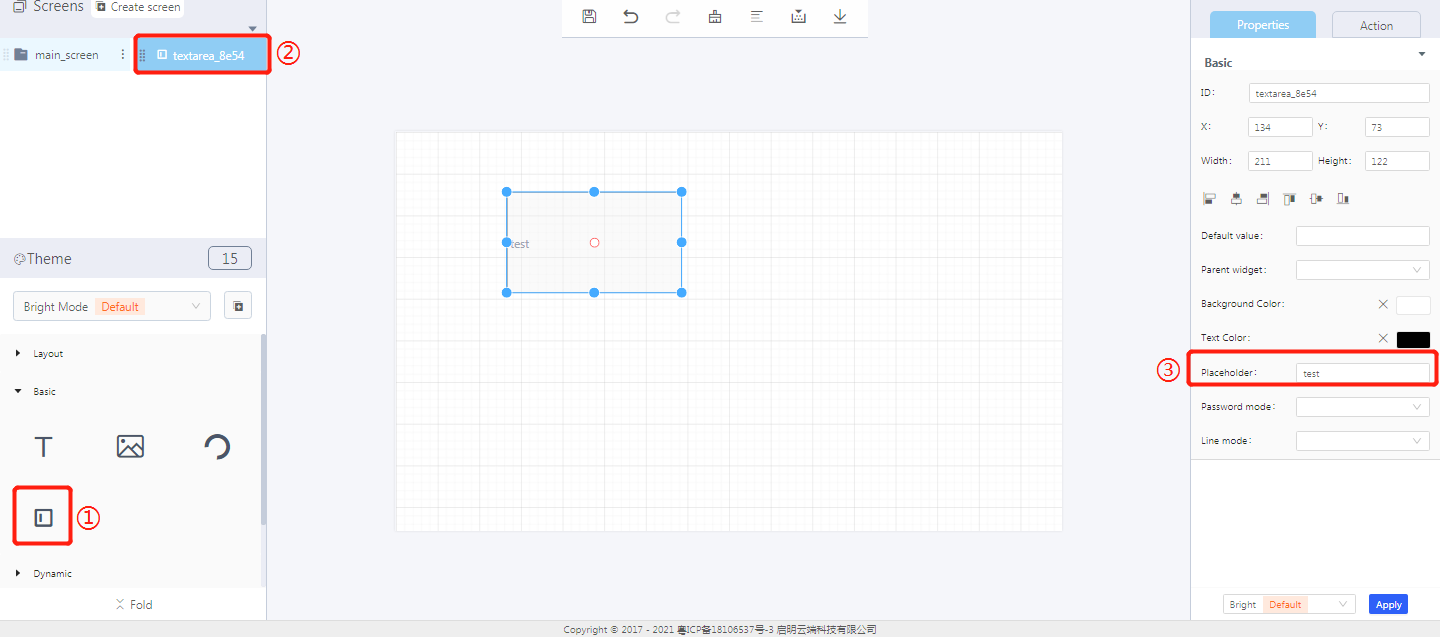
① Create a textarea widget
② The textarea widget ID
③ Set the default display content of a textarea widget
2. Steps for use
2.1 Set properties for a textarea widget
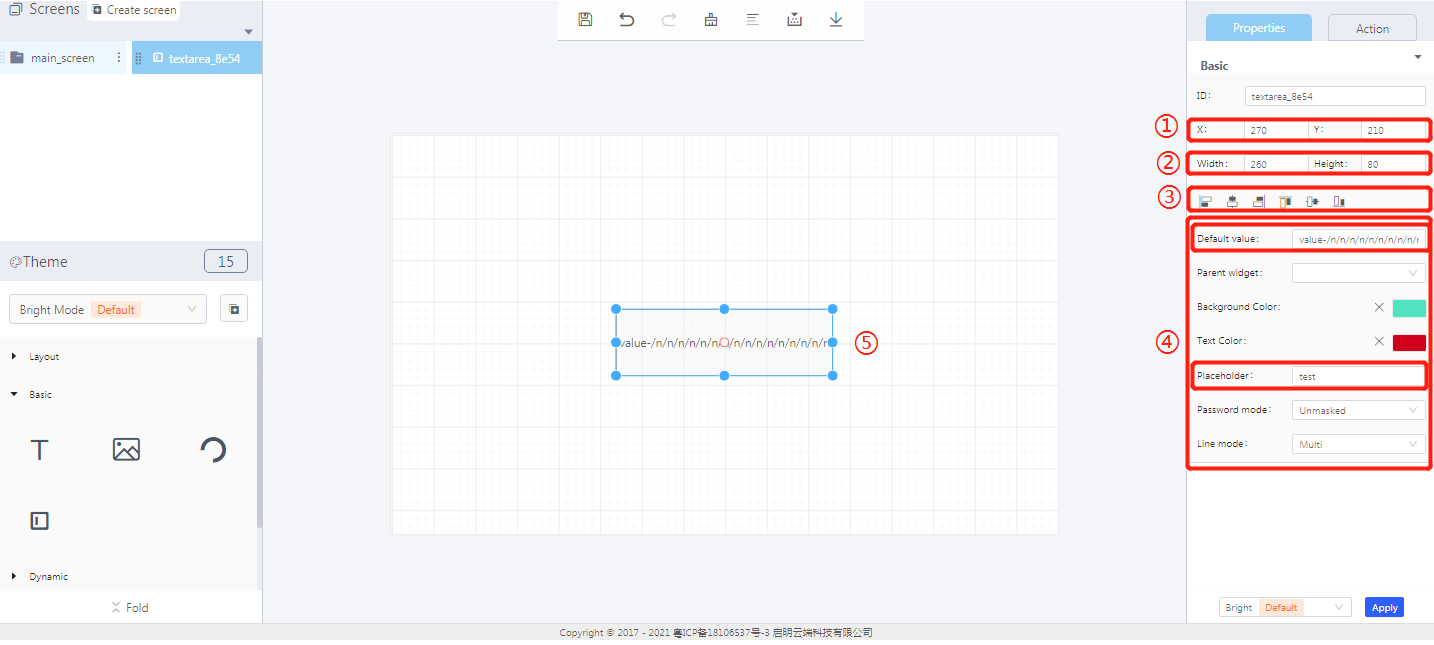
① The coordinate position of a textarea widget
② The size of a textarea widget
③ Alignment
④ Set its style
⑤ You can change the size of the widget by dragging its border directly.
Properties-Basic:
ID: textarea_8e54 is the unique ID number of the textarea widget
X, Y: its coordinate position in the work area
Width, Height: the size of a textarea widget
Alignment (in order): left alignment, horizontal center alignment, right alignment, top alignment, vertical center alignment, bottom alignment
Properties-Content:
Default value: set the display text of a textarea—Chinese is not currently supported
Parent widget: set the parent object, and the textarea widget is its child object
Background color: set the background color of a textarea
Text color: set the text color of a textarea
Placeholder: the default text displayed in a textarea. If “default value” has been given a text content, the placeholder will not be displayed.
Password mode: set text encryption—“unmasked”: display the content; “masked”: replace the content with “·”
Line mode
Single: When the text content exceeds the display width of the textarea, users can use a horizontal scroll bar to browse the remaining text.
Multi: When the text content exceeds the display width of the textarea, the text will wrap automatically.Note:
- In multi mode, when the text content exceeds the display height of the textarea, users can use a vertical scroll bar to browse the remaining text.
- In single mode, there is only one line for text displaying.

3. Blockly—Textarea
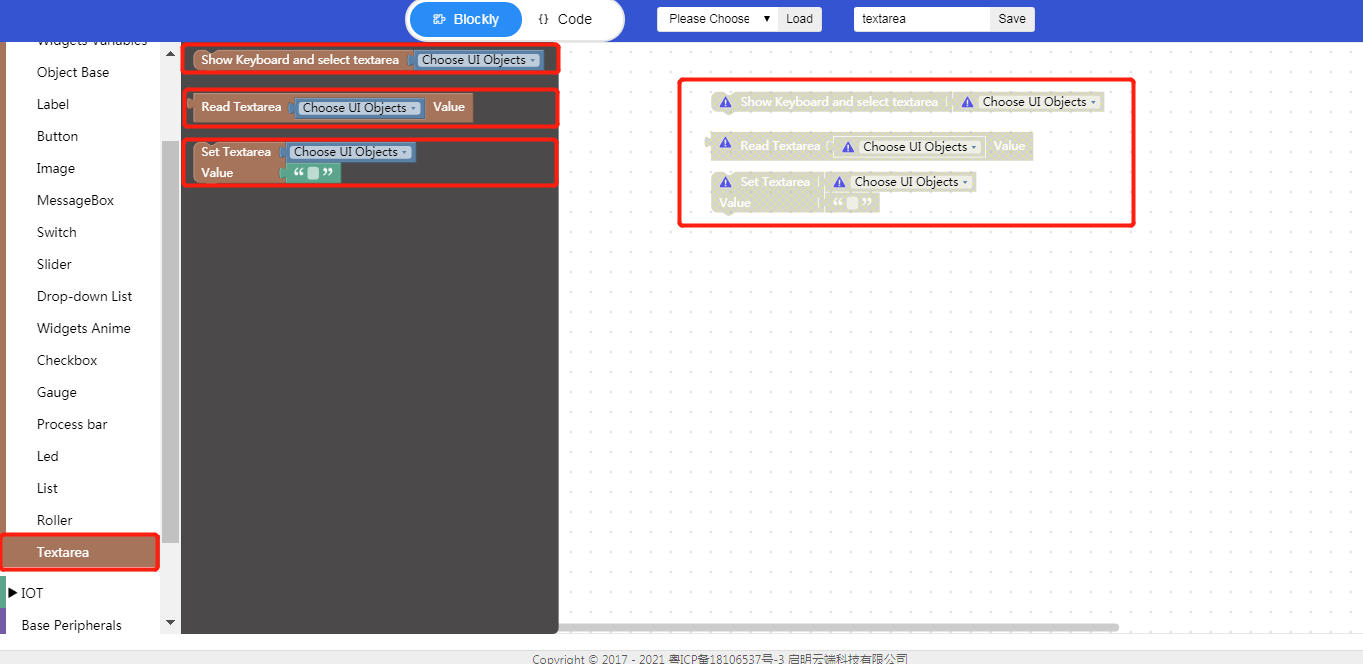
3.1 Show keyboard (used with Process/Event)
Choose UI objects: choose a textarea ID created in Layout-Designer
Show keyboard and select textarea: the text data from keyboard is displayed in the textarea synchronously
3.2 Read textarea (used with Process/Event)
Choose UI objects: choose a textarea ID created in Layout-Designer
Read textarea value: get the textual data from the textarea
3.3 Set textarea (used with Process/Event)
Choose UI objects: choose a textarea ID created in Layout-Designer
Value: click to enter text, which will be displayed in the textarea (textarea content)
Example: choose UI objects “textarea_8e54”, set textarea value “hello”, read textarea value and display it in a label (you need to add a label widget in Designer)
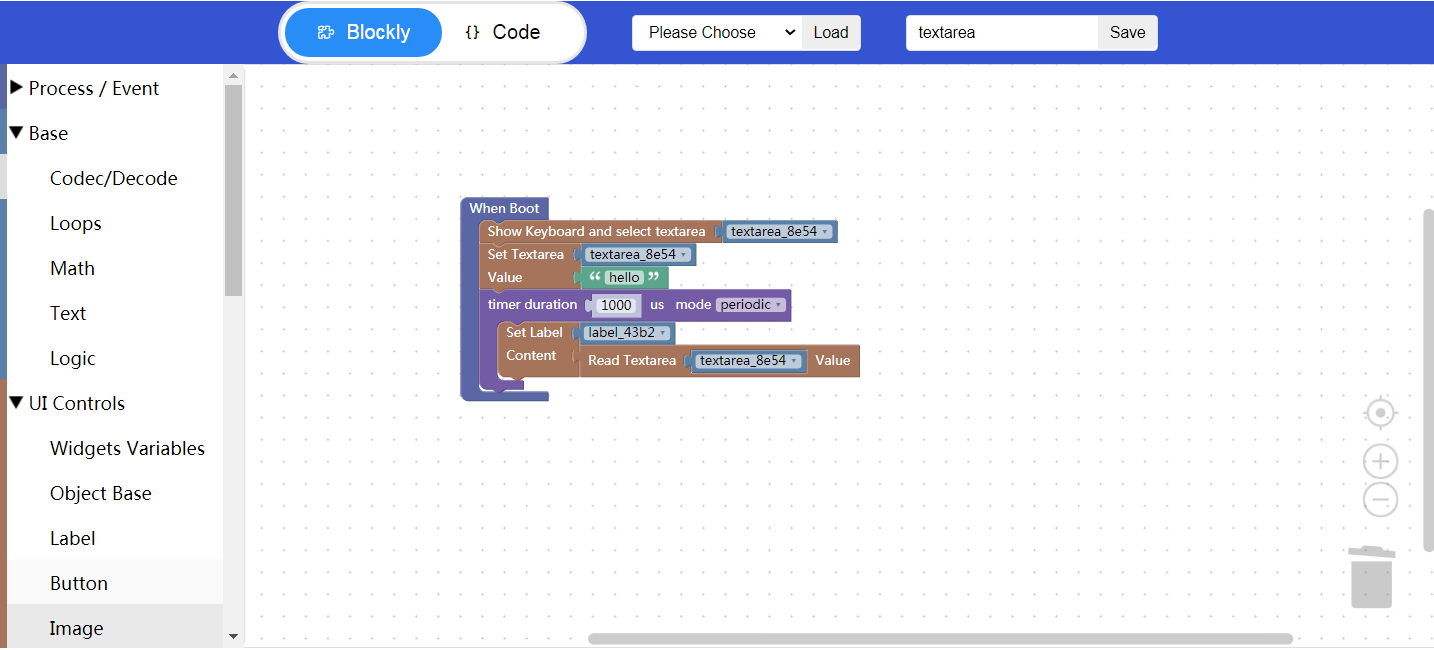
- Click “{} code” to view the code:

① Blockly function init
② Keyboard related API
③ Set textarea content
④ Text content
⑤ Widget ID
⑥ Register a timer callback function
4. Blockly programming (esp32)
- UI design
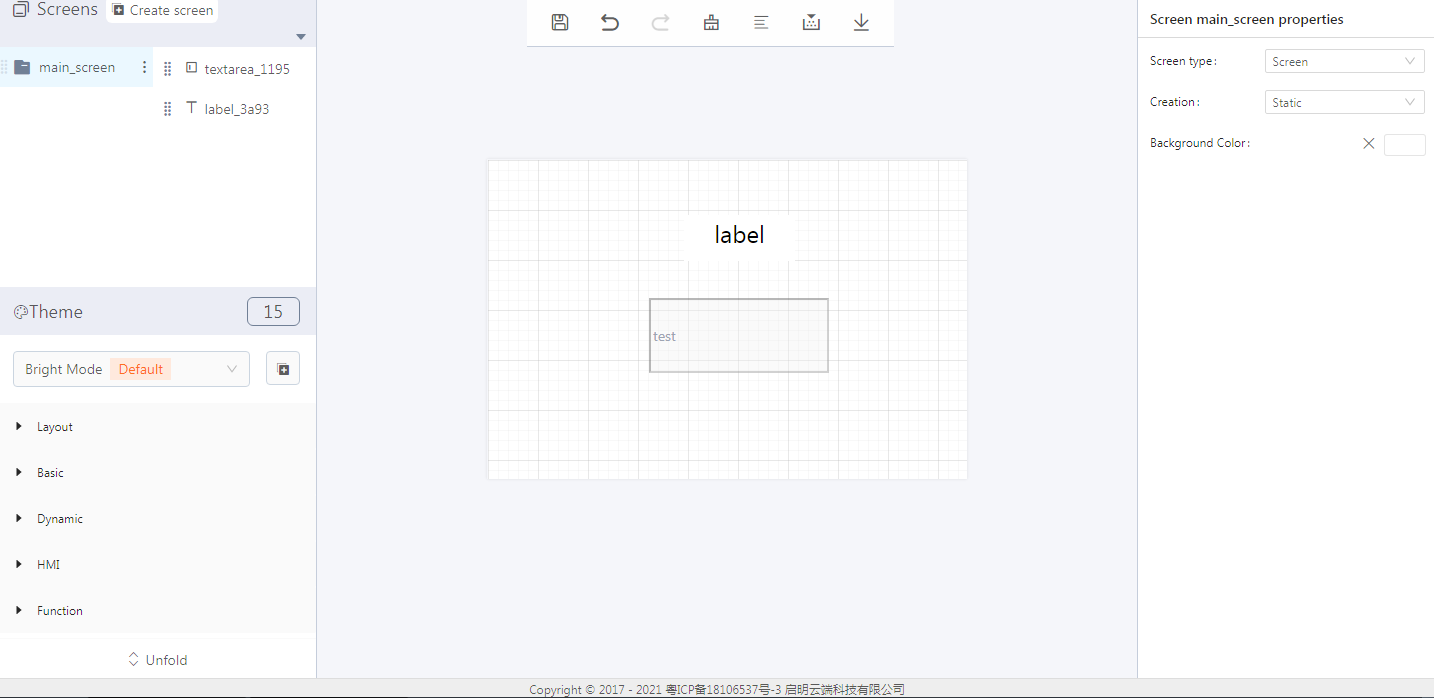
- Blockly design
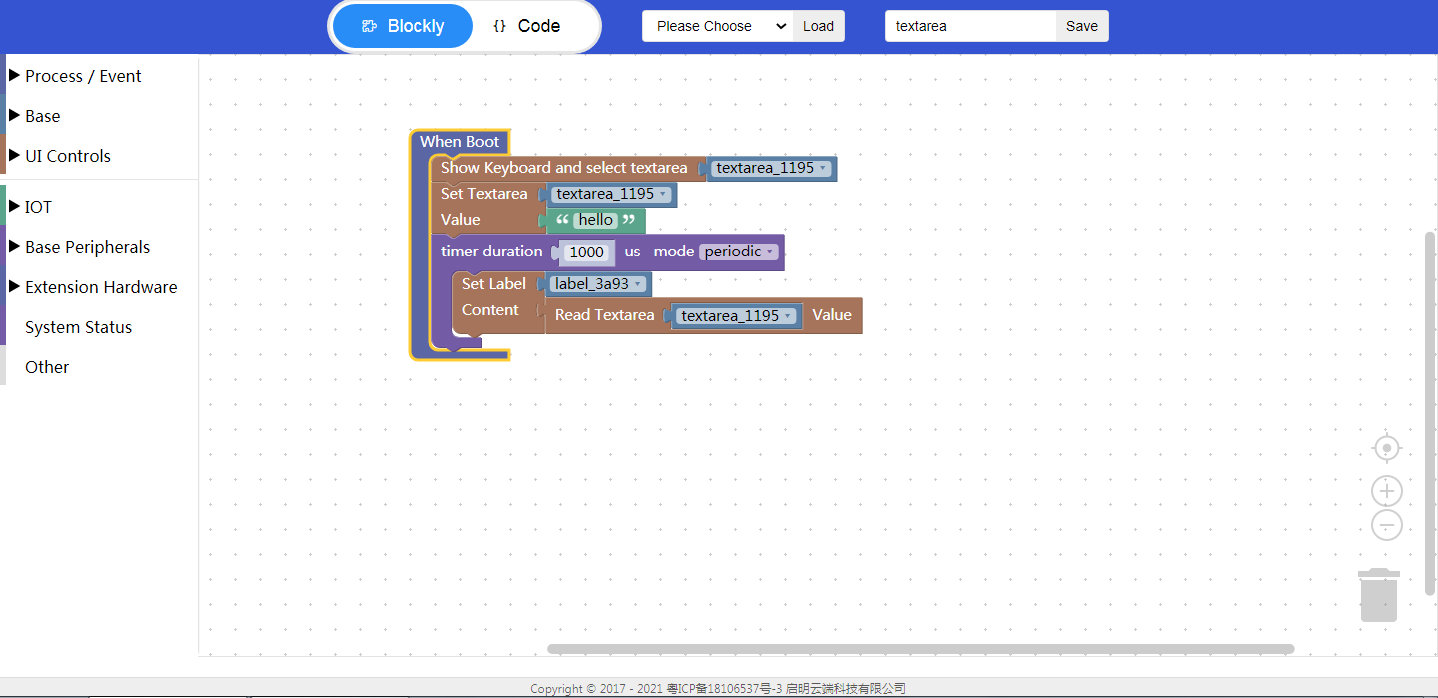
5. Download and analyze the source code of the project
- Zip files

① Font
② Task and widget init entry
- qm_ui_entry.c analysis

③ Designer—widget init entry
④ Create screens
⑤ Create widgets API
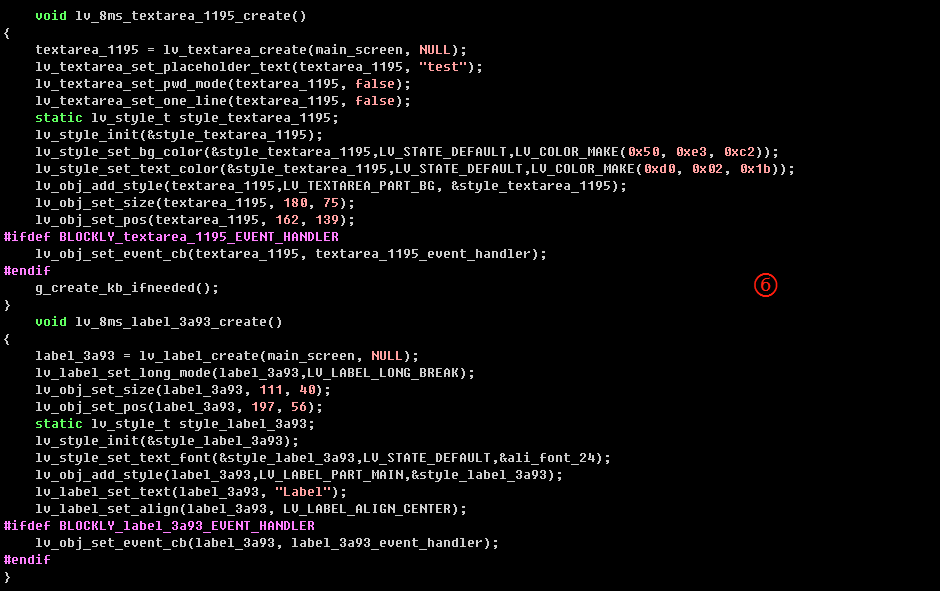
⑥ Create widgets and set the styles

⑦ Blockly logic implementation
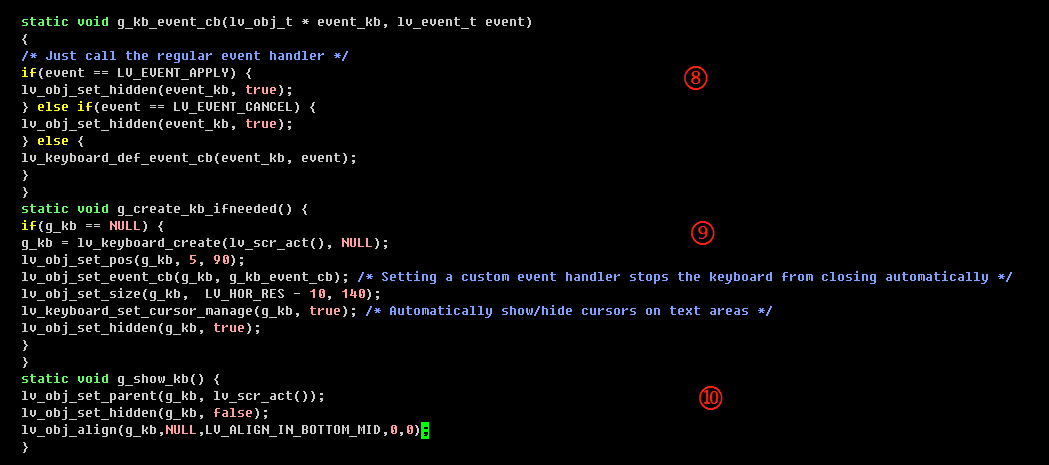
⑧ Keyboard event callback function
⑨ Keyboard widget init
⑩ Show keyboard API
Relevant variables declaration:

- Demo
