Image
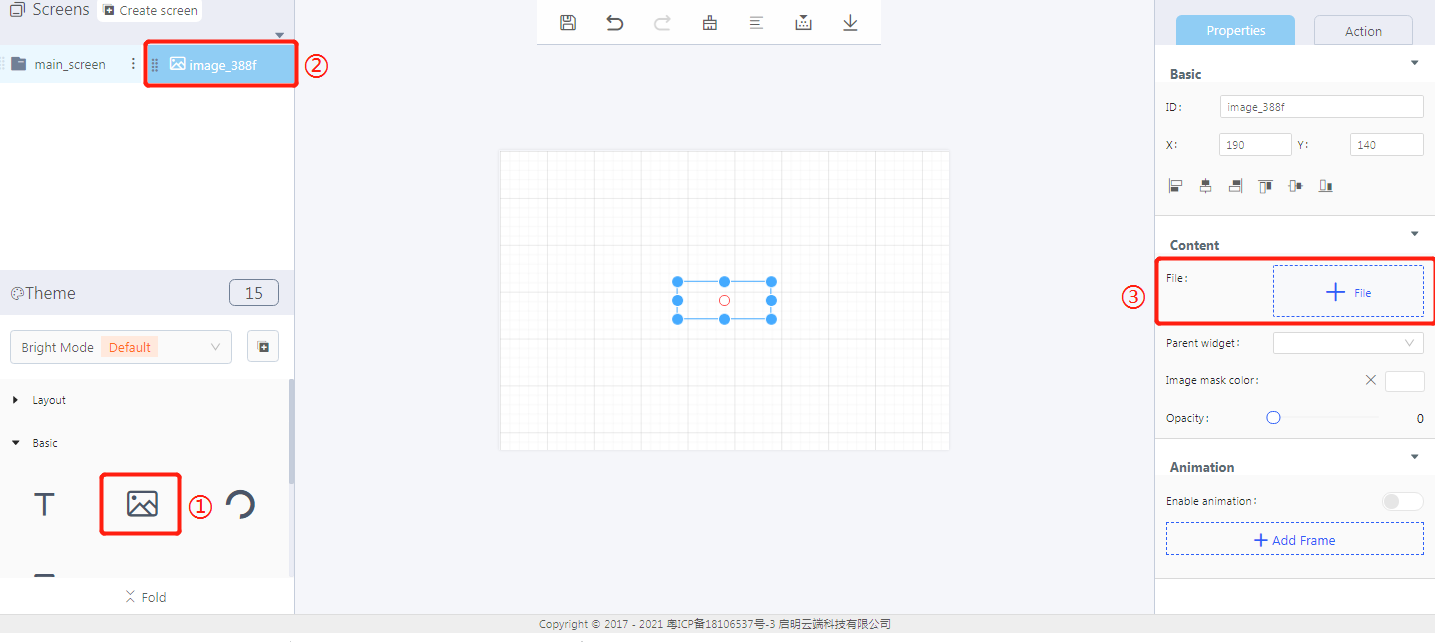
1. Create an image widget

① Create an image widget
② The image widget ID
③ Add an image file
2. Steps for use
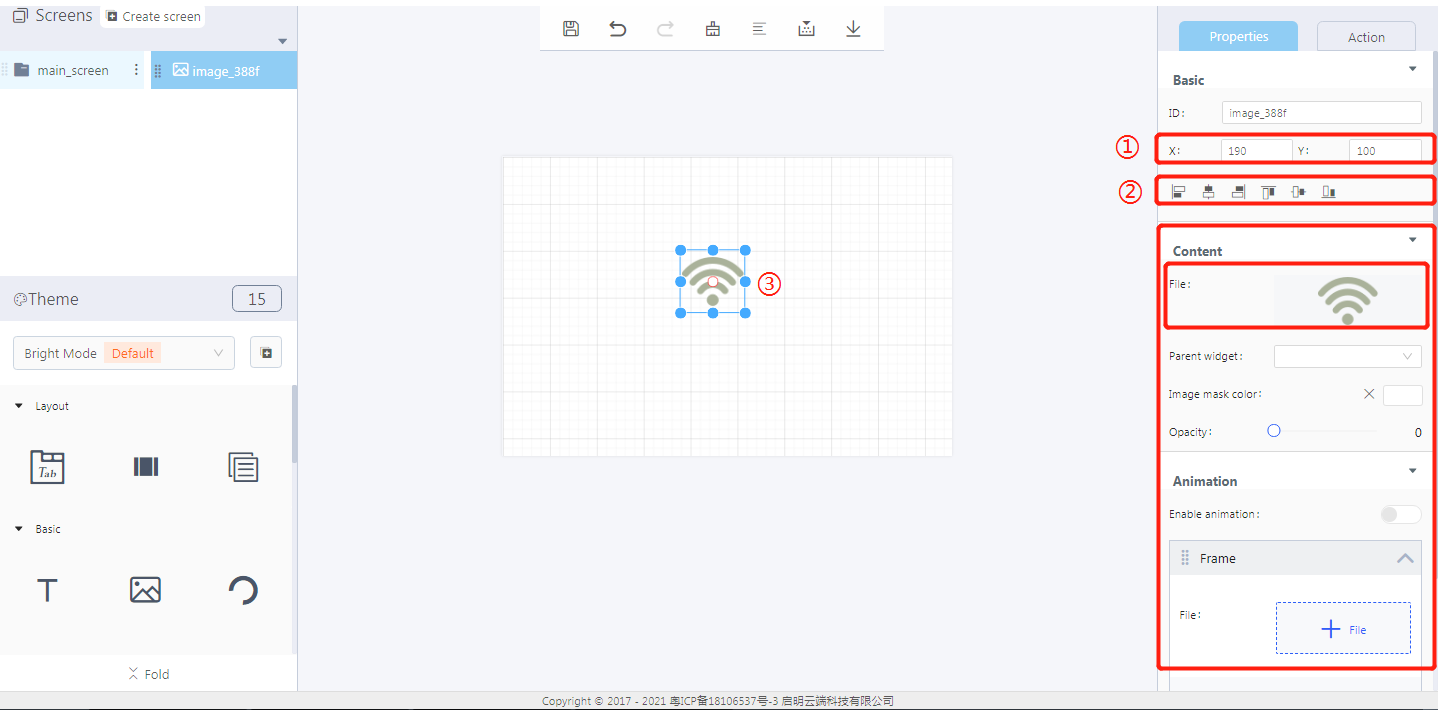
2.1 Add an image and set the widget style

① The coordinate position of an image widget
② Alignment
③ You can change the size of the widget by dragging its border directly.
Properties-Basic:
ID: image_388f is the unique ID number of the image widget
X, Y: its coordinate position in the display area
Alignment (in order): left alignment, horizontal center alignment, right alignment, top alignment, vertical center alignment, bottom alignment
Properties-Content:
File: set the display content of the image widget. The user can click “File” to select an image file to be displayed
Parent widget: set the parent object, and the image widget is its child object
Image mask color: set the display color of an image
Opacity: set the display opacity of an image
Animation: animation can be achieved by adding multiple frames to the image widget
3. Demo
Opacity: 0-primary color
Opacity: 100

Opacity: 255

