LED
1. Create an LED widget
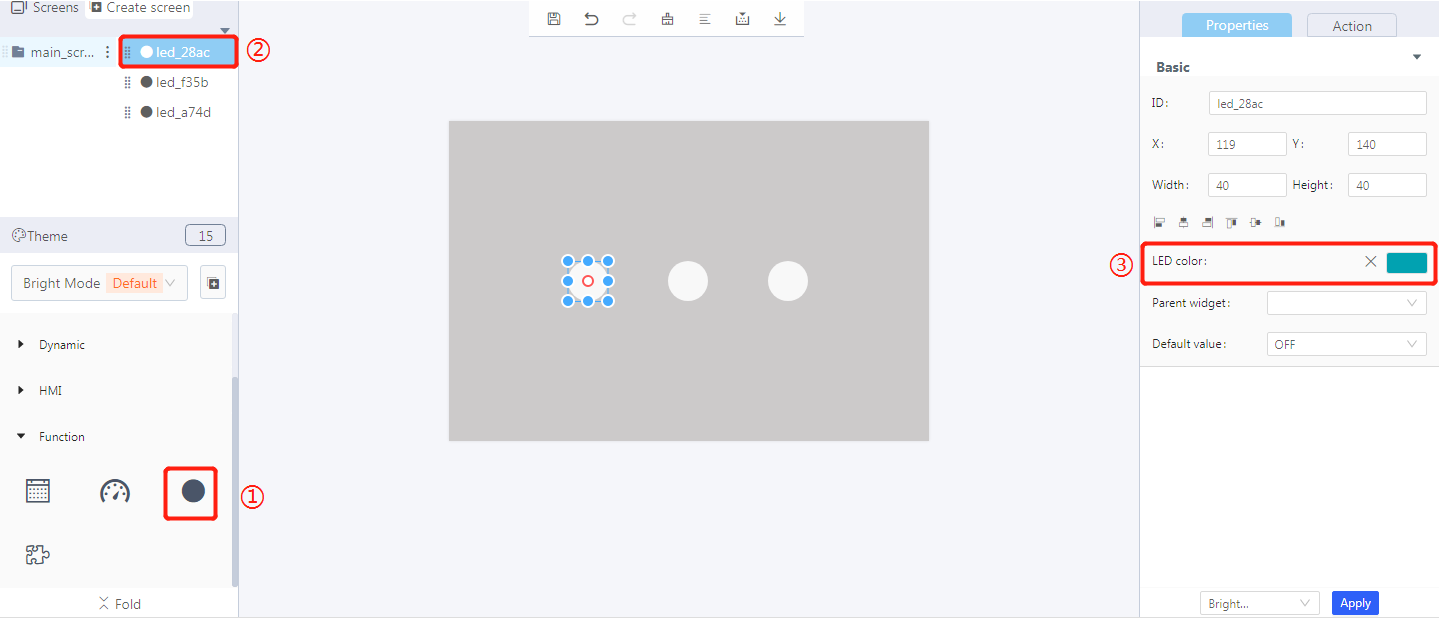
① Create an LED widget
② LED widget ID
③ LED brightness
2. Widget properties
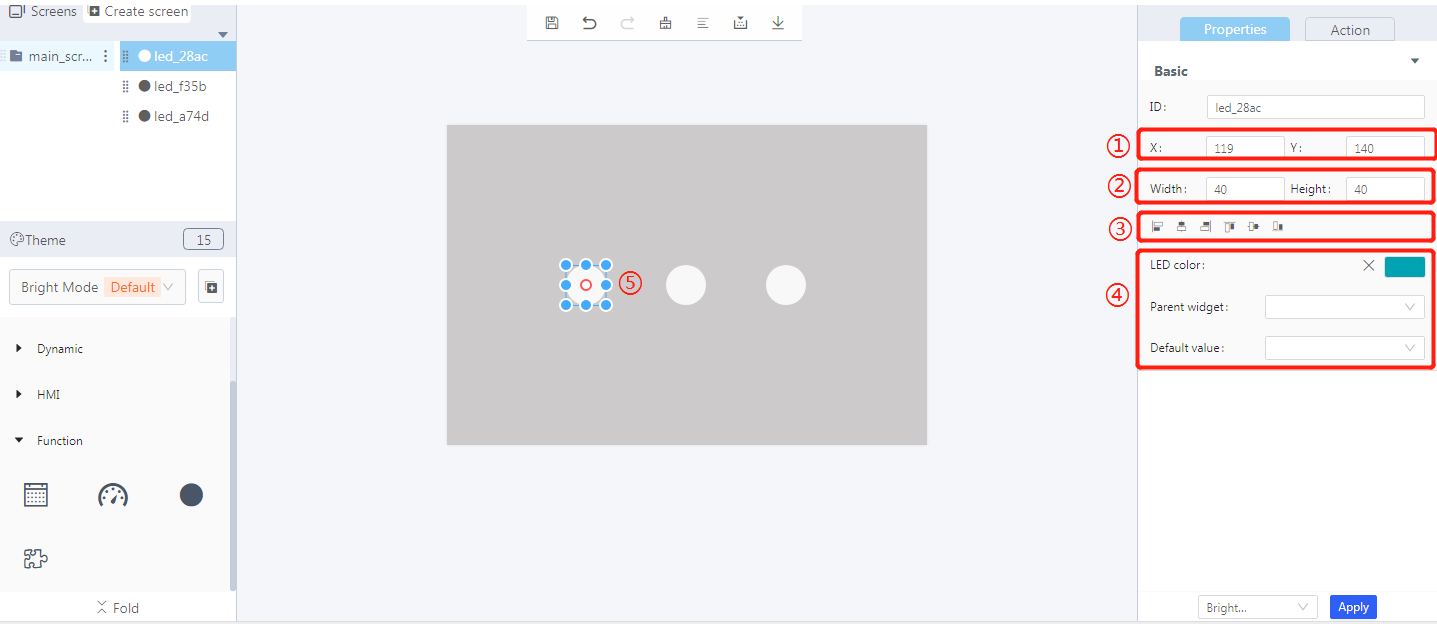
① The position of the LED widget
② The size of the LED widget
③ Alignment
④ Style
⑤ Drag and drop the border to resize the widget
Properties-Basic:
ID: led_28ac is the unique ID number of the LED widget
X, Y: the position of the LED widget in the display area
Width, Height: the size of the LED widget
Alignment (in order): left alignment, horizontal center alignment, right alignment, top alignment, vertical center alignment, bottom alignment
Properties-Content:
LED color: the color of an LED widget when light on
Parent widget: set the parent object, and the LED widget is its child object
Default value: LED status after power-on, on or off
3. Blockly—LED
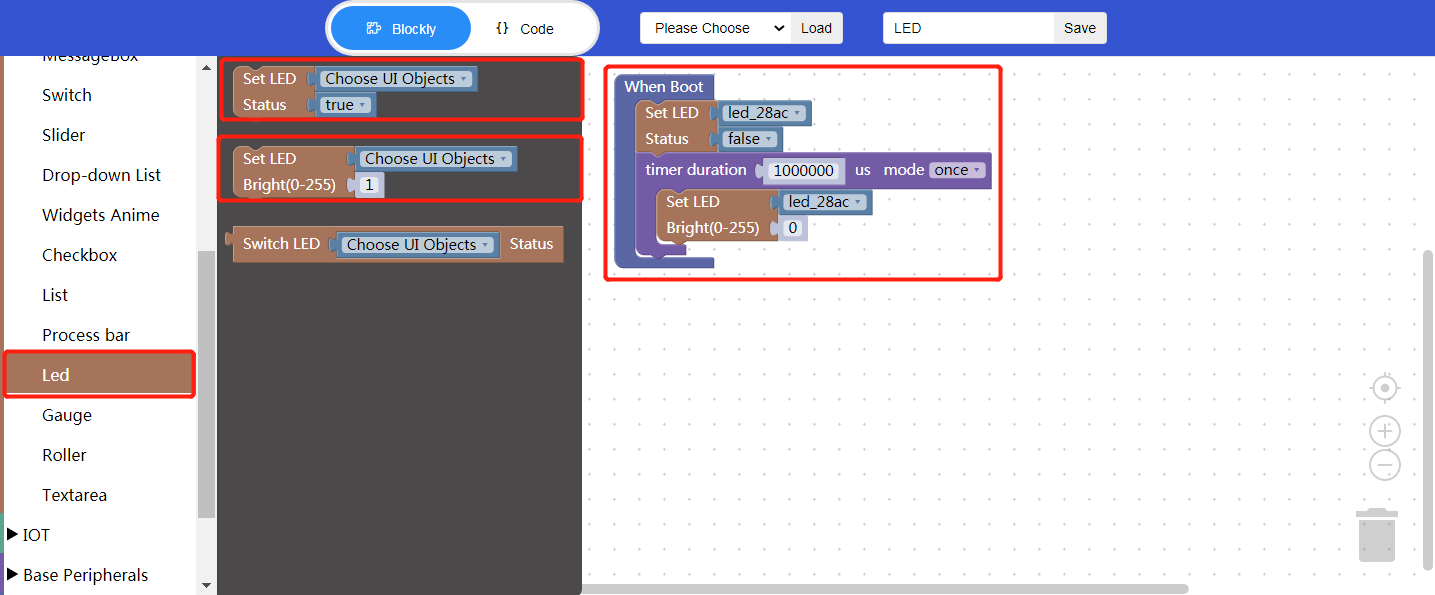
3.1 Set LED status
Choose UI objects: choose an LED widget ID created in Layout-Designer
Status: set the LED status to true or false, that is, on (true) or off (false).
Example: bind the LED id: led_28ac; set LED status: false
Click “{} code” to view the code:
① Blockly function init
② API
③ LED widget ID
3.2 Set LED brightness
Choose UI objects: choose an LED widget ID created in Layout-Designer
Brightness (0-255): set the brightness of LED in the range of 0-255.
Example: bind the LED id: led_28ac; set LED brightness: 0
Click “{} code” to view the code:
① Blockly function init
② API
③ LED widget ID
④ Brightness
3.3 Switch LED status
Choose UI objects: choose an LED ID created in Layout-Designer and switch its status
4. Implement an LED widget example with Blockly
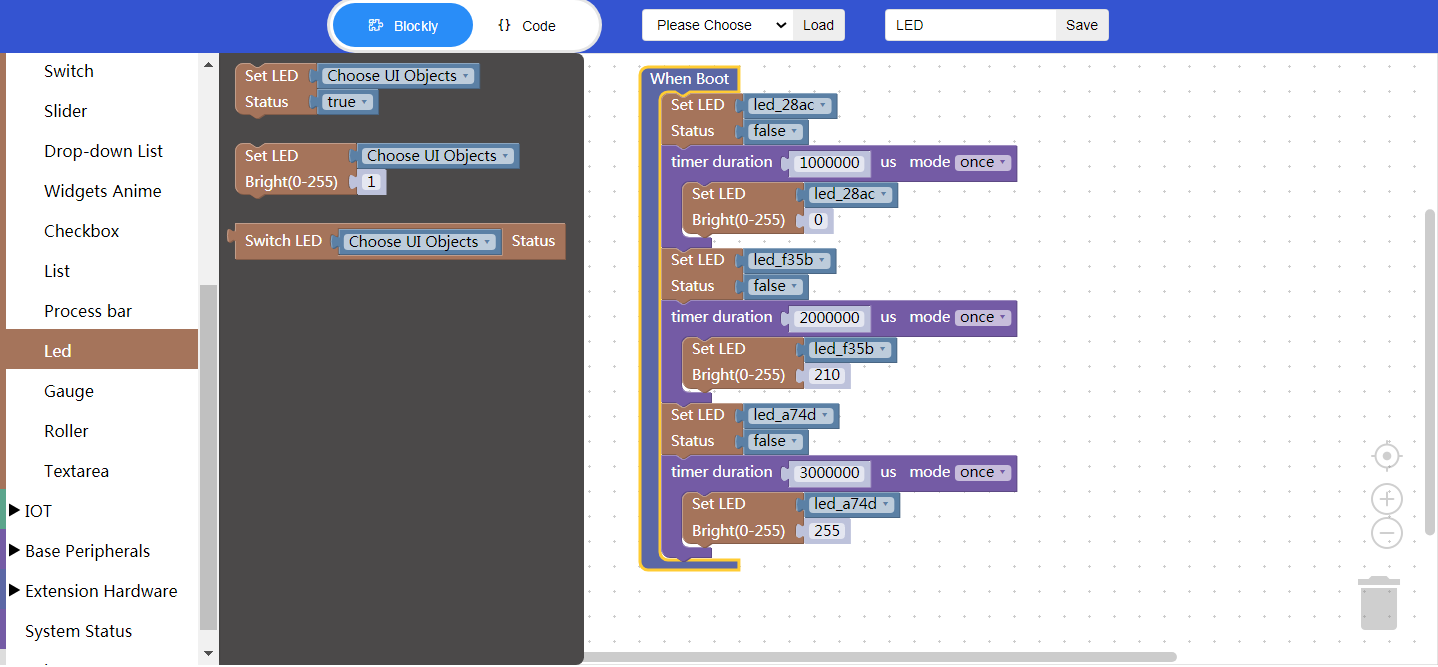
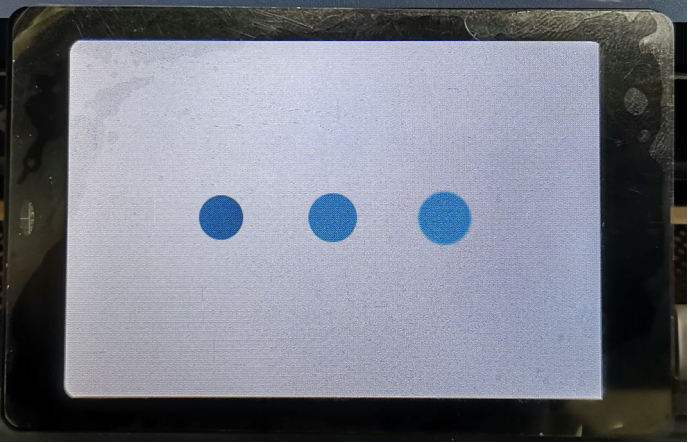
Example: LED lights up in sequence with different brightness
Description: three LED lights will light up with different brightness in one second, two seconds, and three seconds after turning on.
UI design
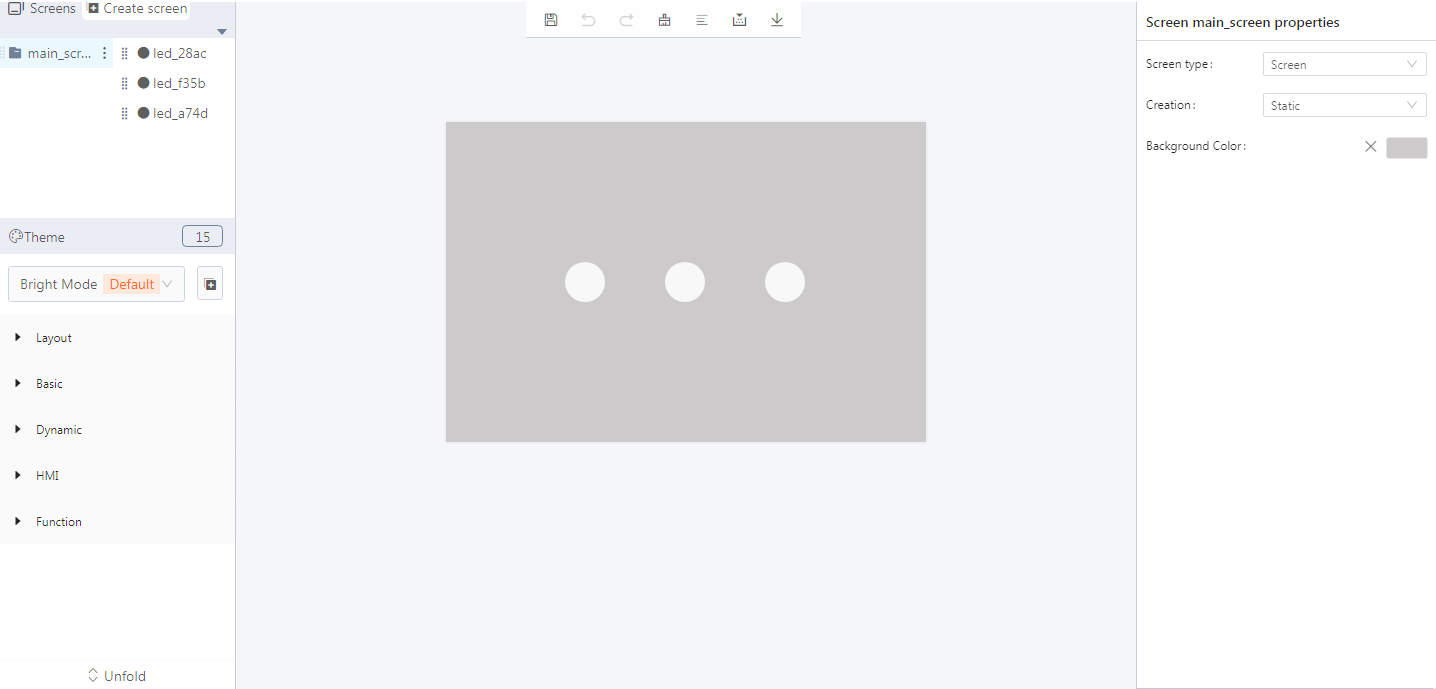
Create LED widgets
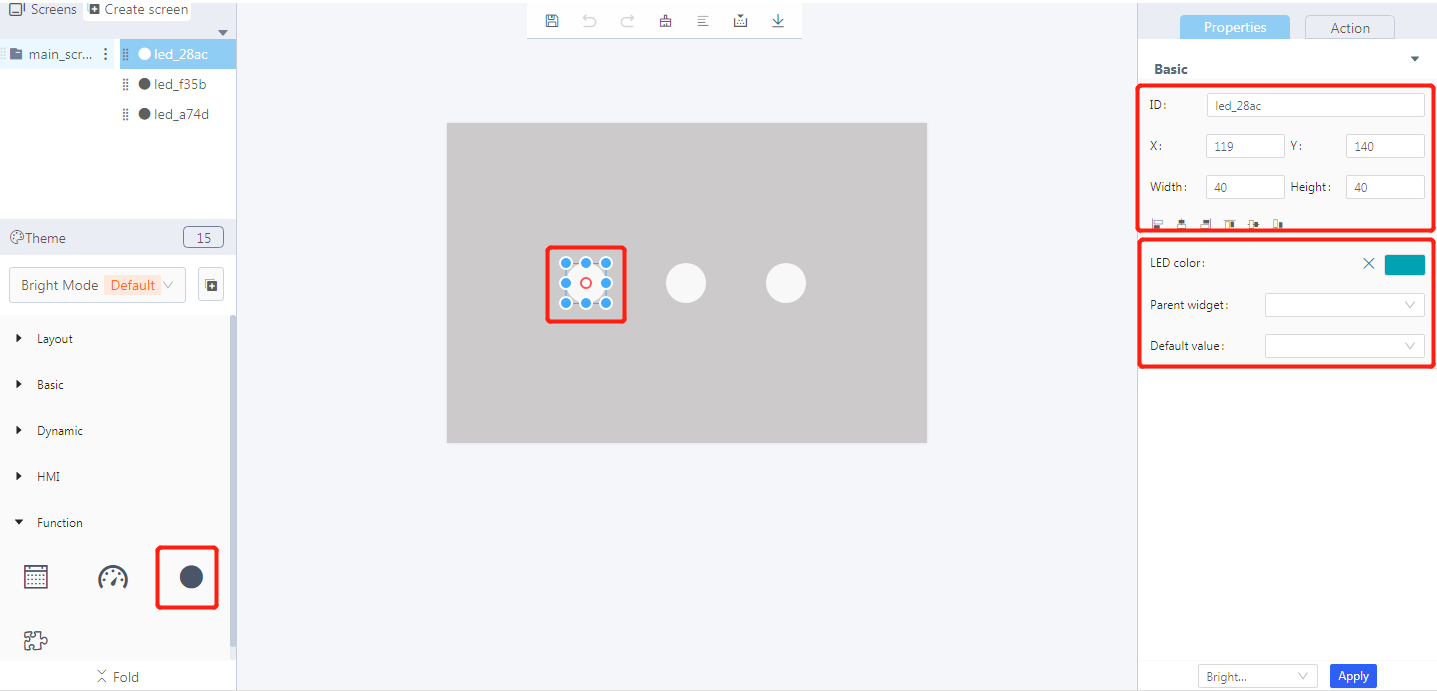
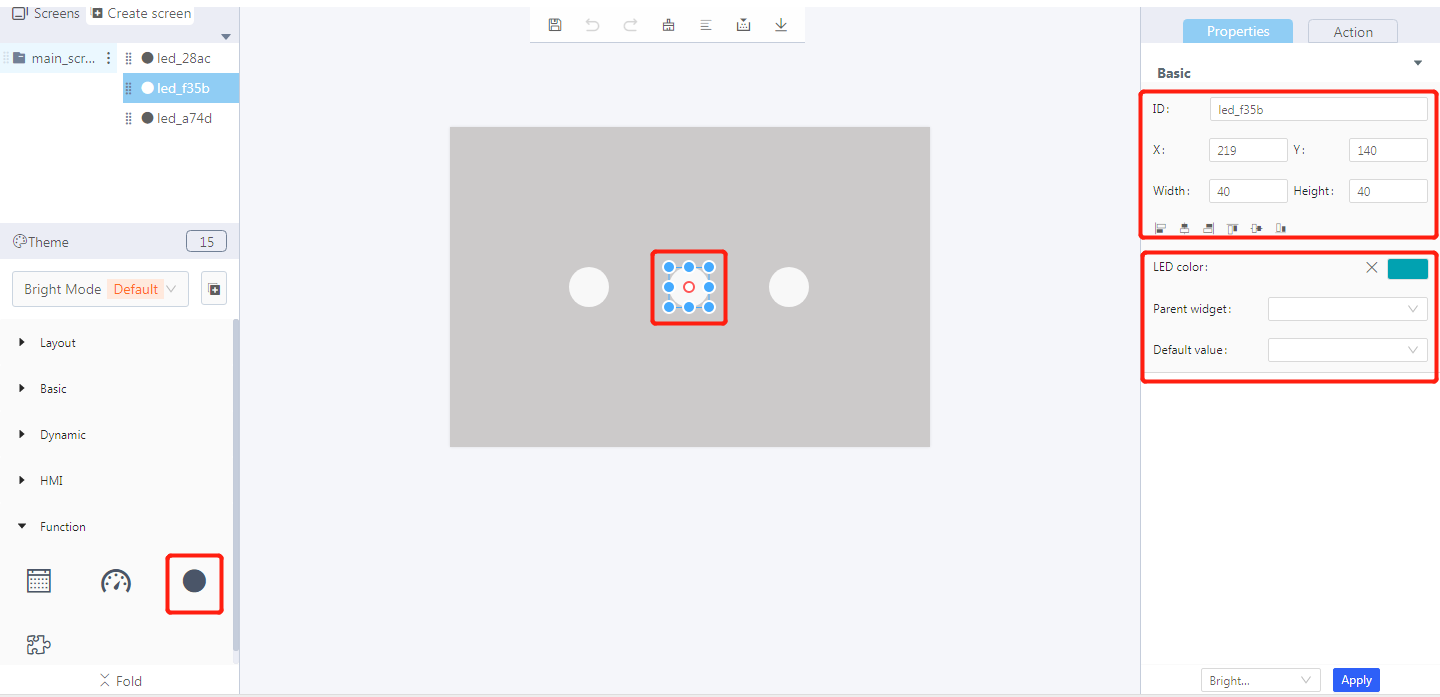
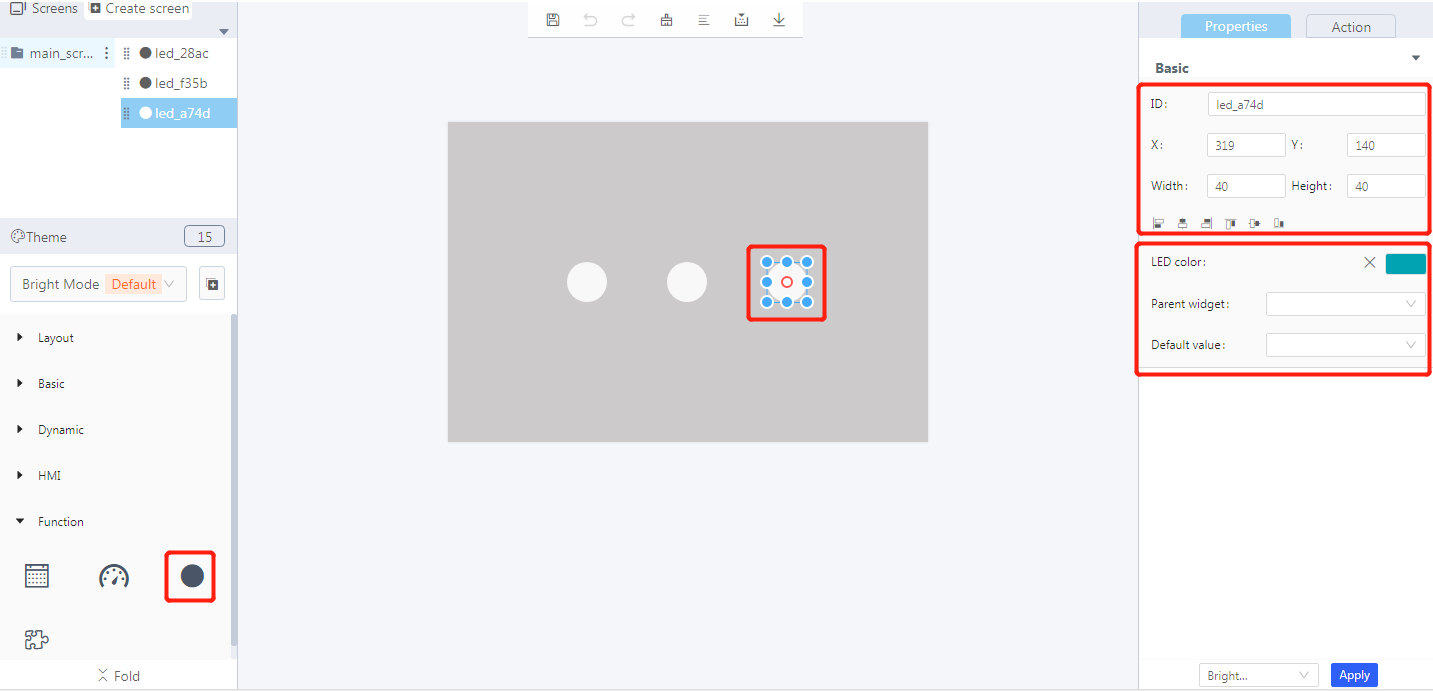
Blockly design
Demo
5. Download and analyze the source code of the project
- Zip files

- qm_ui_entry.c analysis
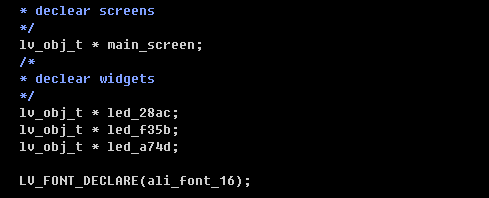
Related variable declaration
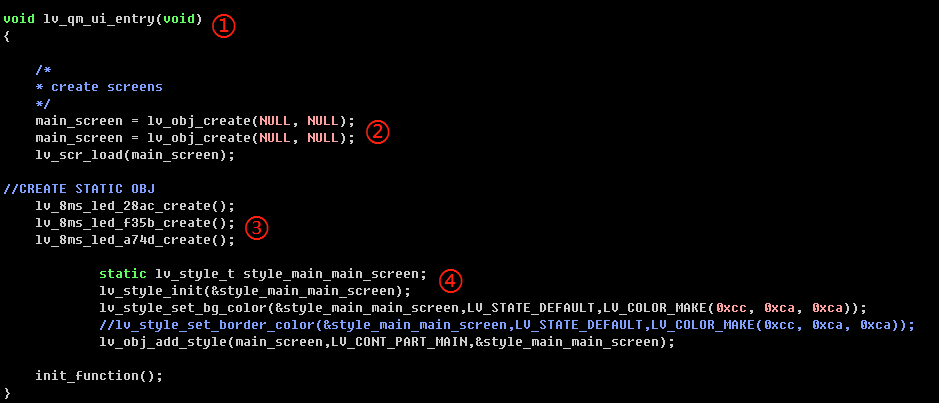
① Entry function
② Create objects
③ Create widgets
④ Set the style
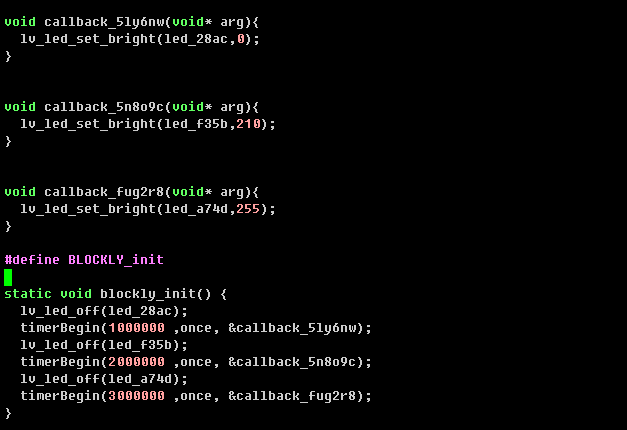
Blockly logic implementation
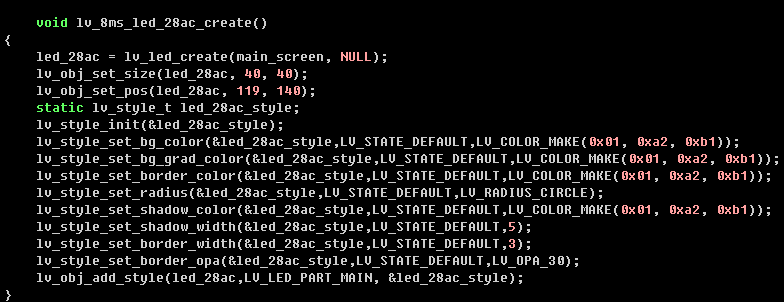
Create LED and set the style
