3. Page
3.1 Create a page widget
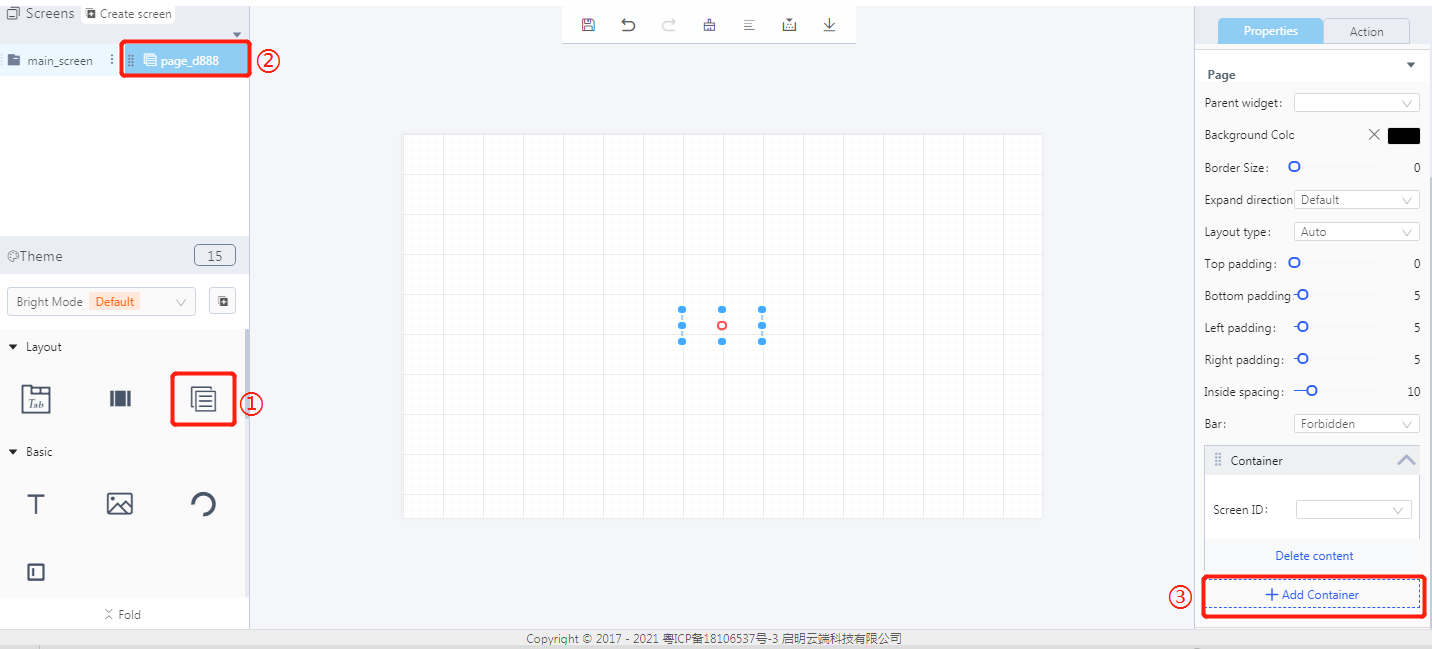
① Create a page widget
② The page widget ID
③ Add a container to the page widget
3.2. Steps for use
3.2.1 Widget properties
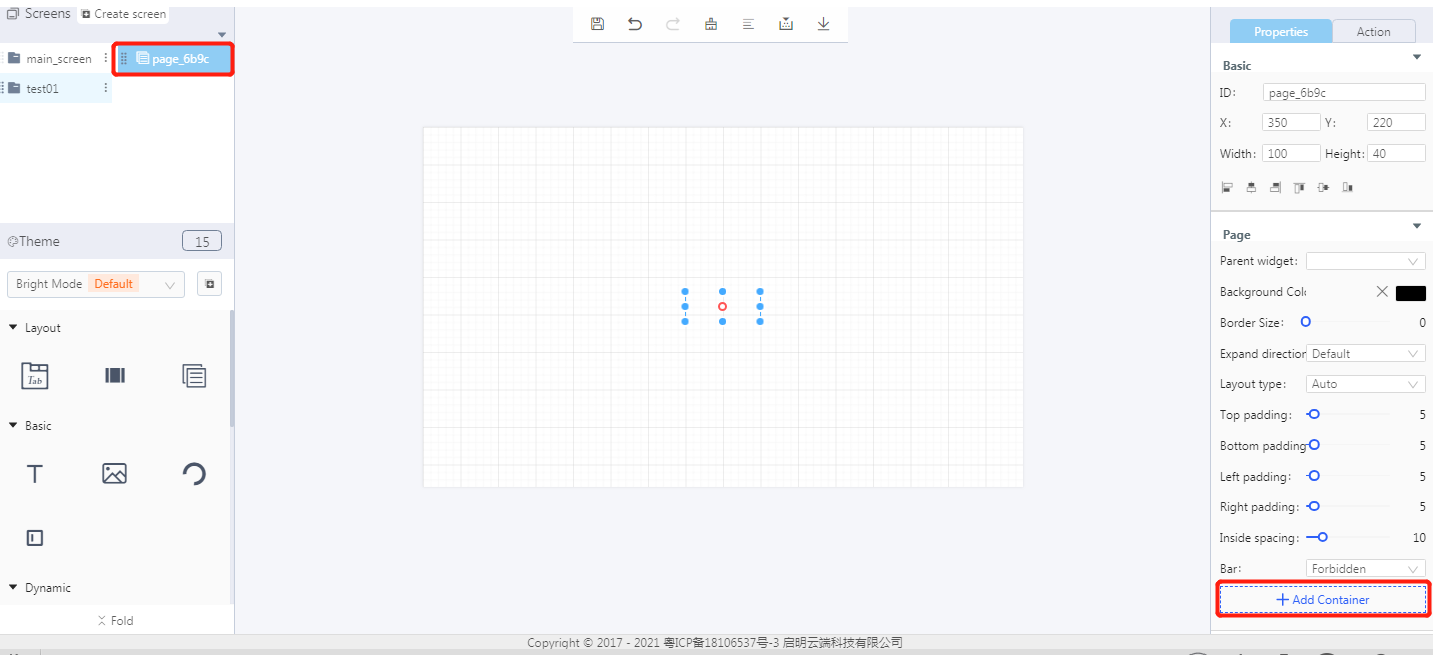
Properties-Basic:
ID:page_6b9c is the unique ID number of the tabview widget
X, Y:its coordinate position in the display area
Width, Height: set the size of the widget
Alignment (in order): left alignment, horizontal center alignment, right alignment, top alignment, vertical center alignment, bottom alignment
Properties-Content:
Parent widget: set the parent object, and the page widget is its child object
Background color: set the background color of the widget
Border size: the value range is 0-20
Expand direction: default, none, vertical and horizontal
Layout style: auto, vertical, horizontal and none; For example: When selecta a vertical style and add multiple containers, you can slide the screen vertically to display the contents of containers.
Top padding:the value range is 0-50
Bottom padding: the value range is 0-50
Left padding: the value range is 0-50
Right padding: the value range is 0-50
Inside spacing: the value range is 0-50
Bar: you can choose forbidden or enable
Add container: click to add a container, which will be displayed in the work area. Screen ID: you need to create a new container in advance. Select and bind a container ID to display the contents of the container.
3.2.2 Create a new screen (set the screen type to container)
- Click to create a new screen.(Demo: three new screens test0001, test0002, and test0003 will be created; screen type: container)
Note: The premise of adding a container is that there are multiple containers in the same project, and the width and height of the container need to be consistent with the width and height of the widget.
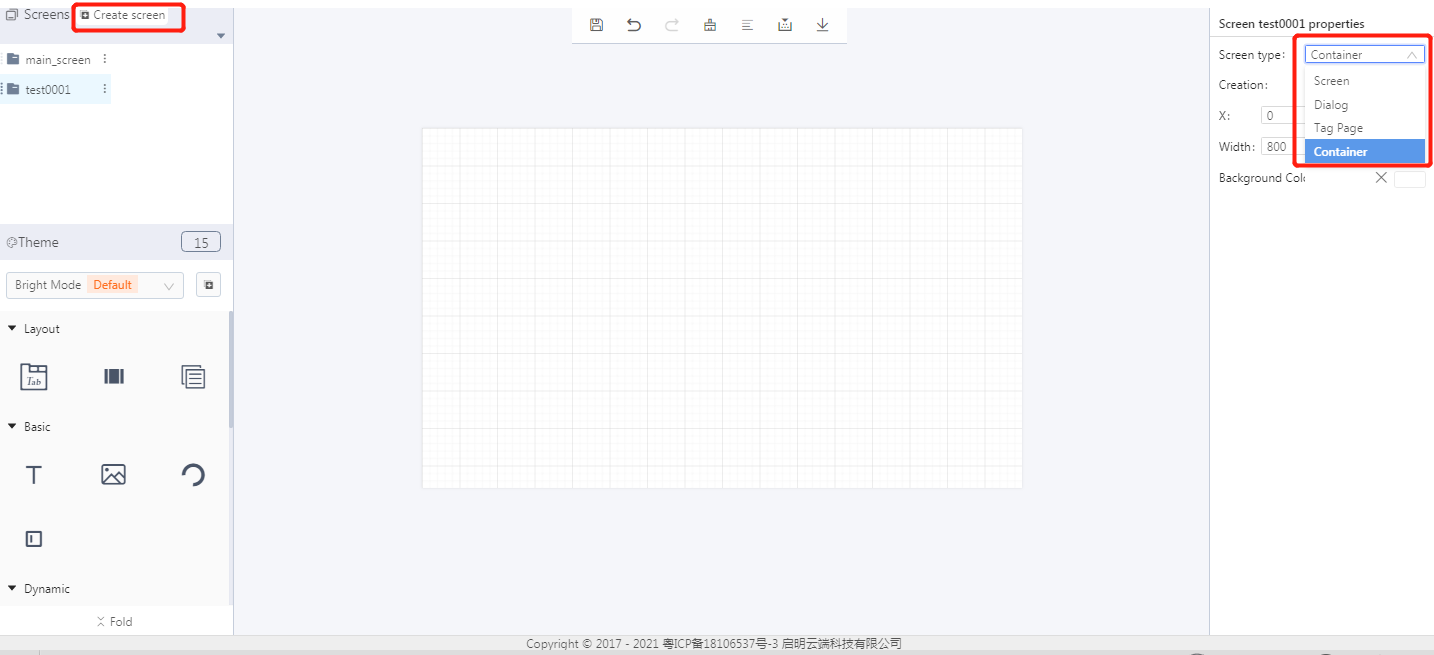
- Add a container to the page widget
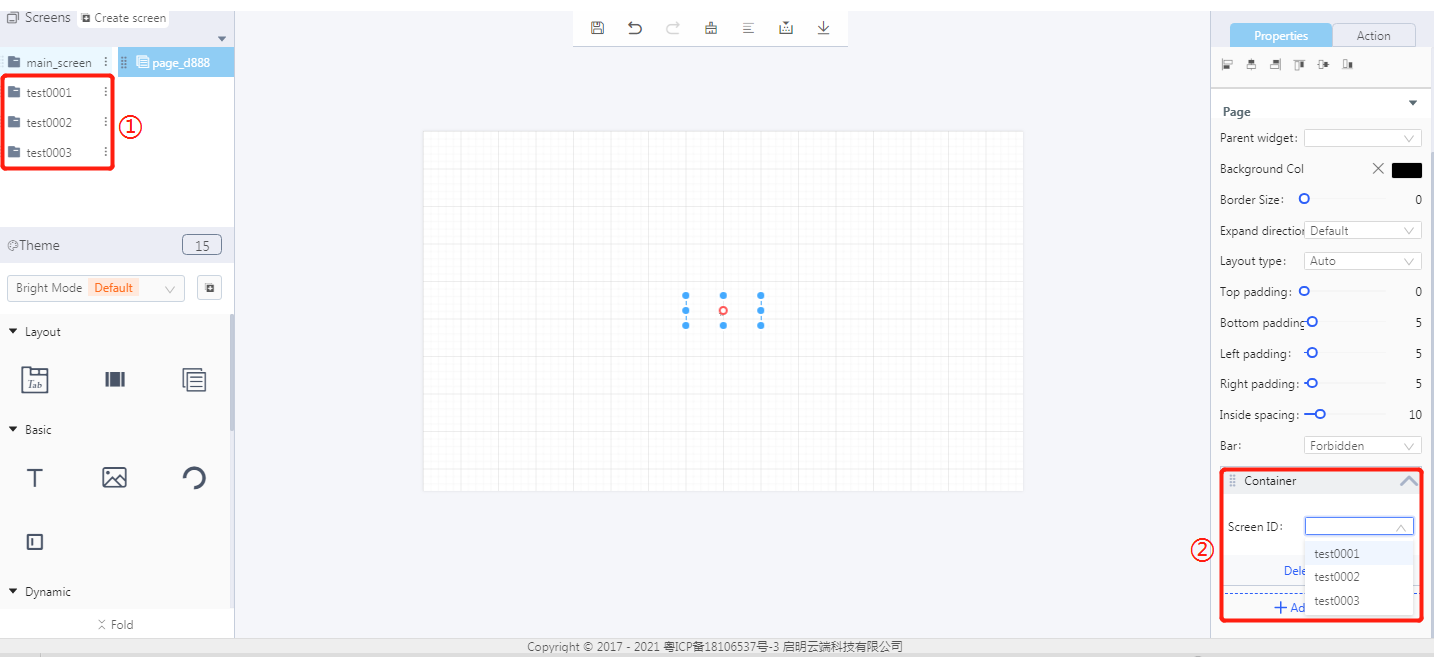
① Container ID
② Select the corresponding container ID
- Set the style
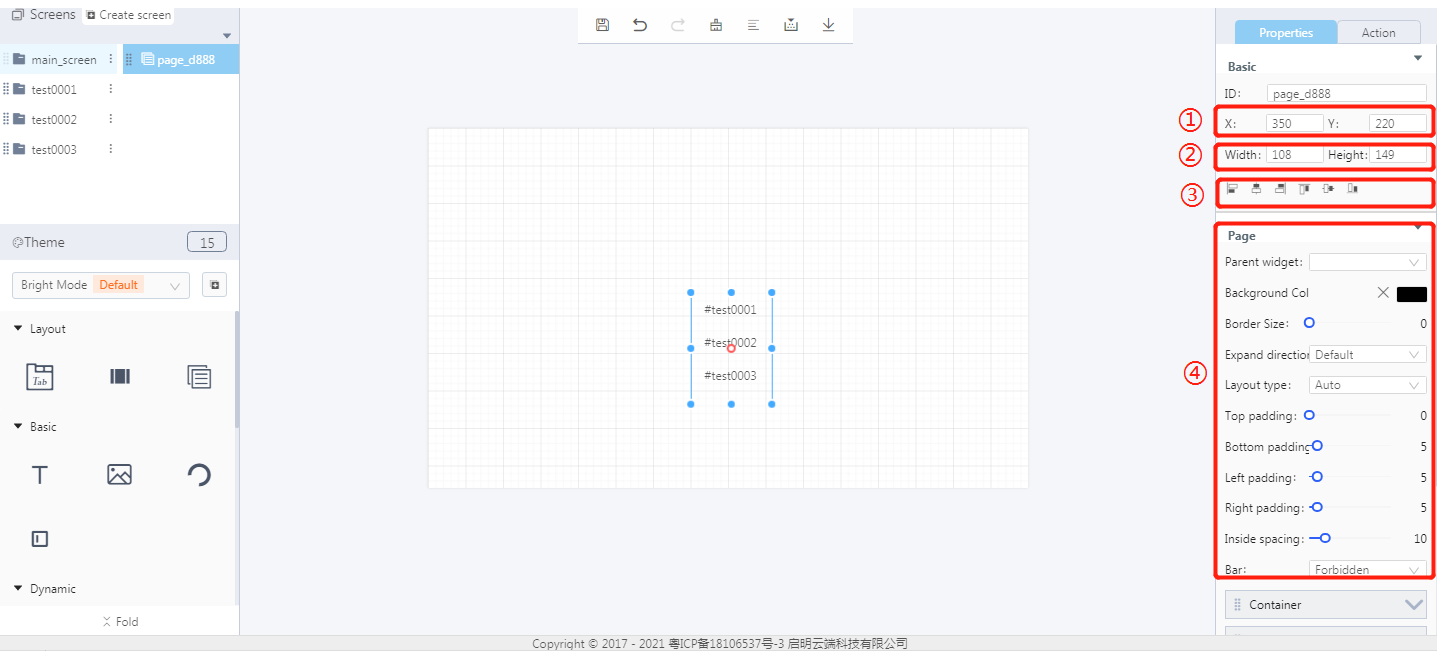
① The position of the page widget
② The size of the page widget
③ Alignment
④ Style
3.3. Download and analyze the source code of the project
- Compile the project and then download the source code of the project.
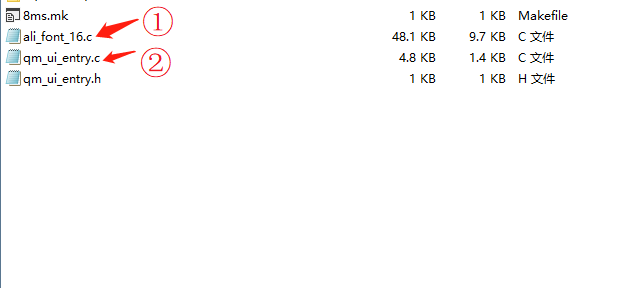
① Font
② Program entry
- qm_ui_entry.c analysis
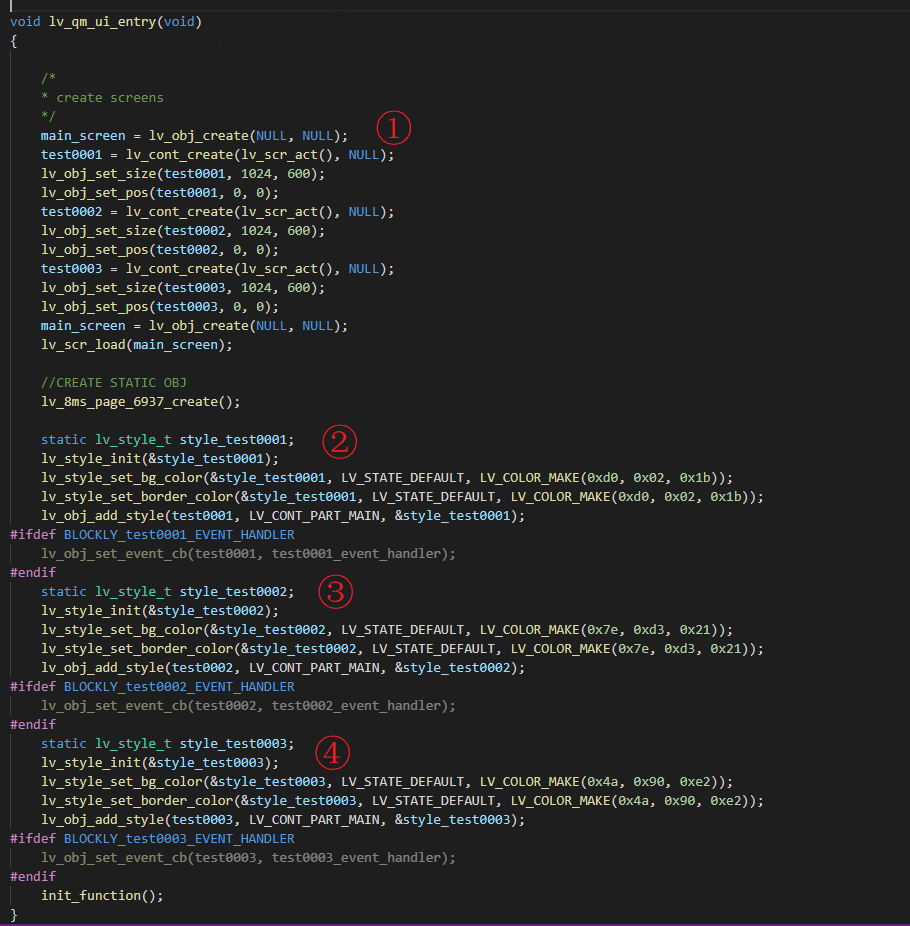
① Create an object
② The style of test0001
③ The style of test0002
④ The style of test0003
3.4 Demonstration
- Project ID: 2568
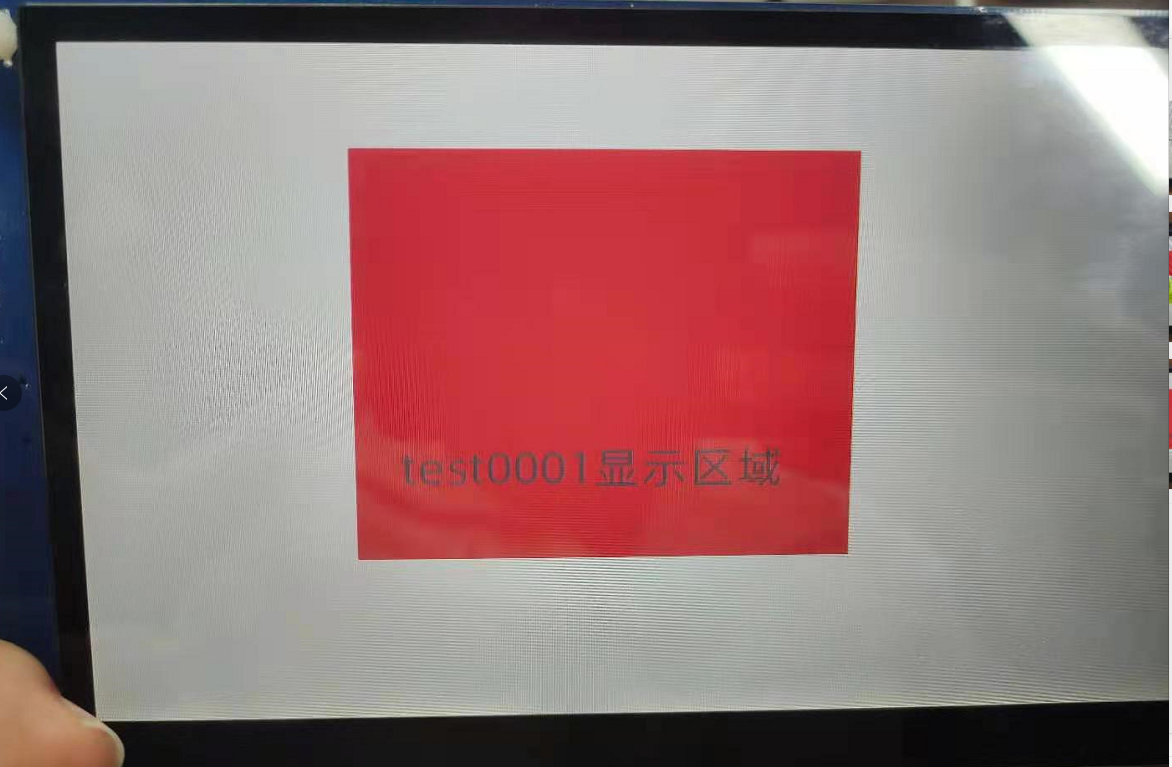
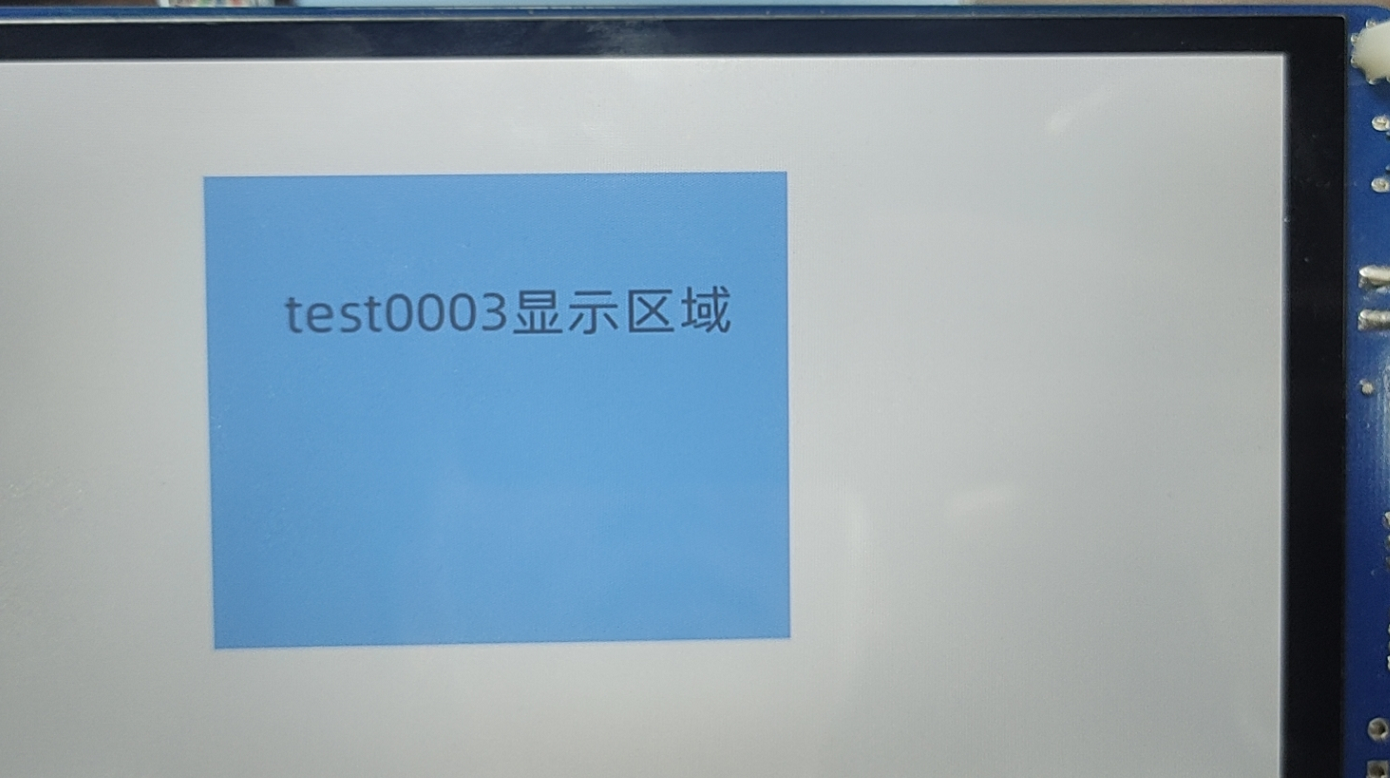
- Slide the screen
