3.3 Label

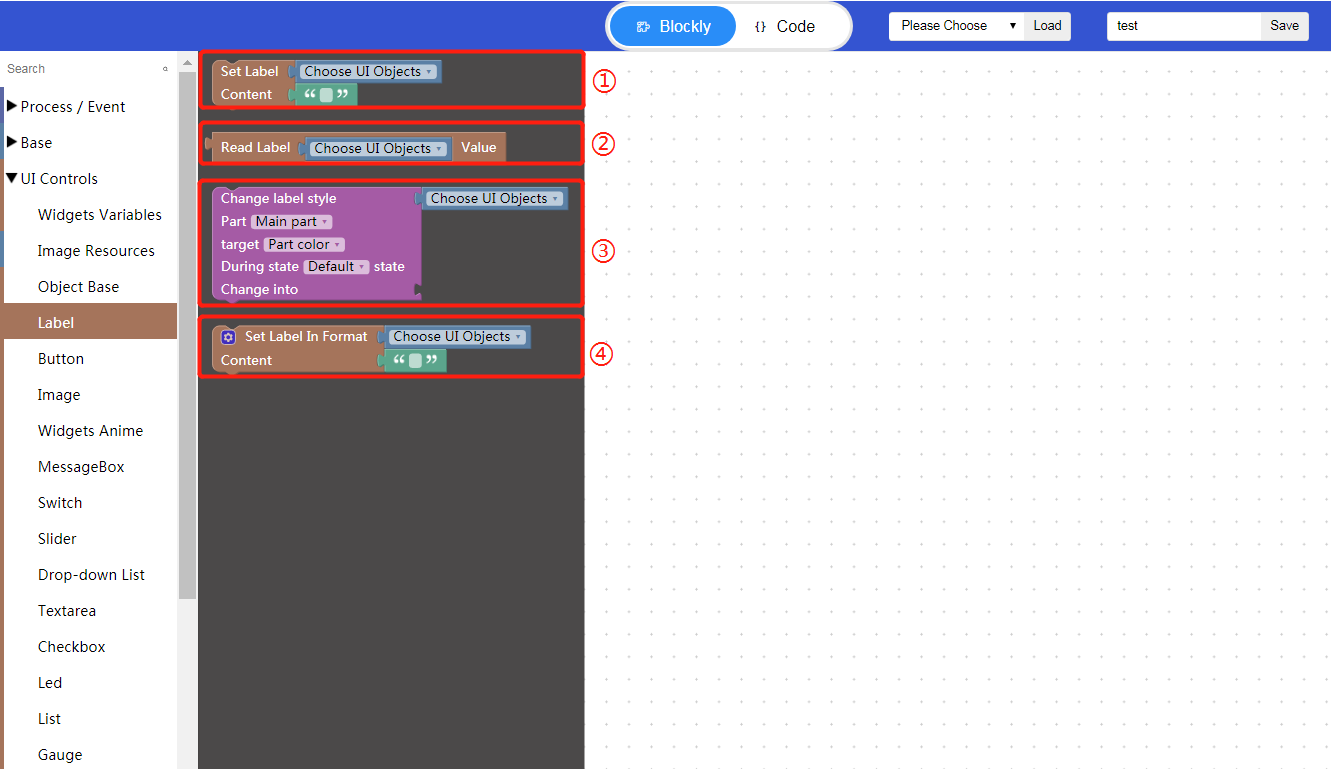
“①” Set label content—Click “Choose UI objects” to choose the corresponding widget id to bind the widget; Click “” to add the custom text content.
“②” Read label value—Click “Choose UI objects” to choose the corresponding widget id to bind the widget.
“③” Change label style—Click “Choose UI objects” to choose the corresponding widget id to bind the widget; You can modify the label style as needed.
“④” Set label content in format—Click “Choose UI objects” to choose the corresponding widget id to bind the widget; Click “” to add custom text content; Click the blue setting icon to add an input to the function.
Example: Click Basic->Label in Designer to create a label widget;Then click UI Controls->Label in Blockly, and click “Choose UI objects” to choose the corresponding widget id to bind the widget.
Tutorial example:
1. Create UI widgets in Designer

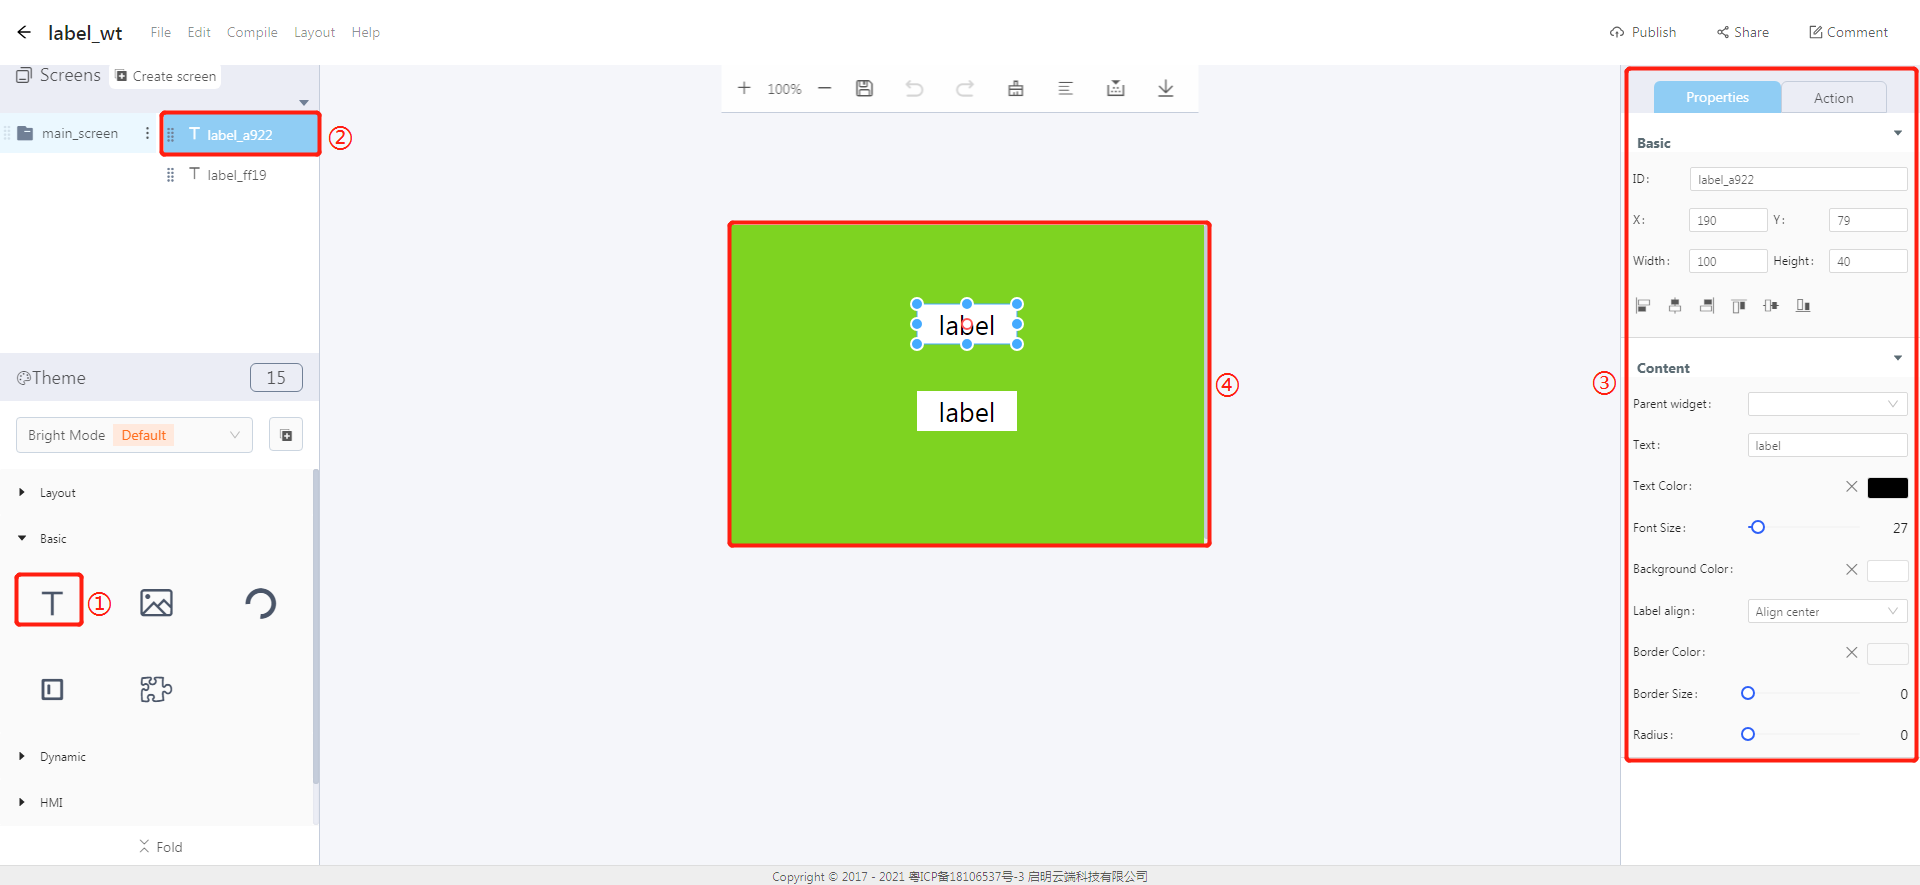
① Click to create a label widget.
② Label ID, which can be modified in ③.
③ You can modify the basic properties and styles for a widget.
④ Display area, where you can drag and drop the border of a label widget to change the size and position of it.
2. Blockly programming process

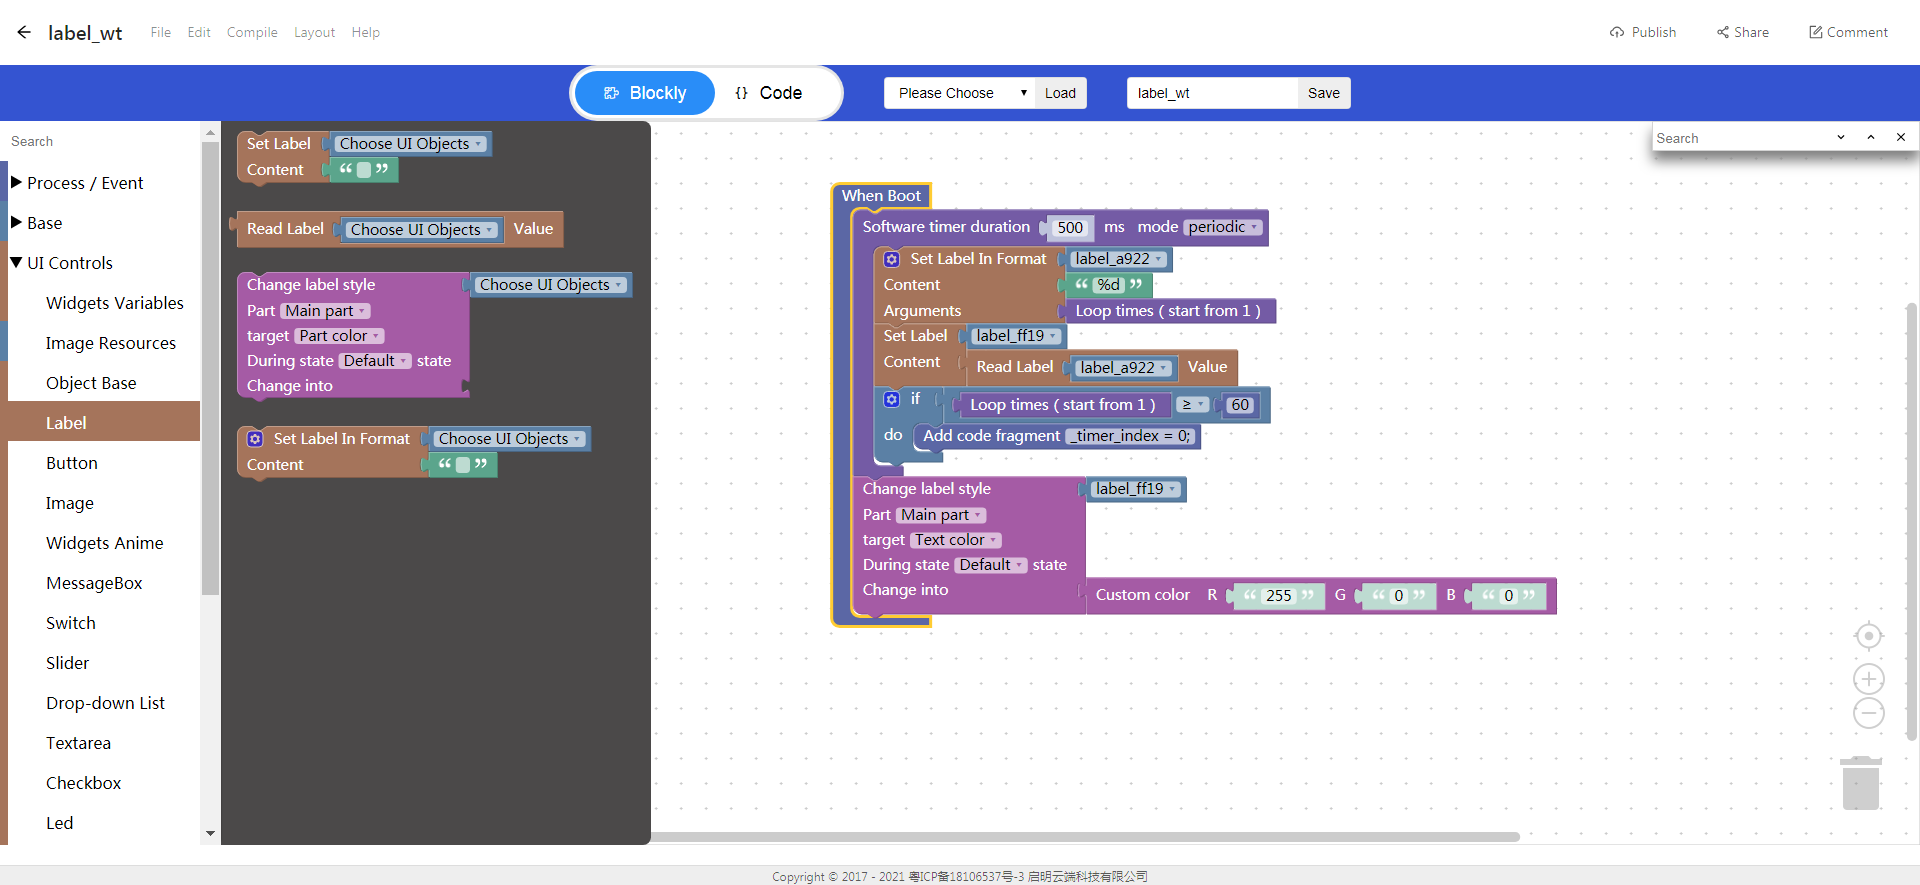
① Click “Process/Event” and select “When boot”.
② Click “Process/Event”, select “Software timer”, set timing duration to 500ms, and select “periodic” mode.
③ Click “UI controls -> Label”, select “Set label in format”, click the blue setting icon on the block to add an argument, bind the widget label_a992, fill in “%d” to the content; To fill in the argument content, click “Process/Event” and select “Loop times”.
④ Click “UI controls -> Label”, select “Set label content”, and bind the widget label_ff19; To fill in the label content, click “UI controls->Label”, select “Read label value”, and bind the widget label_a992.
⑤ Click “Base -> Logic”, and select “if do”. It is judged here if loop times is greater than or equal to 60, set it to 0.
⑥ Click “UI controls -> Label”, select “Change label style”, and bind the widget label_ff19; Select “Main part” for the part to be modified, select “text color” for the target, select “Default” for state, to fill in content to “change into”, click “UI controls ->Object base” and select “Custom color” and fill in R-255,G-0,B-0.
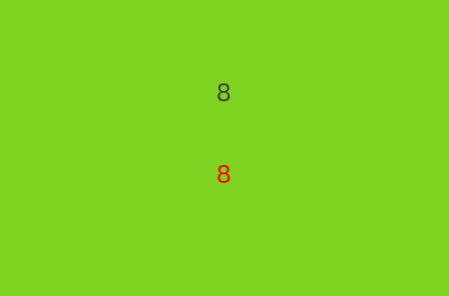
3. Display effect

- Share link:https://8ms.xyz/view/share/NzI3NiMxODUy
