3.5 Image

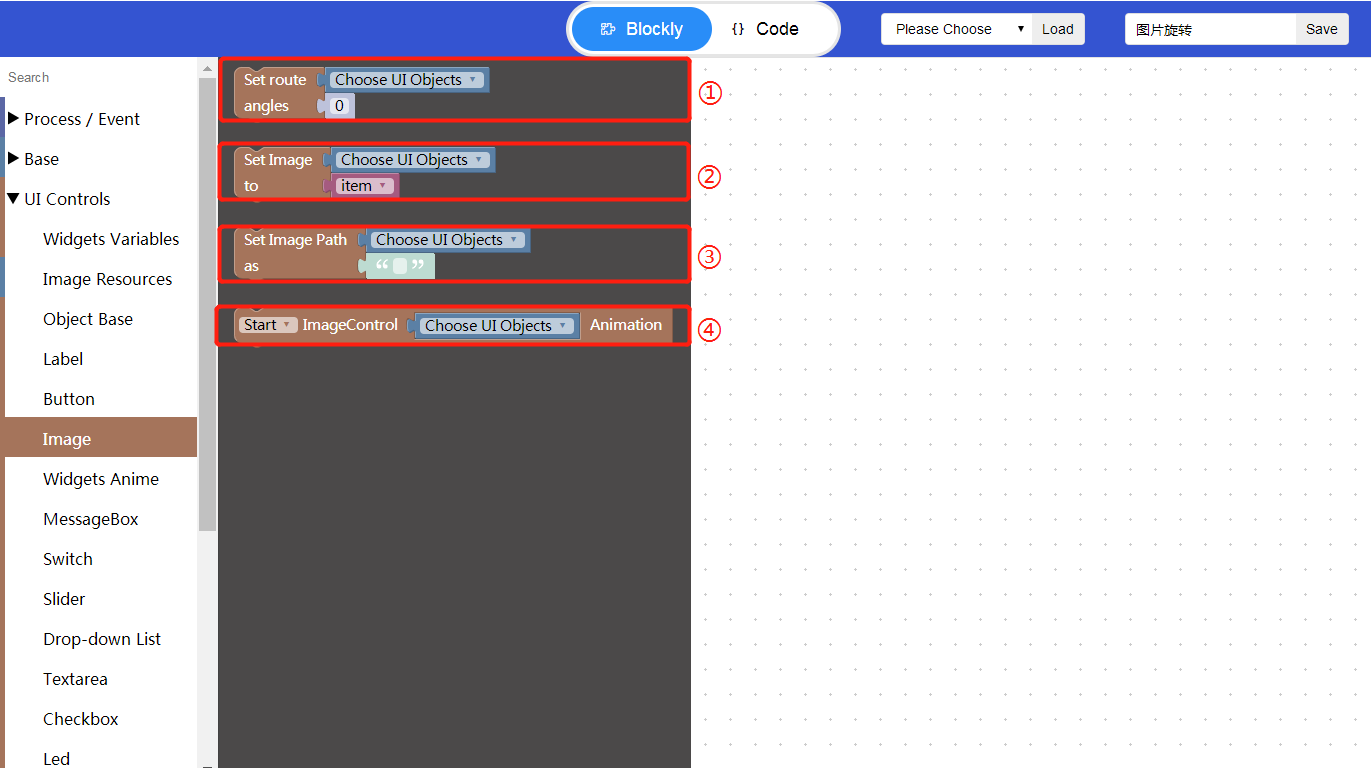
“①”Set route angles: Click “Choose UI Objects” to choose the corresponding widget id to bind the widget; Click “0” to set the rotation angle for an image (range: 0-3600°).
“②”Set Image to: Click “Choose UI Objects” to choose the corresponding widget id to bind the widget;Click “item” to select the image to be added.
“③”Set Image Path as: Click “Choose UI Objects” to choose the corresponding widget id to bind the widget; Click “” to add the image path.
“④”Start/Stop ImageControl Animation: Click “Choose UI Objects” to choose the corresponding widget id to bind the widget.
- An image rotation example
- 1、 Create an image widget and add an image file to it.

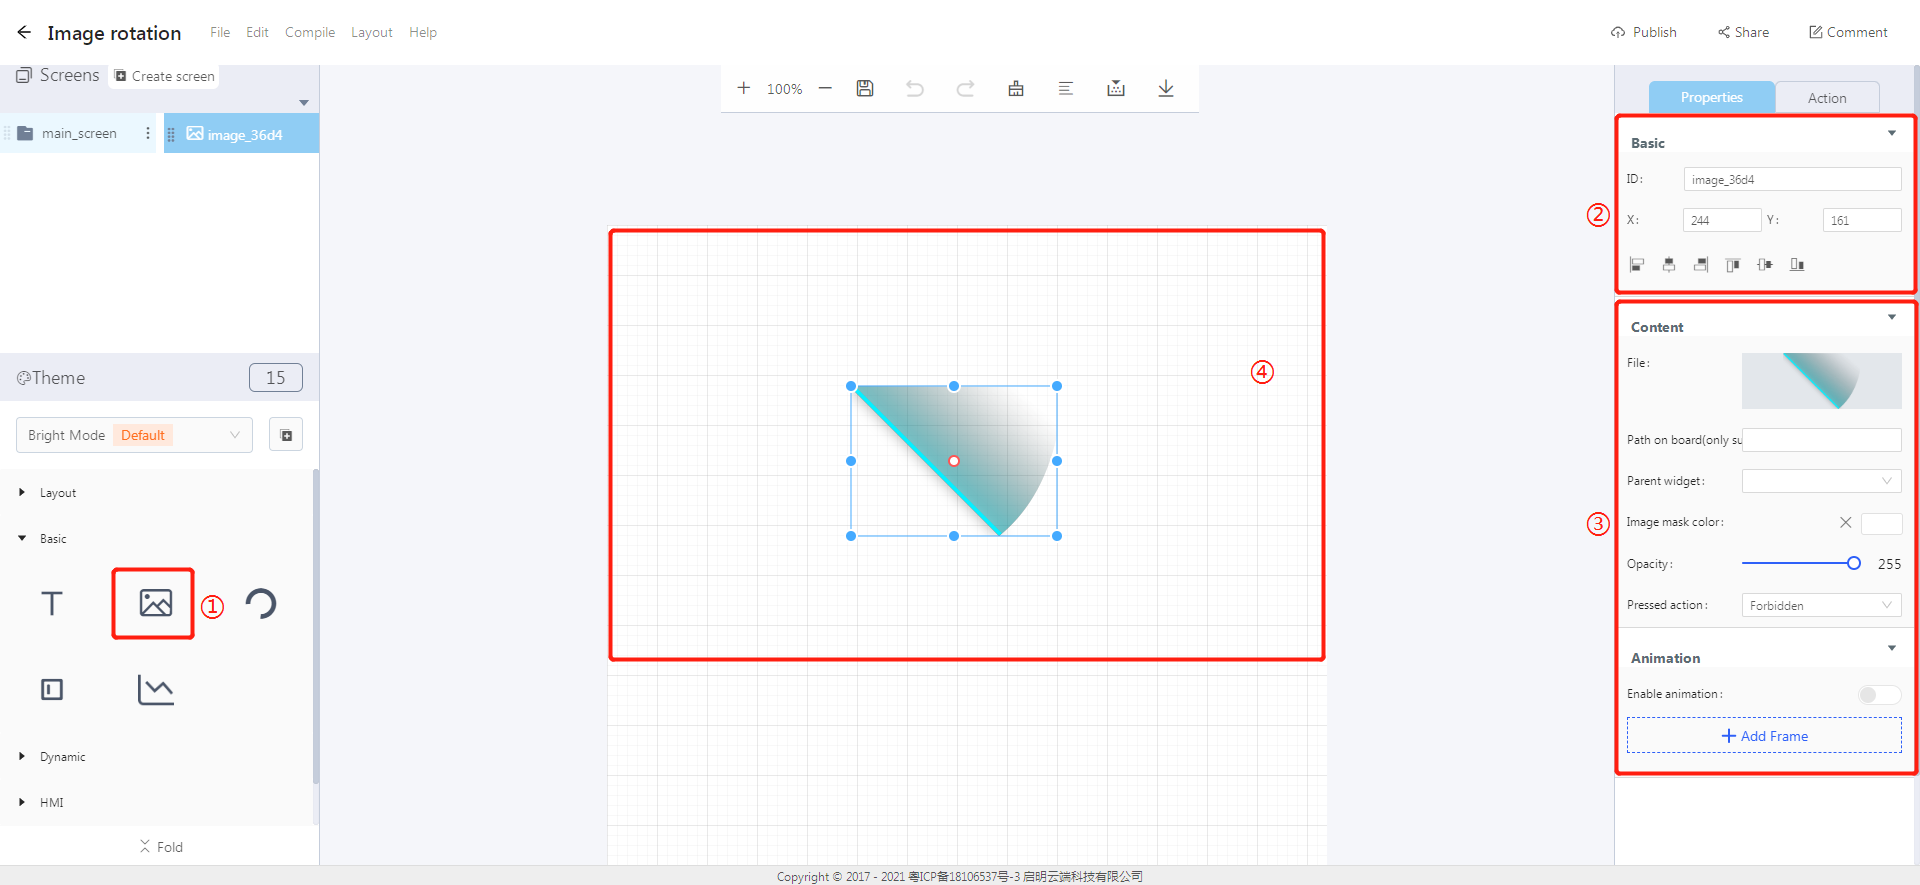
① Click on the image icon to create an image widget.
② Basic: Modify the widget ID and its position.
③ Content: Add an image file and modify the image style.
④ Widget editing area: The size and position of the widget can be modified by dragging and dropping it.
- 2、Block logic implementation

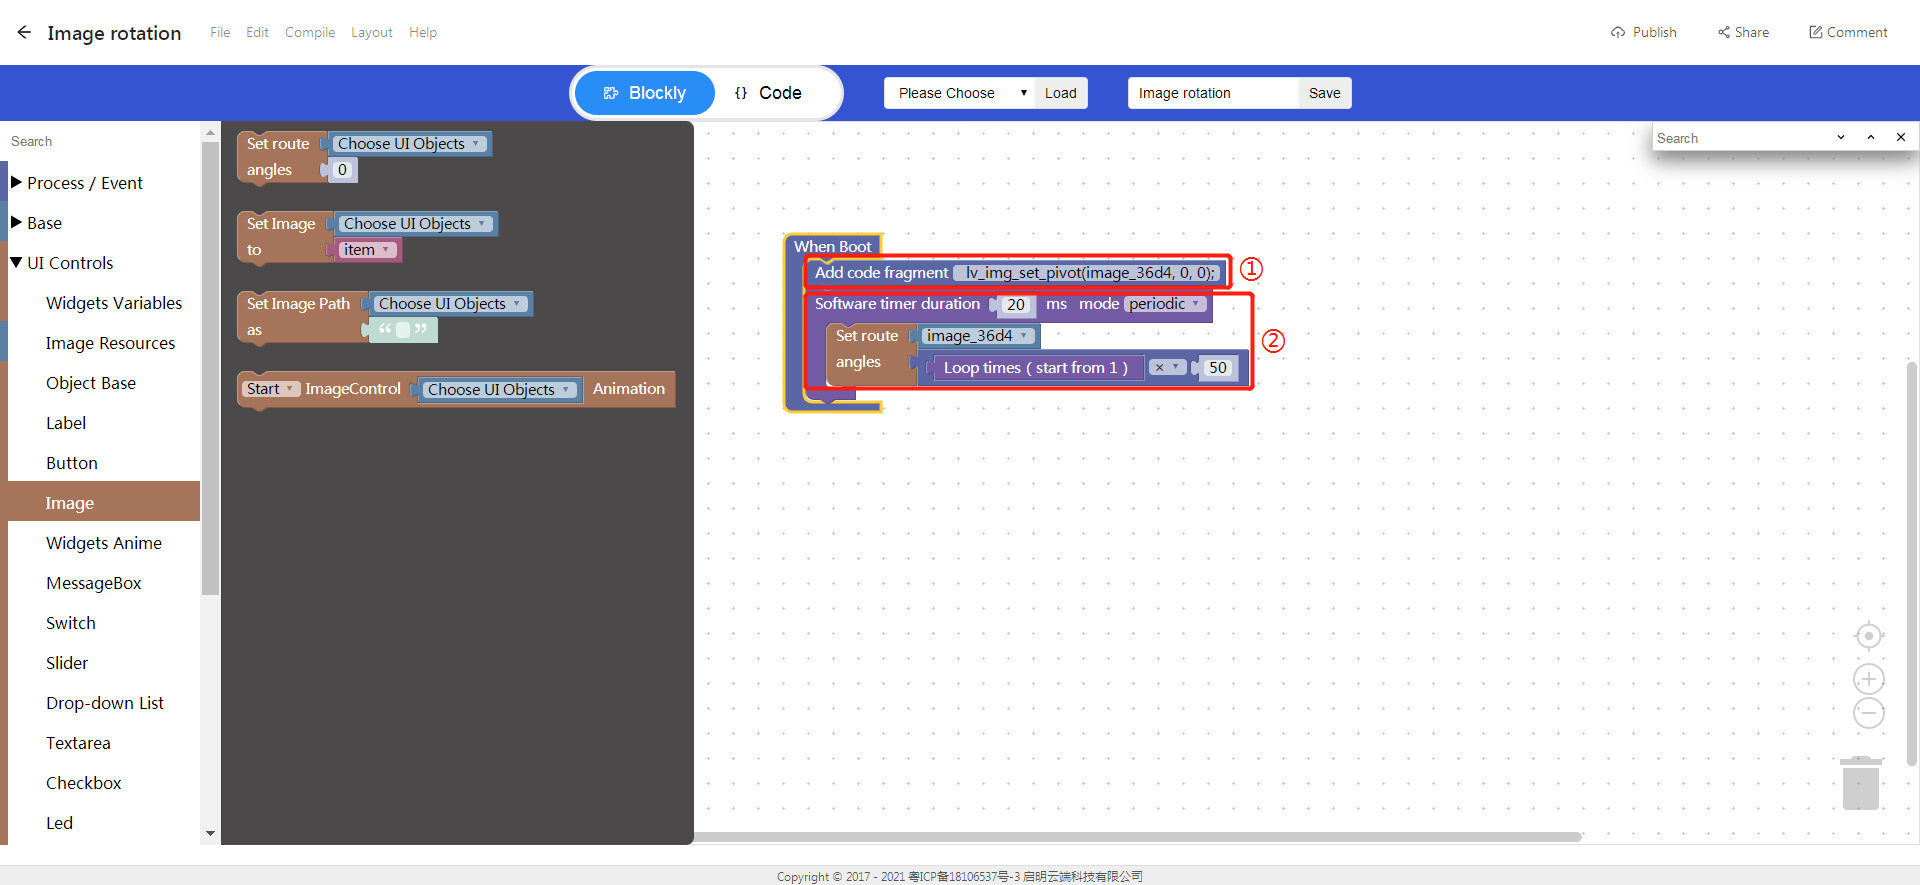
① Set the rotation pivot for an image.
② Use the software timer to rotate an image by setting the image rotation angle.
- 3、Block programming process

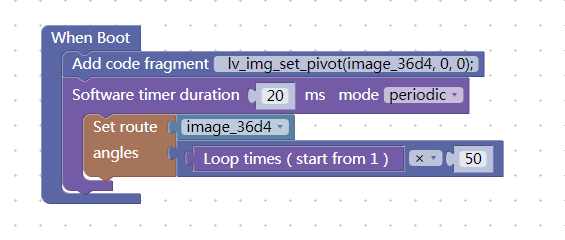
“1” Process/Event-When Boot;
“2” Process/Event-Add code fragment
lv_img_set_pivot(widget ID, x, y);;
Note: The code fragment is used to set the pivot of an image, and the parameters x and y correspond to the image position.
“3” Process/Event-Software timer, set duration as 20ms, and set mode as periodic;
“4” UI Controls-Image-Set route angles, choose image widget ID, set angles to Loop times(start from 1) x 50;
Note: The angle is in degrees, and the resolution is 0.1 degrees (0..3600: clockwise).
